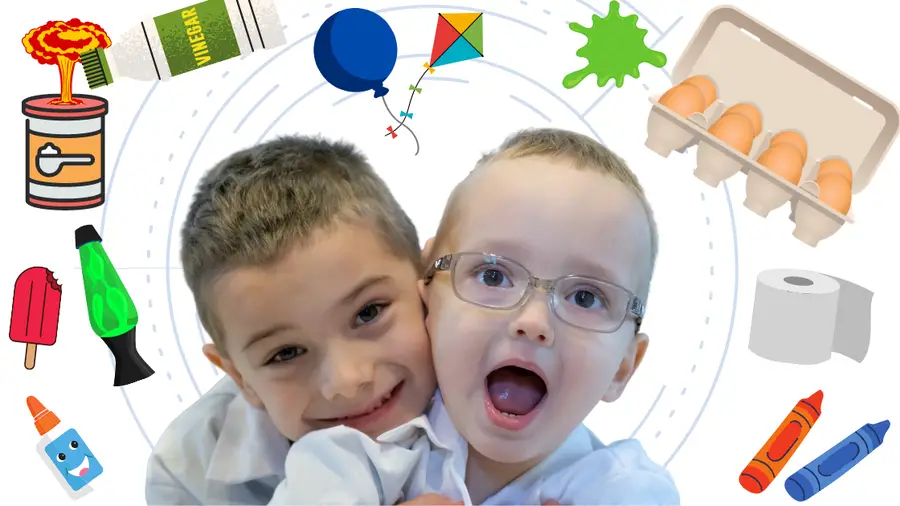
Passing the time with bored children might seem never-ending, as they ask you for the millionth time, “What is there to do?” While they could play the same games they’ve always played or watch the same movies over again, they could learn something new with these STEM activities using common household items.
STEM activities with household items include making rubber eggs, mixing slime, creating homemade paper, cooking edible geode candy, geode crayons, flying homemade kites, or building a homemade lava lamp to name just a few. Many at-home STEM activities need few supplies and require little preparation.
This article will show you simple activities that your kids (and you!) will love and learn something in the process. Let’s explore!
A Collection of STEM projects using common household ingredients wouldn’t be complete without vinegar and baking soda. Usually found in most kitchens, these two items make a chemical reaction found in many classic science experiments.
Vinegar is a weak acid, while baking soda is a base. If you place vinegar and baking soda in a container together, you will get a bubbly chemical reaction. Combining the two together causes an exothermic reaction that produces carbon dioxide. This gas is what causes the sudden foamy expansion.
If you simply mix vinegar and baking soda together, you can see the reaction (add a bit a red food coloring for the classic volcano eruption.) While watching the bubbles foam and overflow is satisfying to watch (and handy for some cleaning applications), you won’t see the carbon dioxide given off. A great way to see the evidence of the gas is by using the reaction to inflate a balloon.
Things don’t always go as planned – if you want to see what happens when things don’t go as planned (and a kid get squirted) check out the blooper video!
You’ll need:
An empty bottle
Vinegar
Baking Soda
A Balloon
Here’s how to make inflate a balloon with vinegar and baking soda
Fill the balloon with the baking soda
Pour the vinegar into the bottle
Holding the balloon off to the side, stretch the opening of the balloon over the mouth of the bottle. Careful not to let any of the baking soda fall into the bottle until you’re ready
When you’re ready, lift the top of the balloon so the baking soda falls into the bottle
Watch what happens!
As the baking soda drops into the vinegar, the resulting carbon dioxide gas will quickly inflate the balloon. Depending on the size of the balloon, it may pop – so you may want to have a towel on hand. If you want to learn more about the chemical reaction happening here, check out our post on the chemistry behind the vinegar and baking soda fizz.
Related Post: See how we use vinegar and baking soda to blast off with a DIY Plastic Bottle Rocket! Follow along for some fun!
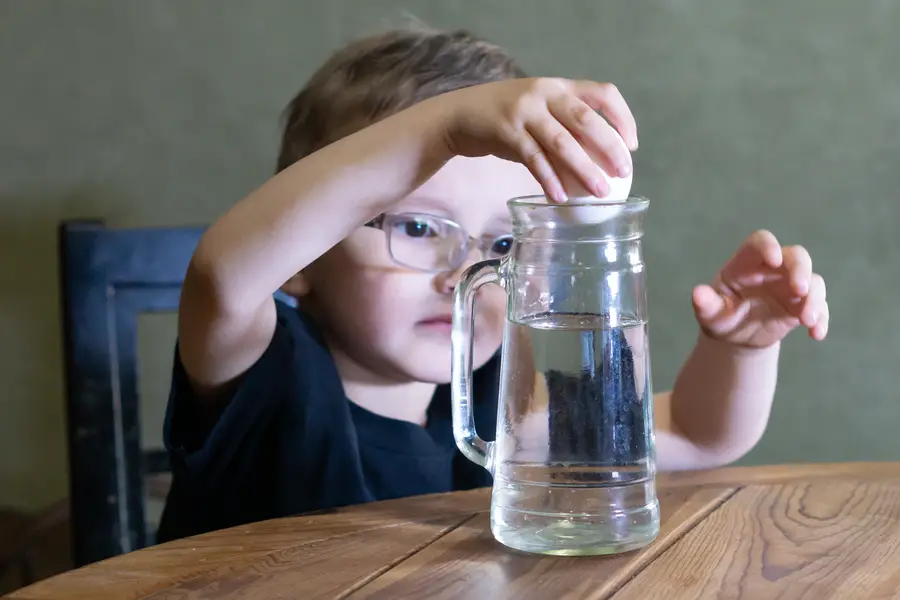
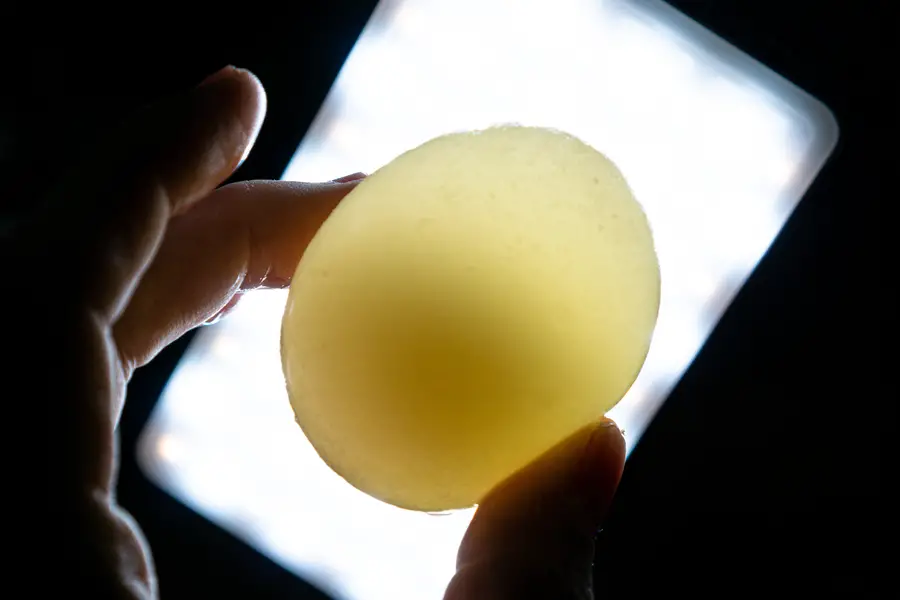
Make Rubber Eggs with Vinegar
Rubber eggs (or “naked eggs”) can be made using enough vinegar to submerge the egg in a cup and an egg.
Before you start, you need to gather the following supplies:
White vinegar
A wide-mouthed jar with a tight-fitting lid
One egg
Here are the steps to make a rubber egg:
Fill the jar most of the way with vinegar.
Drop the egg gently into the jar. It might rise to the top at first, but it will eventually sink.
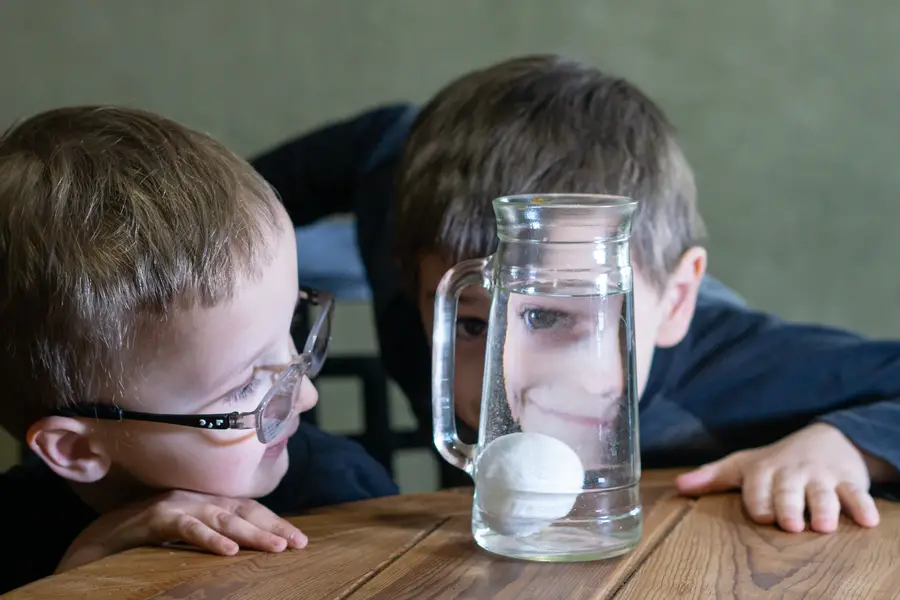
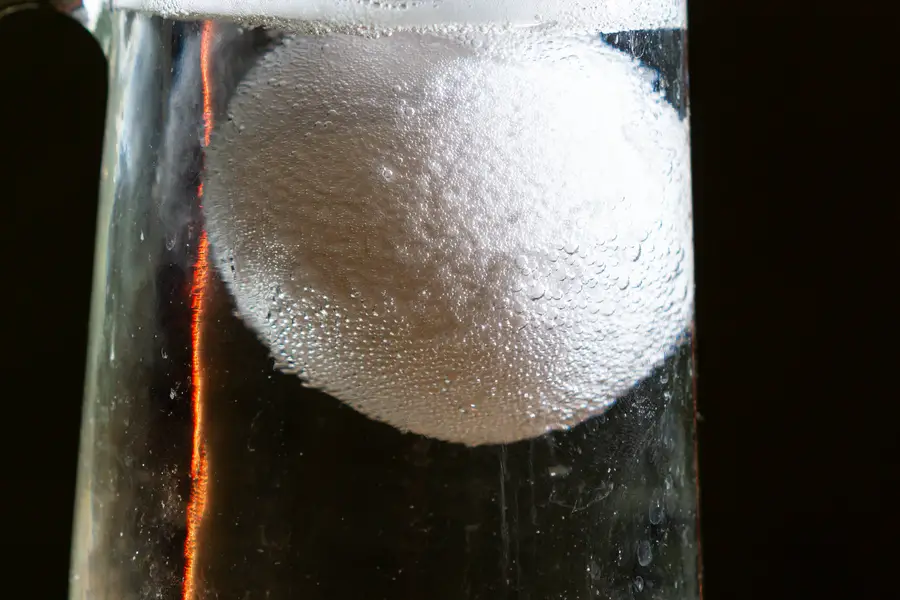
Observe as bubbles start forming; this is carbon dioxide forming as a result of the reaction between the vinegar and calcium in the egg shell.
Cover the jar tightly and let sit at least a few days, if not a week, to dissolve the shell. (You may need to drain and refill the vinegar to fully dissolve the egg shell.)
At the end of the waiting period, carefully remove the egg from the jar and brush off the remaining shell bits. If the shells don’t come off right away, put them back in the vinegar for another day or two.
What Can You Do With the Rubber Egg?
A naked egg with the membranes and other items in place should be translucent and can be gently squeezed without breaking. You can also hold it up to the light to see where the yolk is, which, interestingly enough, usually floats to the top. And if it is dropped low to the ground, it can bounce. It might be a bit messy if it is dropped from too high or gets thrown.
Water Density Egg Experiment: Do Eggs Float?
You can do a simple science activity to demonstrate the density of water with a floating egg.
You’ll need to gather:
An egg
Table salt
a bowl of water
Here’s how to do a floating egg experiment:
Place the egg into the bowl of water
Observer what happens (spoiler – it sinks!)
Remove the egg and stir the salt into the water until it dissolves
Place the egg back into the water
This time it should float
The egg is heavier than the plain water, so it sinks. The salt increases the water’s density, making it heavier than the egg. When the egg is placed into the salt water solution, it floats.
There are a ton of fun STEM activities you can do in the kitchen, and making sweet treats are sure to help focus even the shortest attention spans. Here are a few of our favorites using household supplies usually on hand in most kitchens.
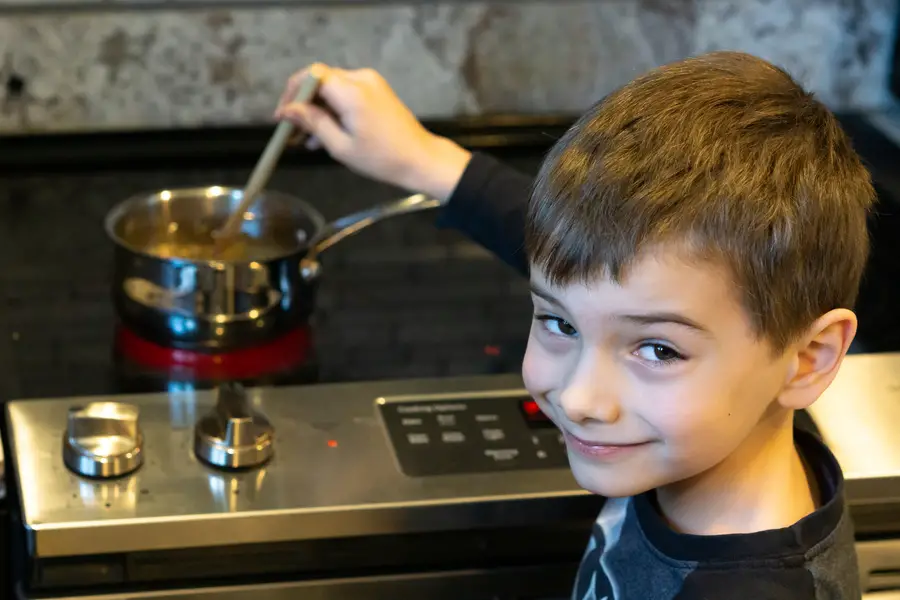
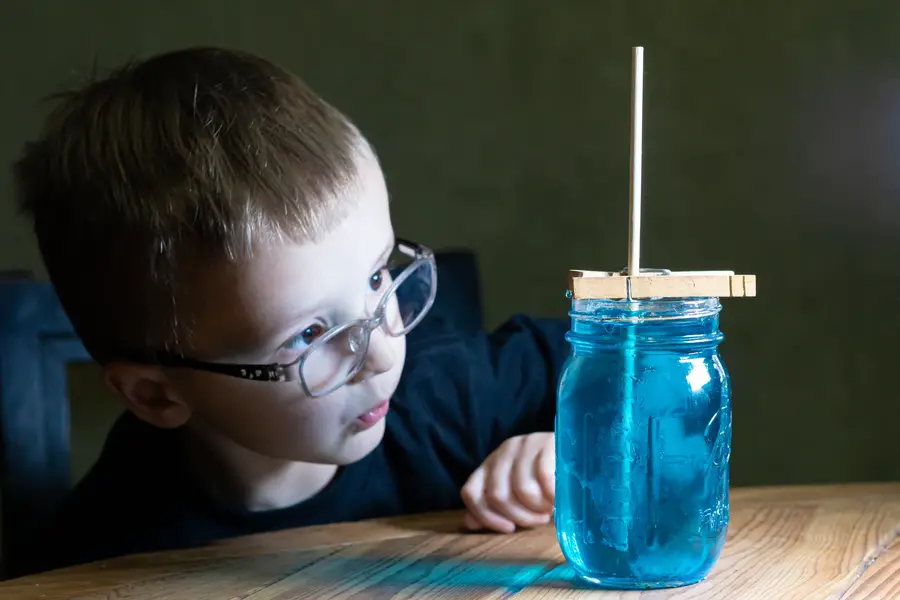
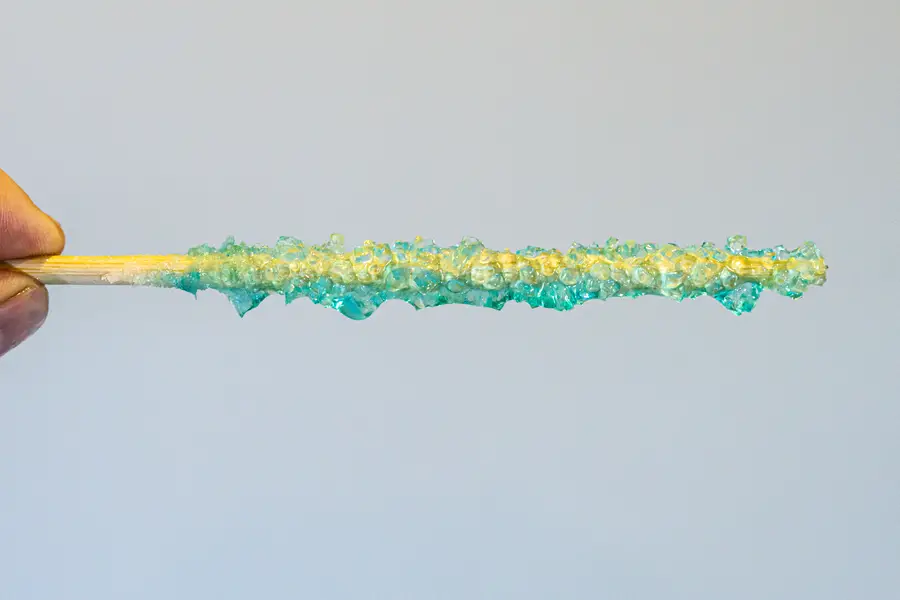
Grow Some Crystals and Make your own Rock Candy
Rock Candy is easy to make and only takes a few ingredients. It’s a delicious STEM activity to learn about solutions, saturation, and how crystals are formed.
What you need to gather:
Glass or Jar
Sauce pan or small pot
Wooden Skewers (or chopsticks)
Clothes pin
1 cup of water
3 cups of granulated sugar
Food coloring (2-3 drops)
Flavoring (1/2 teaspoon flavored extract or oil)
How to make rock candy:
Bring the water to a rolling boil in your sauce pan
Slowly add the sugar and let it dissolve, stirring regularly
Remove the saucepan from the heat once all the sugar has dissolved. (Congrats, you just made a super saturated solution.)
Add you flavoring of choice. (We used some peppermint extract for this batch.)
Add a few drops of food coloring. Have fun color mixing and pairing color and flavor. For instance, blue may pair nicely with raspberry flavoring. We used a drop of blue to lent a cool feel to go with our mint flavoring.
While the sugar solution cools down, wet your skewers. Then roll them or cover them in sugar. This will help “seed” your crystal growth. (In the interest of using items we already had on hand, we used some chopsticks we had from leftover takeout. Popsicle sticks could also work)
Pour the sugar solution into your jar or glass.
Clip the clothespin to the end of your skewer, and place the skewer into the center of the glass. You don’t want it touching the sides or bottom. The clothes pin should help position the skewer and hold it in place.
The rest is waiting and watching. Crystals should start to form on your stick within a few hours, and will grow over the course of a week. Crystals will also form on the sides of the glass.
Once your rock candy is a decent size, pull the skewers out. You can use a bit of warm water to soften things up if it’s stuck.
Enjoy!
The boiling water can hold the sugar in a super saturated solution, though as it cools the sugar comes out of the solution and reforms into crystals, attaching to and growing on the skewer (and glass.)
As the cooler solution cannot hold all of the sugar, it crystalizes onto the stick.
If you want your children to learn about rocks, geodes, and geography, what better way to do that than create an edible rock? When a liquid mineral solution enters a hollow space in a rock, and the liquid evaporates, it leaves a crystal inside it. If the rock is cut or broken open, the crystal becomes visible.
What you need to gather:
Non-stick muffin papers and muffin pan
Hard Candy
Rolling pin and sandwich bags
Cocoa powder
Here’s how you make edible geodes:
Preheat your oven to 300℉ (150℃.)
Unwrap the candy and place the pieces in sandwich bags.
Depending on your children’s age, they can use the rolling pin to crush the candies while you’re setting up the muffin papers in the tin.
Have your children sprinkle different colors in each muffin cup in different patterns.
Place the muffin tin in the oven for five minutes or until just melted.
Once cooled, roll the edges in cocoa powder to create the appearance of rocks.
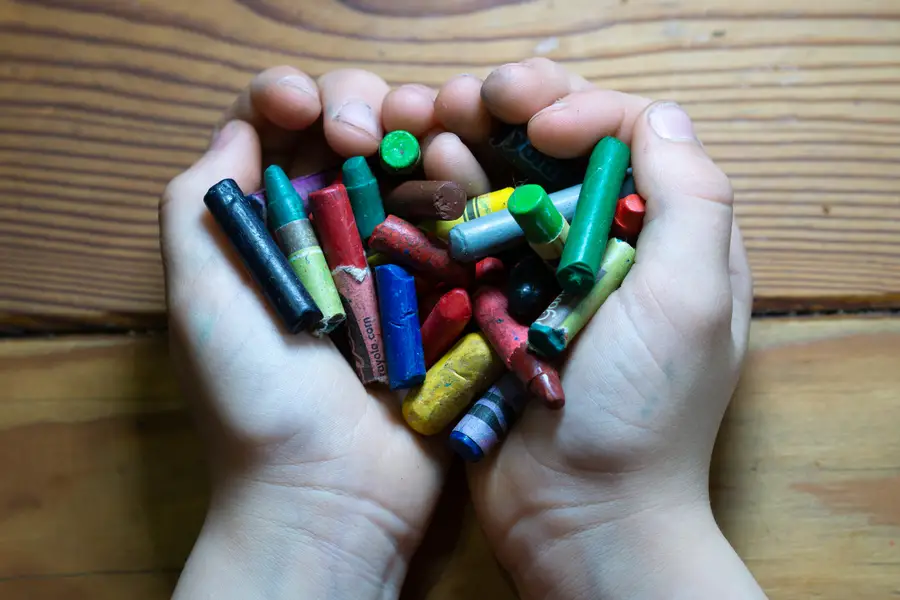
Make Artisan Geode Crayons
For a fun variation on Geode Candy (especially if you’re trying to avoid sugar,) you can do this activity with old or broken crayons to make some fancy geode crayons. This is a great STEAM activity that gives new life to crayons that may otherwise get tossed out.
What you need to gather:
Non-stick muffin papers and muffin pan
Crayon Pieces
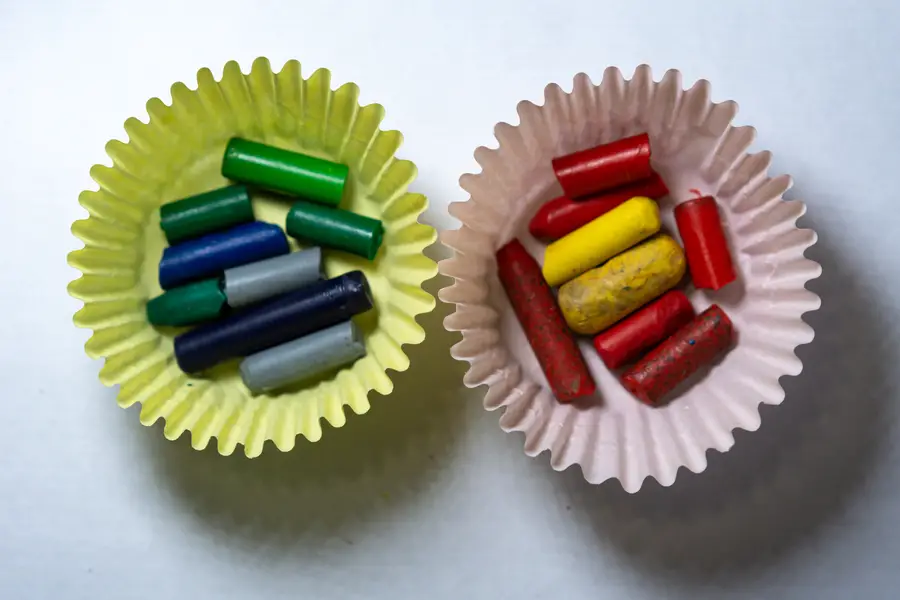
To Make Geode Crayons:
Preheat your oven to 300℉ (150℃.)
Remove the crayon wrappers and papers.
Break the crayons into small pieces before putting them in muffin cups.
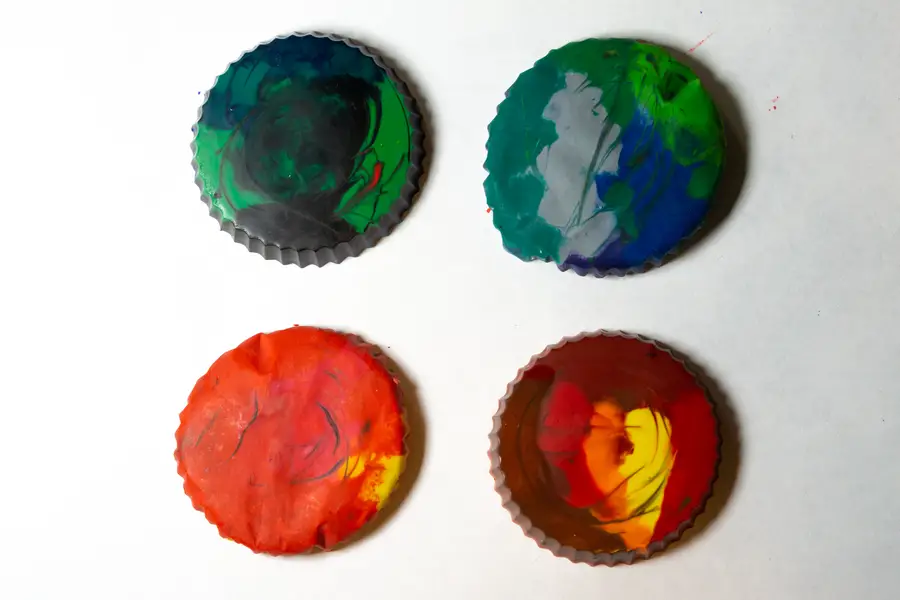
Melt in the oven for a few minutes. If you leave them in too long, they’ll melt to the point where everything mixes into one color, so keep an eye on them as they melt.
Remove them from the oven and let them cool
Peel away the muffin cups. We found the wax soaked through paper muffin cups, so silicon ones may work better for this activity.
Use your crayons to make some cool artwork!
You can mix and colors together for some cool crayons. Feel free to experiment with color theory and combinations. We mixed some blues and greens in one cup, and reds, yellows, and orange in another cup.
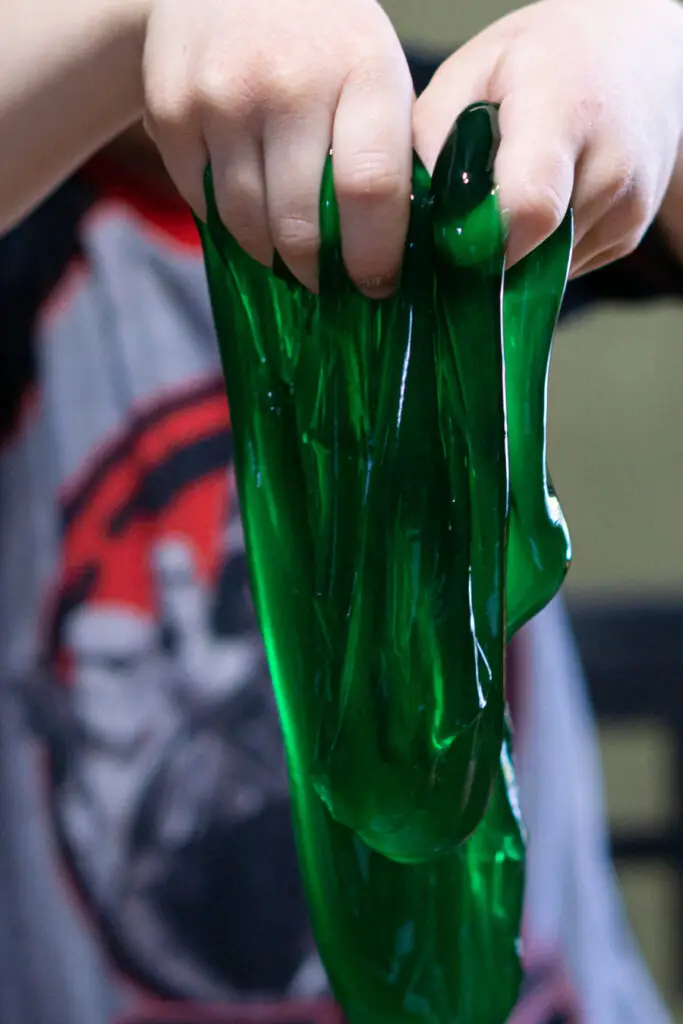
Making Slime from School Glue
Another awesome activity kids love is making glue slime. The are many glue slime recipes and variations you can try. We like this one because it is simple, uses 3 core ingredients, and is always a hit.
You will need:
A bottle of glue
Water
Borax (You can skip the Borax if needed, though we suggest it for this recipe)
Food Coloring (optional)
A mixing bowl
Easy Glue Slime Recipe:
Squeeze out the bottle of glue into the bowl
Fill the bottle with water and pour that into the bowl
Mix the glue and water
Mix in a few drops of food coloring
Stir in borax
The borax is optional, though it adds some texture and makes the slime satisfyingly stretchy. The borax also makes it much easier to lift the slime off of surfaces.
You can control the consistency of your slime by adding more water or borax. Too thin? Add a bit more borax until it starts to clump. Too stiff or solid? Stir in a bit more water to thin it out.
If you have some glitter, go ahead and add some in for that extra sparkle.
You can store glue slime for a surprisingly long time in a tupperware container. You may need to add in a bit of water from time to time if it starts to get too solid.
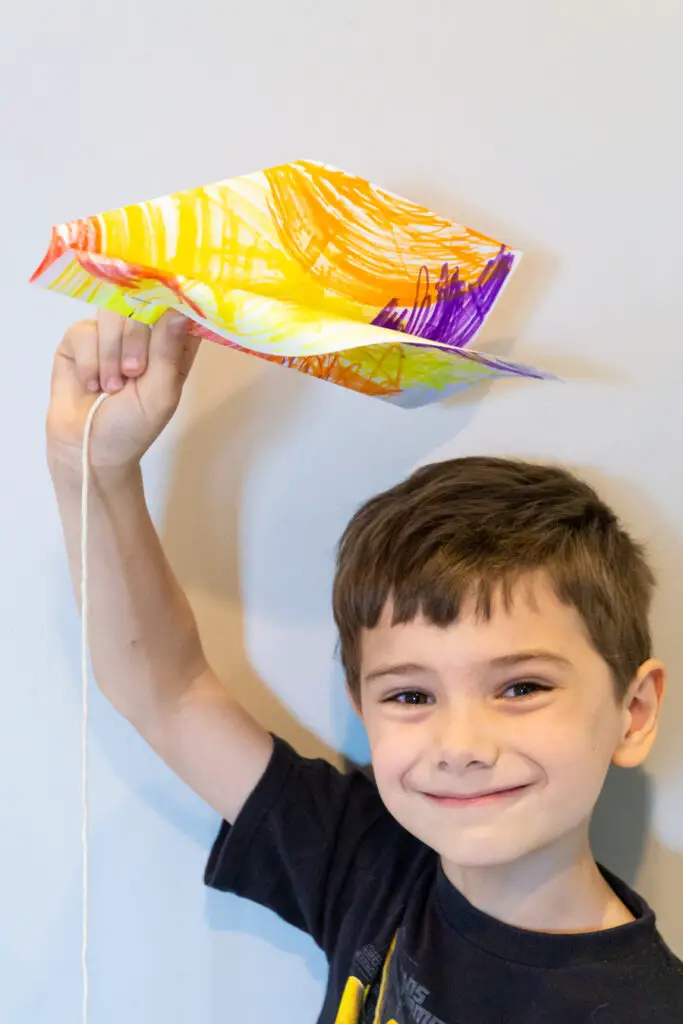
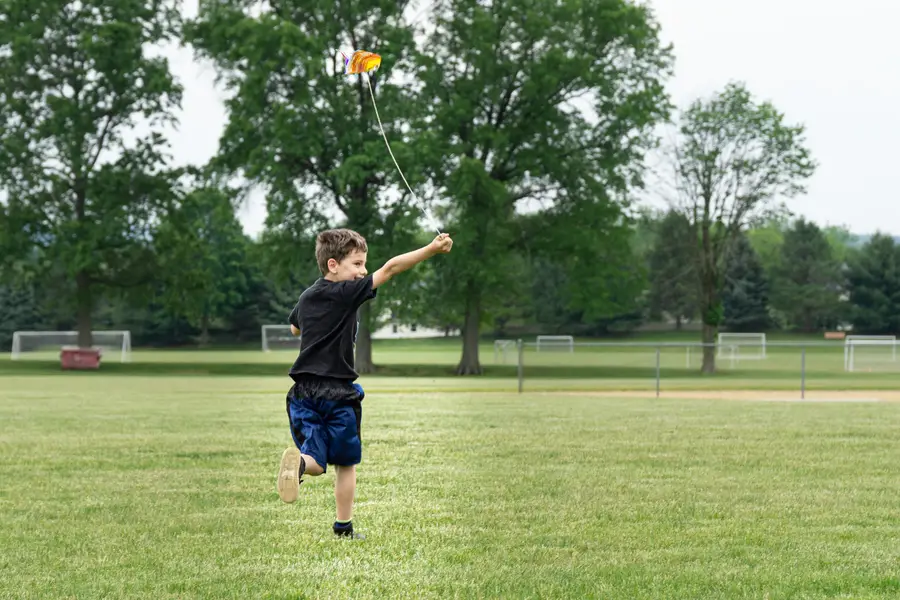
Making kites together as a family used to be a normal activity, but it’s a rare thing to do now that there are so many other things taking up people’s time. When you make a kite with your kids, they will learn the engineering principles and how wind lifts certain objects and drags them through the air.
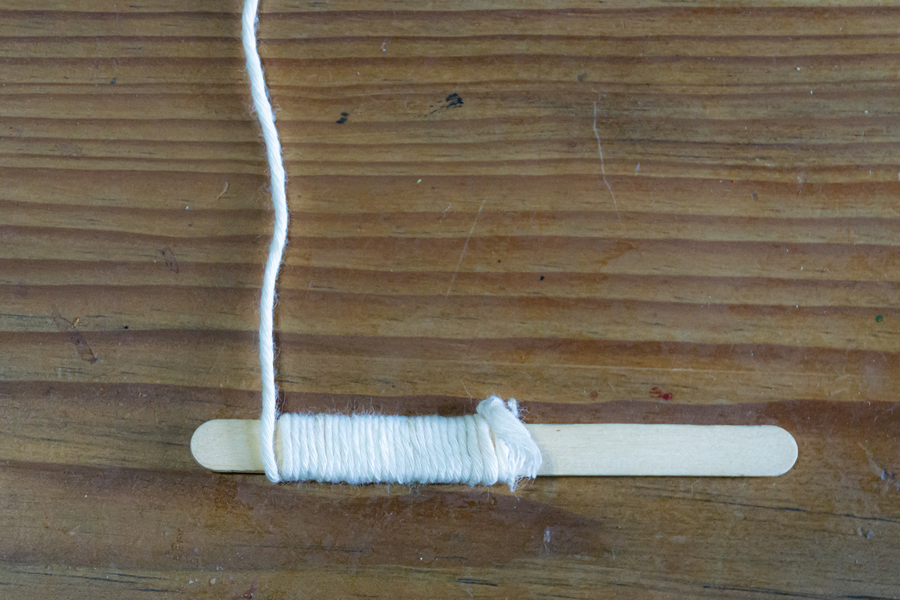
What you need to gather:
A piece of paper
Lightweight string
A popsicle stick
Tape, hole punch, and a stapler
A ruler
Markers
Color your KiteReady to flyKite String
Here’s how you build a kite:
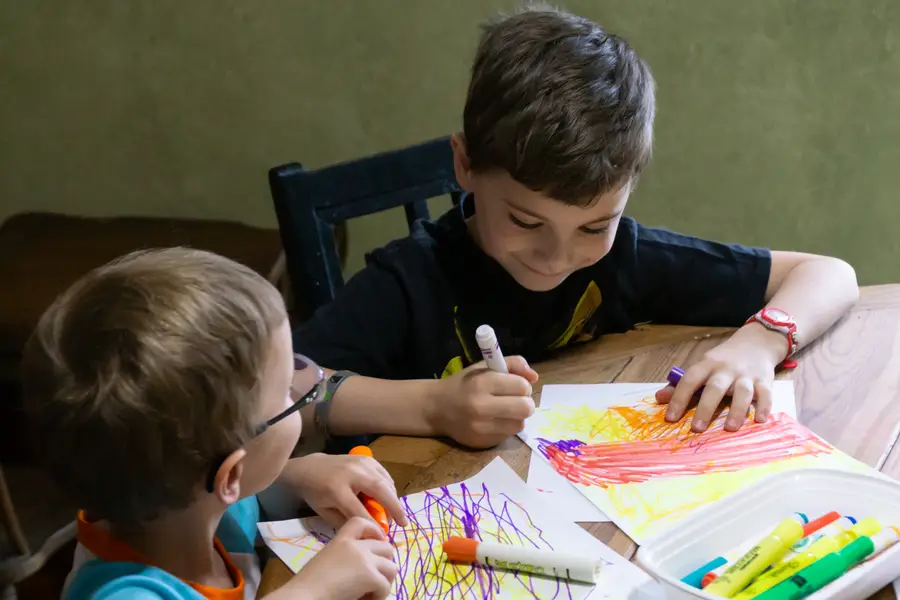
Have your child decorate both sides of a piece of printer paper.
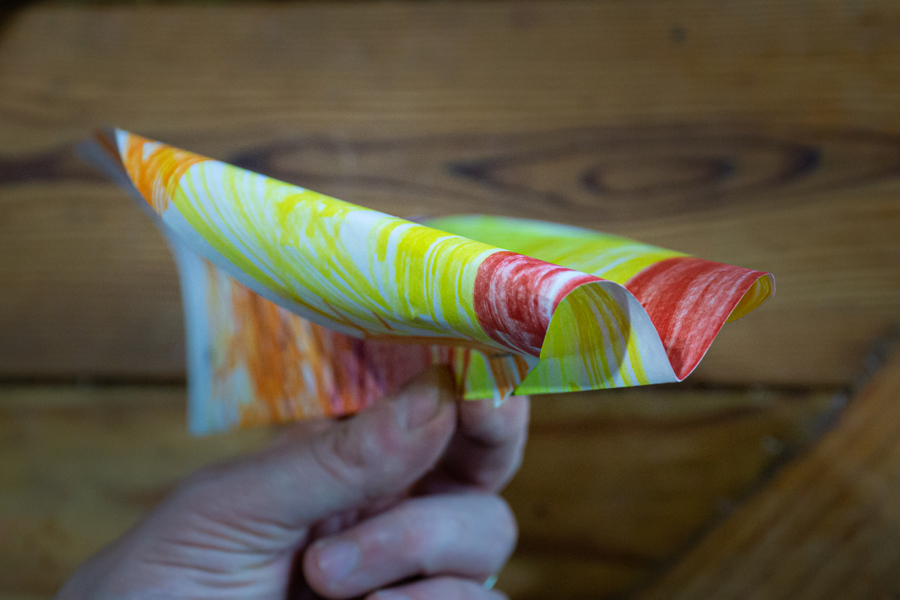
Fold the paper in half, lengthwise.
Using your ruler, make a mark at about the 2 ½“ (0.98 cm) and 3 ½” (1.38 cm) points along the folded edge. We’ll use one to wrap around our “wings” and the other to attach the string.
Curve the paper to the marks and staple at the 2 ½” (0.98 cm) mark. You can also use tape if that works better for you. At this point, your kite will resemble a paper airplane with the wings curved around instead of creased.
Punch a hole at the 3 ½” (1.38 cm) mark for the string to go through. You can use some tape to reinforce the hole so the string does not tear right through the paper.
Tape one side of the string to a popsicle stick while tying the other end through the hole on the kite.
Wrap the extra string around the stick until you go out to fly it.
Go fly a kite!
These won’t go incredibly high and need some wind or constant movement to stay aloft. Our little guys enjoyed the creative activity of designing their kites, and were proud to fly something they built themselves. They especially loved running around outside and seeing who’s kite would stay up the longest.
Go Fly a Kite!
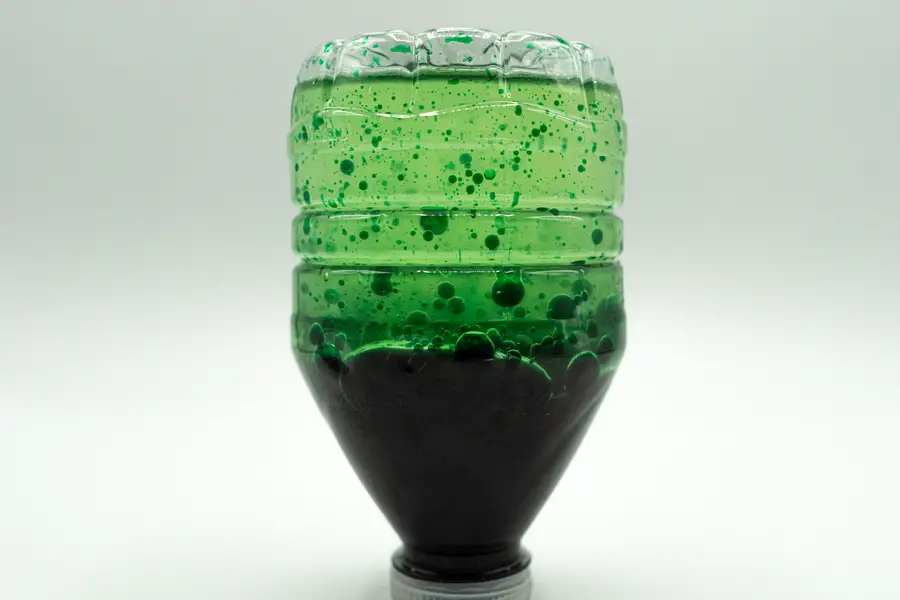
Build a Homemade Lava Lamp
Lava lamps of the 1960s and 1970s were very popular, but do you know how they worked? Lava lamps work with the suspension of a heavier liquid, like oil, in a lighter liquid like water. To demonstrate a simple science experiment about liquids and density, help them build a lava lamp.
Gather the following supplies:
A clear glass jar or cup
Water
Vegetable oil
Food coloring
Alka-Seltzer tablets
Here’s how to make a lava lamp:
Pour the tap water into the glass, about one-quarter full.
Place a few drops of food coloring into the water.
Fill the rest of the glass with oil.
Add a piece of one Alka-seltzer tablet.
As you’re working with this experiment, notice what happens after adding the tablet. It drops to the bottom of the glass, but the bubbles go up into the oil, dragging the water through the oil, which causes the lava lamp effect.
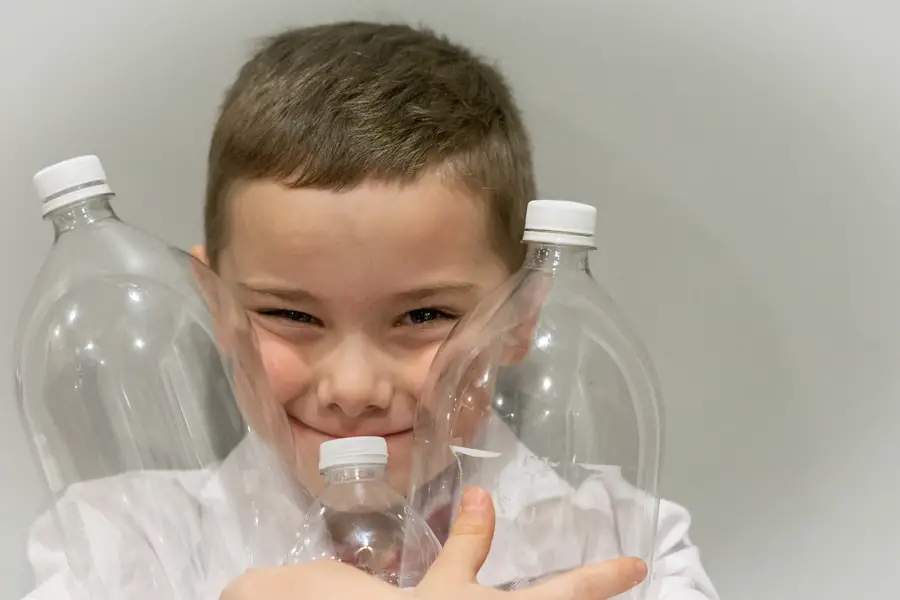
We also made a lava lamp inside an empty water bottle. You can simply shake it up if you don’t have any Alka Seltzer, and watch the oil and water separate and move around. Click through for more fun STEM activities for kids using water bottles.
Create Homemade Paper From Things Around the House
You can make homemade paper from things like paper egg cartons, recycled paper, or other paper-like products you no longer need.
This activity is a bit more involved, though still something children could do mostly independently, with minimal help from you or another adult. Children will learn how to make new things from old materials Who’s ready to do some up-cycling?
What you’ll need for this activity:
Recycled paper or cardboard items – egg cartons are perfect.
An old wood frame and a nylon mesh screen put together to make a mold, plus a second screen/frame to press out moisture
A second hand blender
Spatula and sponge
How to make paper:
Have your children tear the paper or thin cardboard into small pieces.
When the paper is ready, they can put all the paper into the blender.
Pour twice as much water as paper in the blender, and blend until it becomes a thick paste or soup-like consistency. For colored paper, please have your children choose a food coloring and let them put in a few drops before blending.
Place the mold over a sink, preferably a laundry sink, to keep the mess to a minimum.
Slowly pour the mixture on the screen and spread flat.
Press the moisture out with the second screen. Then, place between two mesh screens to dry.
Please consider:
If you use one of your kitchen spatulas, you may want to use an old one or replace it rather than use it for food preparation.
Likewise with your blender- you may want to do activities like this with an old blender or pick up a cheap secondhand blender dedicated to this purpose.
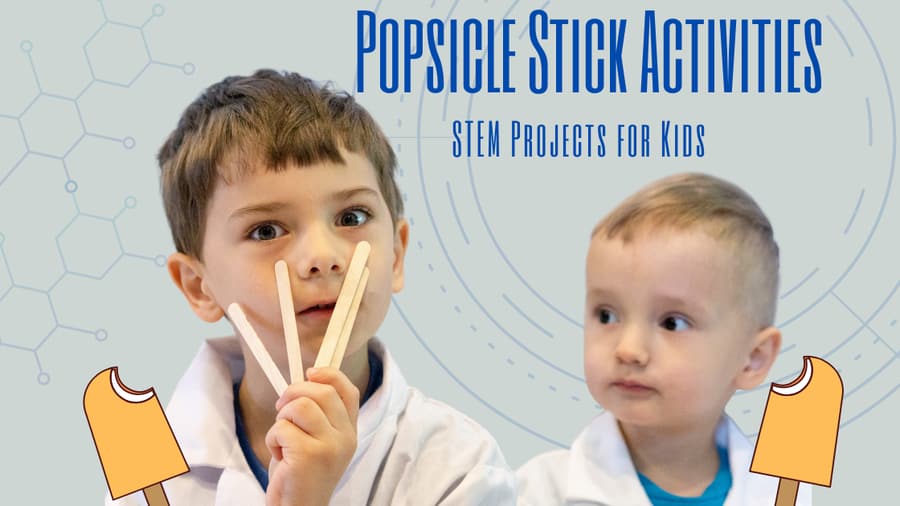
Popsicle sticks are another great source for some simple activities with stuff you probably have around the house. Check out our popsicle stick STEM activity post for catapults, boats, bridges, rubber band guns, and more! (and if you don’t have any popsicle sticks, craft sticks are inexpensive to buy in bulk.)
Have you ever wondered if paper clips could float, or how you can teach concepts like counting and estimation with a simple office supply? We have a whole post detailing educational STEM activities with paper clips. Pull a few paper clips out of the junk drawer, and we’ll see you there.
Simple STEM Activities Can Teach Kids Advanced Concepts
While these subjects can be challenging for many kids to learn through traditional methods, kids can learn advanced concepts in these topic areas through simple activities. Kids learn by doing, and when you can explain why the activities work the way they do, they will take that knowledge with them through their school years. We go more into depth in this post about the importance of STEM learning.
STEAM bring the arts into the mix; you can read more in our post about the difference between STEM and STEAM. Our kids love learning through these types of activities, and we hope you will too!
Wrap Up – STEM Activities with Common Household Items
There you have it! Using simple materials and household objects, you can keep kids busy and entertained, while teaching several advanced concepts in STEM subjects. If you need a fun indoor activity for kids, give these a try!
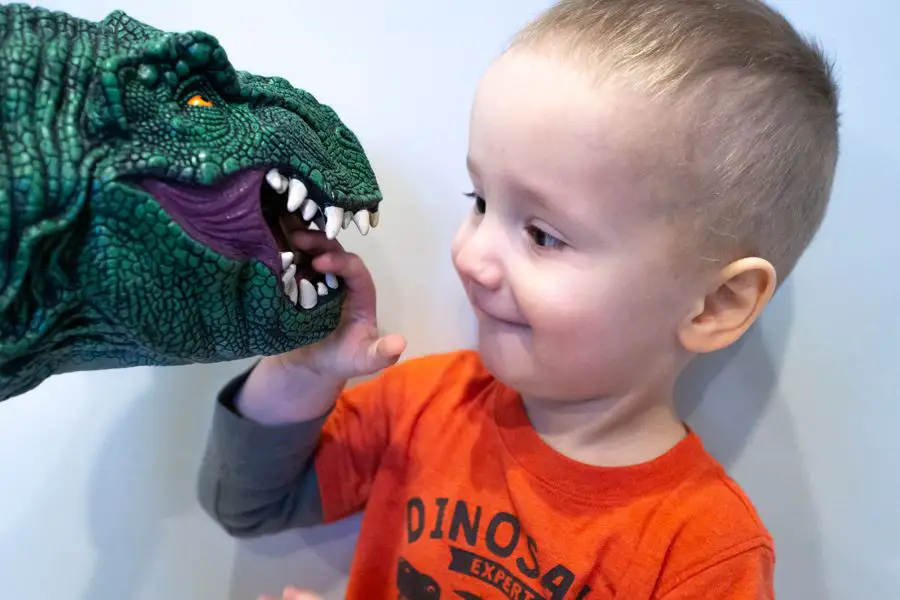
Dinosaurs seem to capture the imagination of every child. What better way to keep your kids active and learning than with dinosaur activates to do at home.
Popsicle sticks should be a staple item in every craft bin or makerspace. They’re inexpensive, easily sourced, and versatile. We’ve gathered a list of some of our favorite STEM projects using popsicle sticks to share with you.
Howie Miller is as dedicated to fatherhood as he is to life long learning. Musician, Photographer, Educator, Consultant, Entrepreneur, Blogger, and founder of STEMtropolis, where you can share his adventures in STEM and STEAM with his family.
School's out and it's time for vacations, pools, beaches, and games. Just because we're taking a break doesn't mean that learning stops!
Summer is the perfect time for kids to explore with fun...
Bubbles are not just for playtime; they're a gateway to understanding some fascinating scientific concepts! Whether you're a parent, teacher, or curious kid yourself, these bubble experiments will...