There are all kind of STEM toys and kits available, and keeping up can get costly. STEM learning and activities can don’t have to break the bank! You can do STEM activities with everyday objects.
Most of us just toss or recycle toilet paper tubes without a thought. You can do STEM activities with toilet paper rolls that will keep kids engaged and thinking on the cheap.
*We’re an affiliate – we may earn a commission through qualifying purchases from the links on this page. As always, thanks!*
Can You Buy Toilet Paper Tubes?
If you’re planning on doing some activities, you may need a bunch of toilet paper tubes. What if you don’t use toilet paper that fast? Can you just buy the tubes by themselves? Of course you can! You can buy just the cardboard tubes without the toilet paper. Just look for “bulk craft tubes” or “cardboard tubes” instead of toilet paper tubes. Here’s a link to a package of 40 tubes on Amazon to get you started. And, you have choices if you don’t want plain brown cardboard: check out these white tubes.
Toilet Paper Roll Construction Set
Building toys are some of the best STEM or educational toys available. They encourage spacial thinking, trial and error problem solving, all the while developing fine motor skills.
Keeping your kid supplied with toys like Legos, Magna Tiles, Tinker Toys, or K’Nex, can get expensive, especially for new parents. Don’t fret over the potential cost. With a little ingenuity, you can create your own DIY construction set out of materials you most likely already have:
Toilet Paper rolls. Paper Towel tubes work well too
Scissors
Paint, markers, or wrapping paper to decorate your tubes
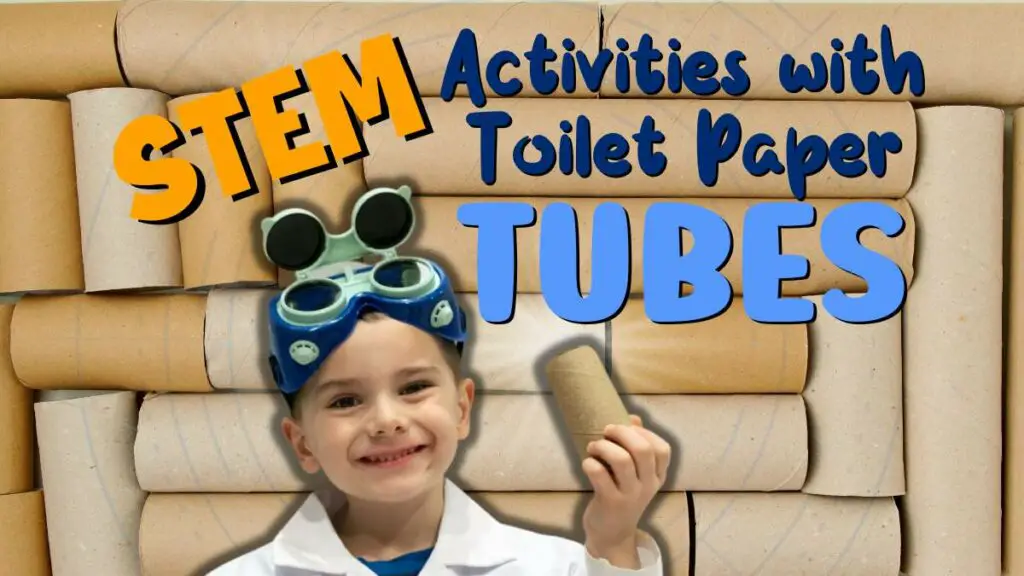
By making small cuts on each end of the tube, we can create slots to join the tubes together. Make four cuts in the top and bottom of each tube, and it’s easy to join the tubes together.
Cut the tubes to different lengths to create a variety of sizes or use some paper towel rolls to have smaller or taller tubes in your building set.
Draw or cut windows into some of the tubes. Paint or decorate the tubes to make them more colorful.
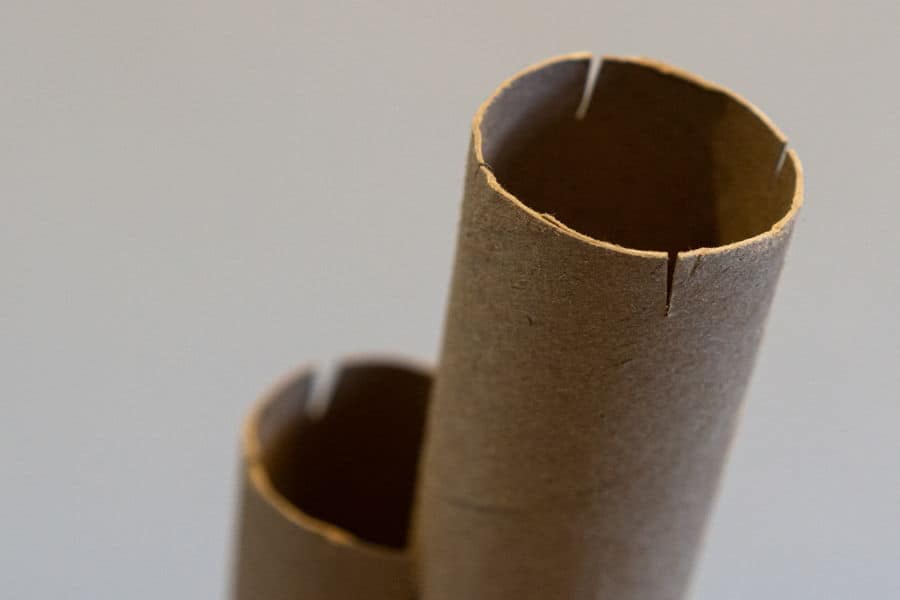
Tube City
We talked about “Tube City” before in this post about creative play, and it deserves mention in this list.
I used to get up early and build a Tube City on our coffee table. Our boys loved coming downstairs to discover a huge collection of tubes for them to knock down. It was worth the looks on their little faces as they raced to knock over every last tube.
Each tube can be a single building, or they can create elaborate buildings out of many tubes. Tube City can transform into Tube Castle if they like, it’s all up to their imagination.
You can crimp the ends of a tube and insert it inside of another to make a taller tube or tower. You can tear or cut the ends of tubes to slot them together for more stability, or incorporate some construction set tubes from the activity above.
Watch your kids as they problem solve to build more interesting structures.
If you have paper towel rolls or tubes from wrapping paper (or any cardboard tube) , they make great additions to tube city to add a little variety to your buildings.
And the thing that kids love best about building structures from cardboard tubes? Knocking it down, of course!
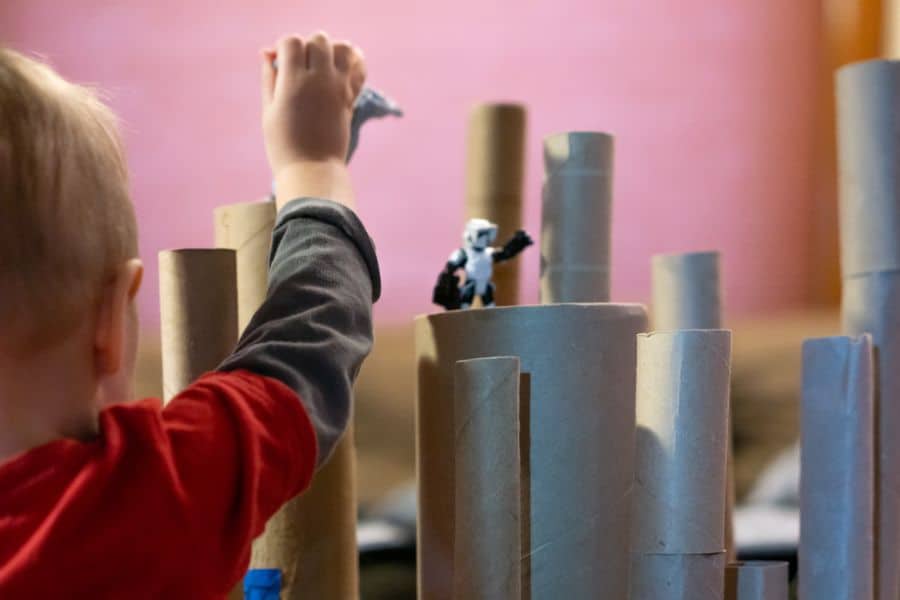
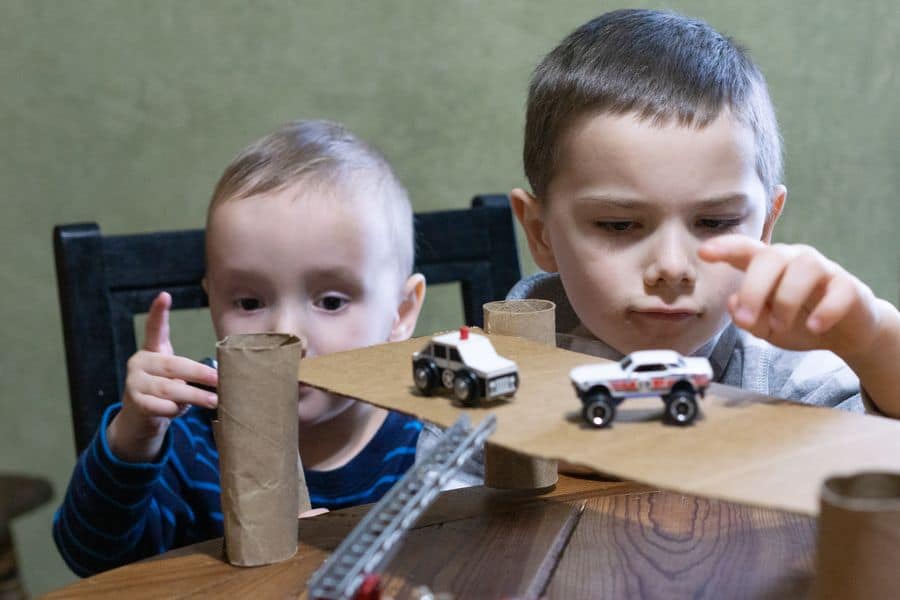
Marble Run with Toilet Paper Rolls
Our son came home from daycare raving about “playing marbles.” When I quizzed him on it a bit, he perfectly described a marble run, and was delighted when I suggested we build our own version at home. This is a simple STEM activity with toilet paper rolls to build a marble run. You’ll need:
Toilet Paper Rolls
Paper Towel Rolls (optional)
Side of a large cardboard box
Tape
Glue
Scissors
Marbles or Superballs
You’ll
need several tall tubes. You can use
paper towel rolls, or tape three toilet paper rolls together to make get a tube
of about the same height.
Cut
several tubes in half to create your marble chutes. You can tape several toilet paper rolls
together to create longer chutes. You
could even tape a few paper towel rolls together for an extra long chute if you
like.
Next,
cut holes in your towers for the chutes to rest in. Plan the path of your marble, and cut the
hole in each tower a bit lower so the chute will slope downward between
towers. Make sure the holes are large
enough for the marble or ball to roll through.
You
can set everything up as is, though the rig will probably be rickety and prone
to falling over. You may want to glue
the base of the tubes down on a large piece of cardboard. Cutting the side off
of a large cardboard box makes a great base.
Once
the glue is dry on the towers, insert your chutes. You can glue these in place as well for more
stability.
Feel
free to paint or decorate your toilet paper roll marble run.
Mable Run Wall
This
is a variation on the Marble run. We’ll
use the side of the box as a wall, and attach the tubes to it. Each tube will need to be mounted diagonally
so the marbles or balls can drop from tube to tube.
We’ll still cut some of our tubes in half, though instead of using them as chutes, we’ll insert them into the top of each tube to catch the marble dropping from the tube above it.
Experiment with the placement of each tube by dropping a marble or ball from the tube above it. Note the path the marble follows so you know about where to place the top of the next tube. If you’re off a little but, it shouldn’t be a big deal. You can adjust the tubes you cut in half to compensate and channel the marble into the tube.
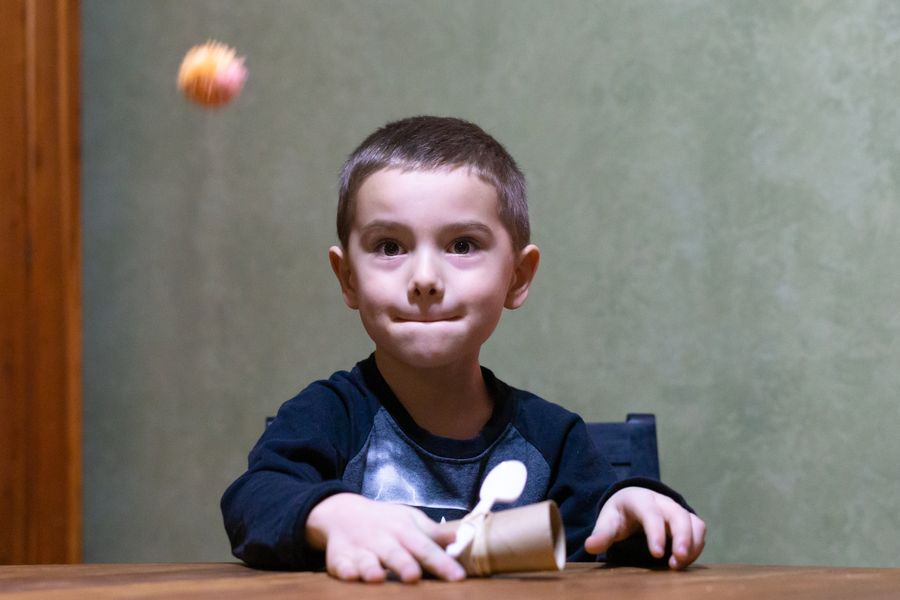
Toilet Paper Roll Catapult
Catapults are classic engineering design (thanks Leonardo), and is easy to fashion with a toilet paper tube and a few common household objects.
Toilet paper roll or paper towel roll
Plastic Spoon
Rubber band
More tubes to knock down
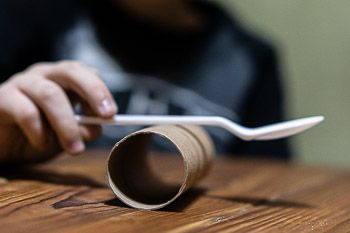
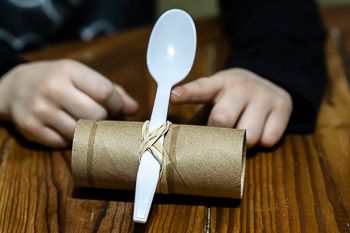
This is a simple STEM activity where you’ll use the rubber band to secure the spoon to the cardboard roll. Hold one end of the roll so the spoon is parallel with the counter or table.
You’ll want to make an X shape across the spoon to hold it tightly in place. (But not so tight you crush the tube.)
Set the Spoon on the rollUse a Rubber Band to attach the spoon
Place your projectile of choice on the spoon (marshmallows, small foam balls or other soft objects work well.) You can launch anything, but keep it safe.
Pull the spoon down and… LAUNCH!
We also learned that instead of bending the spoon back to launch, you could simply smack down the end of the spoon. This sparked a quick lesson about how a lever works with a fulcrum to launch our catapult.
You can set up other cardboard rolls to knock down, or lay siege to Tube City. Add a few action figures or toys and make your own real life version of Angry Birds.
Try setting up some tubes in a triangle shape and try catapult bowling.
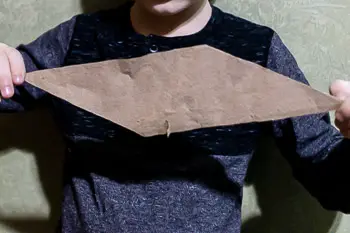
In
this exercise, we’re going to dissect a toilet paper roll to find out how it
was made.
Ask
your child to identify the shape of the roll.
Most kids will answer “circle” or “round.” Some kids may correctly identify it as a
cylinder shape.
Simply
start at one end of the roll and find the seam.. Peel it apart gently and
unravel the roll until it’s just a flat piece of cardboard. Note the shape. It’s a parallelogram. How can a parallelogram make a cylinder?
This
is a cool exercise in reverse engineering: taking something apart to see how it
is constructed. This is also a great
jumping off point to talk about 2D space vs 3D space.
Cardboard Kazoo using a Toilet Paper Roll
For a simple musical instrument, you can make a kazoo from a cardboard tube. Gather the following items:
Toilet Paper Roll (or paper towel roll)
Wax Paper or plastic shopping bag
Rubber Band
Sharp Pencil (to poke a hole in the tube)
Paint, markers, etc. to decorate your kazoo
Cover
one end of the tube with wax paper or a small section cut from the shopping bag
Use
the rubber band to secure it to the end of the tube
Carefully
poke a hole in the side of the tube with a sharp pencil
Talk
or sing through the open end of the tube.
It may take a bit of practice to get the right sound
Decorate
you DIY kazoo with paint, markers, wrapping paper, or whatever you like!
What makes the kazoo sound? The hole allows air to escape the tube. As it does so, the movement of the air causes the wax paper to vibrate and make sounds.
If you use a paper towel roll, how does the sound change?
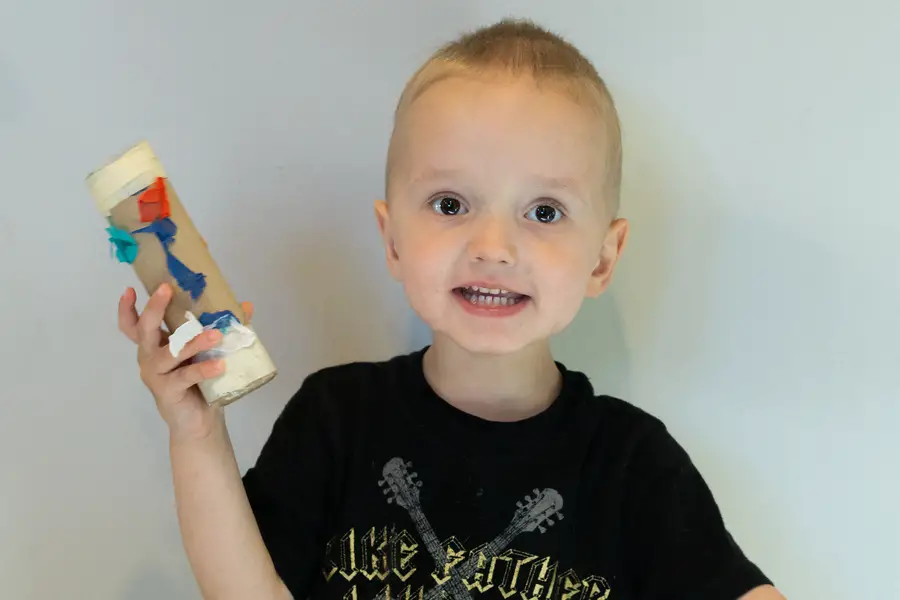
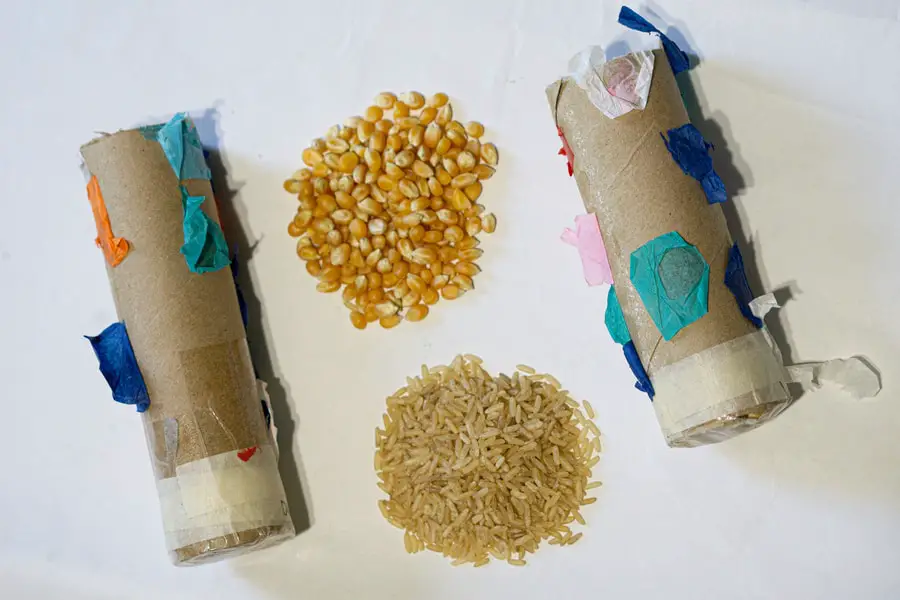
Toilet Paper Shaker Instrument
If you’ve made the kazoo in the activity above, why not add a shaker to your musical collection for some percussion. It’s easy to make a DIY shaker, and we’ll only need a few things that you may already have on hand:
1 Toilet Paper Roll
Paper Bag or Plastic Wrap (to seal the ends of the tube)
Rubber bands or tape
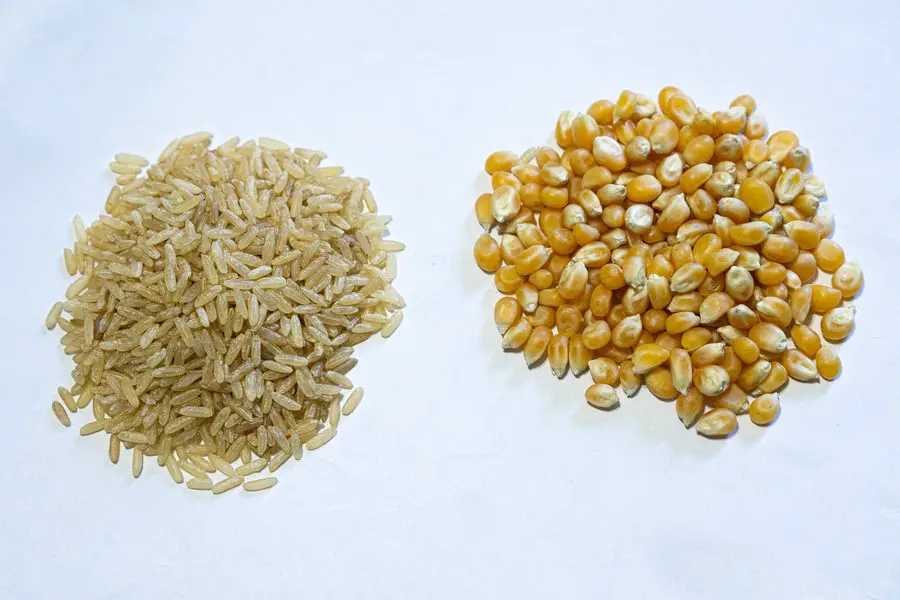
Dry Rice, Beans, Noodles, etc…
Scissors
Paint, Markers, Stickers, etc. for decoration
Cut a few sections of the paper bag or plastic wrap.
Wrap the piece of the paper bag or plastic wrap around one end of the tube and secure it with a rubber band or tape. We used masking tape and plastic wrap for our shakers.
For our shaker, we’ll need something inside the tube to make noise when we shake it. Place some dry rice, beans, or small noodles inside. Fill about 1/3 of the tube.
Cover the other end of the tube with a piece of the paper bag and secure it with a rubber band.
We put dry rice in one, and popcorn kernels in another.
Shake it!
Use paint, markers, stickers or a little of everything to decorate your new shaker. Out little guy wanted to glue on some pieces of tissue paper, as you can see in the above photos.
Toilet Paper Roll Car
1 Toilet Paper Roll
Cardboard or construction paper
Paint, stickers, crayons, or markers for decorating
Scissors
Start with a simple toilet paper roll, and use scissors to cut a U shape a few inched from one end. Fold this flap up to create a windshield. You can also place small toys in the hole to “drive” the car.
Cut 4 circles from cardboard or construction paper.
Glue the wheels on.
Use paint, crayons, or markers to decorate your car.
Cardboard Bridge
Building bridges is a common engineering challenge, and a great STEM activity to try with toilet paper rolls as the main pieces. This fairly a easy and straightforward project that shouldn’t take much time to complete. You’ll need:
4 Toilet Paper Rolls
1 flat piece of cardboard
Scissors
Cut the flat piece of cardboard into a rectangle.
Cut a vertical notch in each of the tubes at about the same height.
Once you have the notches cut, fit the four corners of the flat rectangular piece of cardboard into the notch in each of the tubes.
You’ve got a bridge! At this point, you can add a few pieces of cardboard to make ramps. Use markers or paint to decorate your bridge.
You can pretend to drive your Toilet Roll Car from the activity above across your bridge.
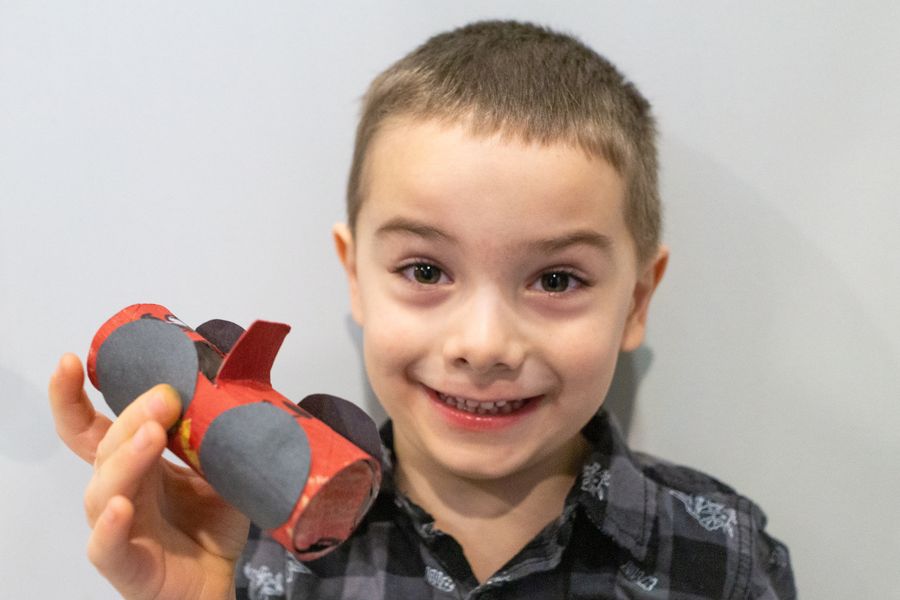
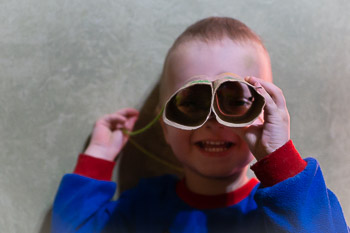
Toilet Paper Roll Binoculars
It’s almost instinct for little kids to look through tubes. Why not encourage their natural curiosity and craft some binoculars? You’ll only need a few simple items you may already have at home:
3 Toilet Paper Rolls
String, yarn, or ribbon
Glue
Scissors
Glue two of the tubes together lengthwise along the sides.
Cut the third roll down the center lengthwise and roll it flat.
Wrap the roll you cut in the last step around the other two. Glue this piece over to help hold them together.
Cut a length of string or yarn. About 12-16 inches should do it. You want it to fit easily over your child’s head, but no so long so it snags or gets tangled.
Glue the ribbon to each side of the cardboard rolls.
Paint, color, or use stickers to decorate your binoculars.
Binoculars can be a great tool to limit your child’s field of vision for playing Eye Spy, or focusing on specific objects.
Looking for more fun activities? Sign up for access to our free printable library for some awesome activities for home, home school, or classroom:
Wrap Up – STEM Activities with Toilet Paper Rolls
And there you have it: STEM activities with toilet paper rolls. Most people just discard toilet paper rolls, paper towel rolls, and cardboard tubes without much of a thought. If we apply some imagination and critical thinking, there is quite a bit we can do with the lowly toilet paper roll. Which activity was your favorite?
Dinosaurs seem to capture the imagination of every child. What better way to keep your kids active and learning than with dinosaur activates to do at home.
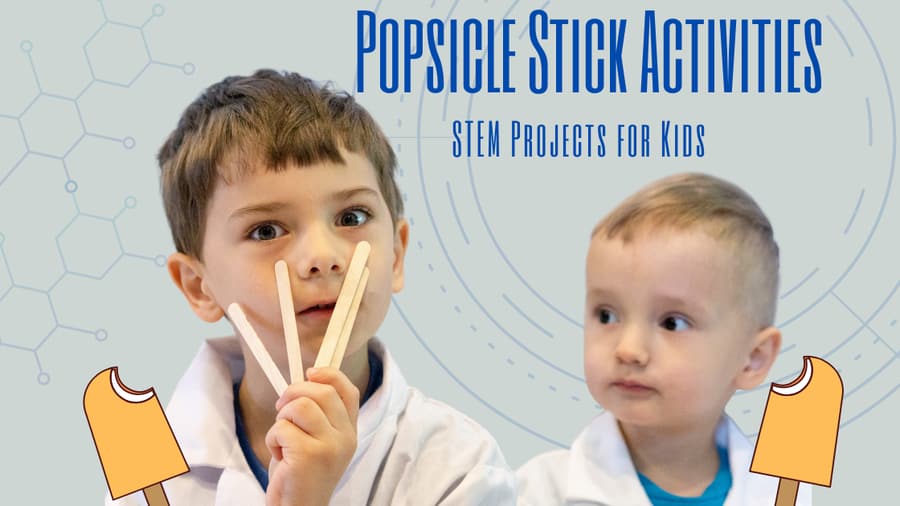
Popsicle sticks should be a staple item in every craft bin or makerspace. They’re inexpensive, easily sourced, and versatile. We’ve gathered a list of some of our favorite STEM projects using popsicle sticks to share with you.
Howie Miller is as dedicated to fatherhood as he is to life long learning. Musician, Photographer, Educator, Consultant, Entrepreneur, Blogger, and founder of STEMtropolis, where you can share his adventures in STEM and STEAM with his family.
School's out and it's time for vacations, pools, beaches, and games. Just because we're taking a break doesn't mean that learning stops!
Summer is the perfect time for kids to explore with fun...
Bubbles are not just for playtime; they're a gateway to understanding some fascinating scientific concepts! Whether you're a parent, teacher, or curious kid yourself, these bubble experiments will...