
School’s out and it’s time for vacations, pools, beaches, and games. Just because we’re taking a break doesn’t mean that learning stops!
Summer is the perfect time for kids to explore with fun summer science experiments and hands-on activities . With the warm weather and long days, children have the ideal opportunity to step outside and interact with the natural world, conducting experiments and making discoveries that foster a love for science.
Whether you’re a parent, teacher, or caregiver, incorporating fun science activities into your summer plans can provide endless fun and educational benefits for kids of all ages.
Join us for some fun activities that are easy to set up and perfect for young explorers. Let’s explore!
Jump to your favorite activity:
Plastic Bottle Rocket
Balloon Rockets
Solar Oven
Nature Journaling
Insect Observation
Bee Hotel Jar
Firefly Lantern Jar
Backyard Summer Scavenger Hunt
DIY Popsicles
Homemade Ice Cream
DIY Kite
DIY Weather Station
Seed Germination
DIY Sidewalk Chalk
Plastic Bottle Rocket: Designing and Launching a Water-propelled Rocket
Description: Create and launch a water-propelled bottle rocket to explore principles of physics and aerodynamics.
Materials Needed:
- Plastic bottle (2-liter works best)
- Water
- Bicycle pump with needle adapter
- Cork
- Launch pad or rocket stand (We used simple rubber bands and chop sticks)
- Safety goggles


Steps:
- Fill the bottle one-third full with water.
- Seal the bottle with the cork
- Push the pump’s needle adapter through the cork.
- Place the bottle on the launch pad and securing it in place. We used chop sticks secured to the bottle with rubber bands. It’s low tech, but quick and keeps the bottle standing
- Using the bicycle pump, pressurize the bottle.
- Keep pumping until the bottle launches (you may get wet if you’re pumping!)
- Observe the rocket’s flight and discuss the factors affecting its trajectory.
Science Concepts:
- Newton’s Third Law of Motion (action and reaction)
- Air pressure
- Aerodynamics
- Forces and motion
Check out more activities about space and astronomy!
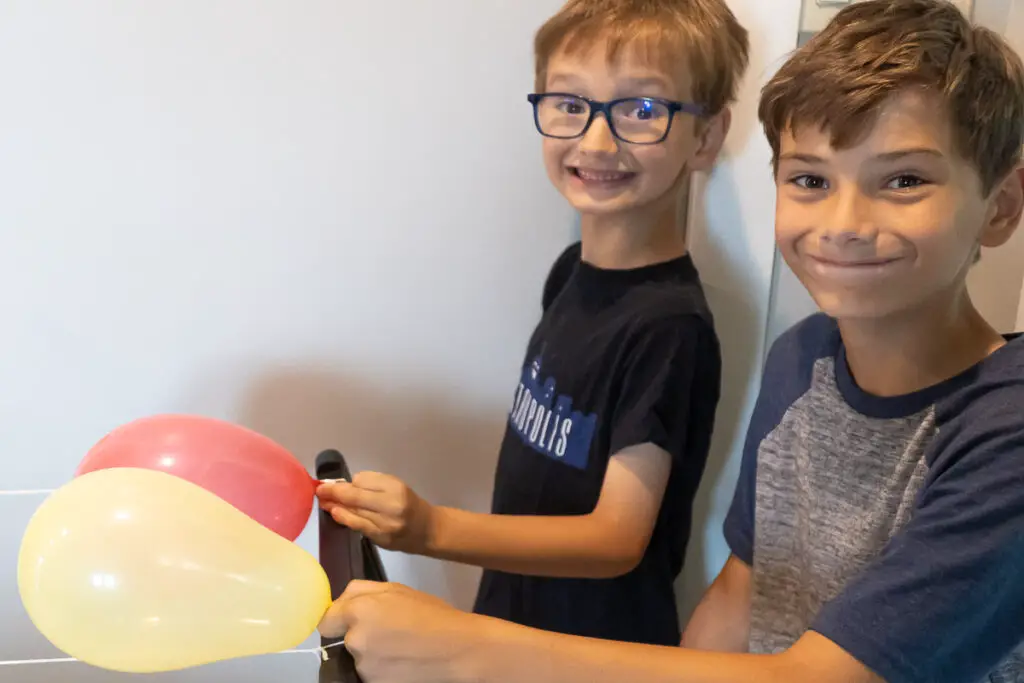
Balloon Rockets
Blast off with balloon rockets to explore the principles of thrust and aerodynamics. By attaching inflated balloons to straws on a string, kids can experiment with different designs to see how they affect speed and distance.
This hands-on activity demonstrates Newton’s Third Law of Motion in a fun and engaging way. Get creative and decorate your rocket!


Materials Needed:
- Balloons
- Straws
- String
- Tape
- Chairs or other anchor points
Steps:
- Tie a piece of string between two anchor points, like chairs.
- Thread a straw onto the string.
- Inflate a balloon and tape it to the straw without tying it.
- Release the balloon and observe how it propels along the string.
- Experiment with different balloon sizes and shapes to see how they affect the rocket’s speed and distance.
- Record observations and discuss the results.
Science Concepts:
- Thrust
- Aerodynamics
- Newton’s Third Law of Motion
Solar Oven: Making S’mores with a Pizza Box
Create a solar oven using a pizza box to make delicious s’mores. This hands-on activity teaches kids about solar energy and heat transfer as they harness the sun’s power to melt chocolate and marshmallows for a tasty treat.
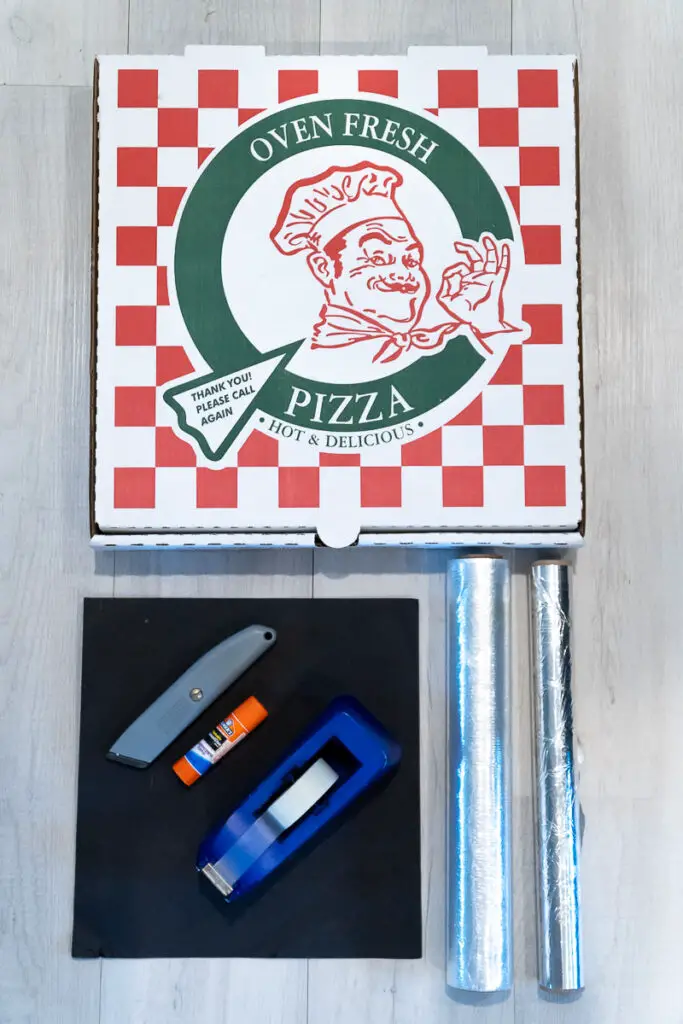

Materials Needed:
- Pizza box
- Aluminum foil
- Plastic wrap
- Black construction paper
- Tape
- Glue (we used a glue stick)
- Scissors or a utility knife
- Ruler
- S’mores ingredients (graham crackers, chocolate, marshmallows)
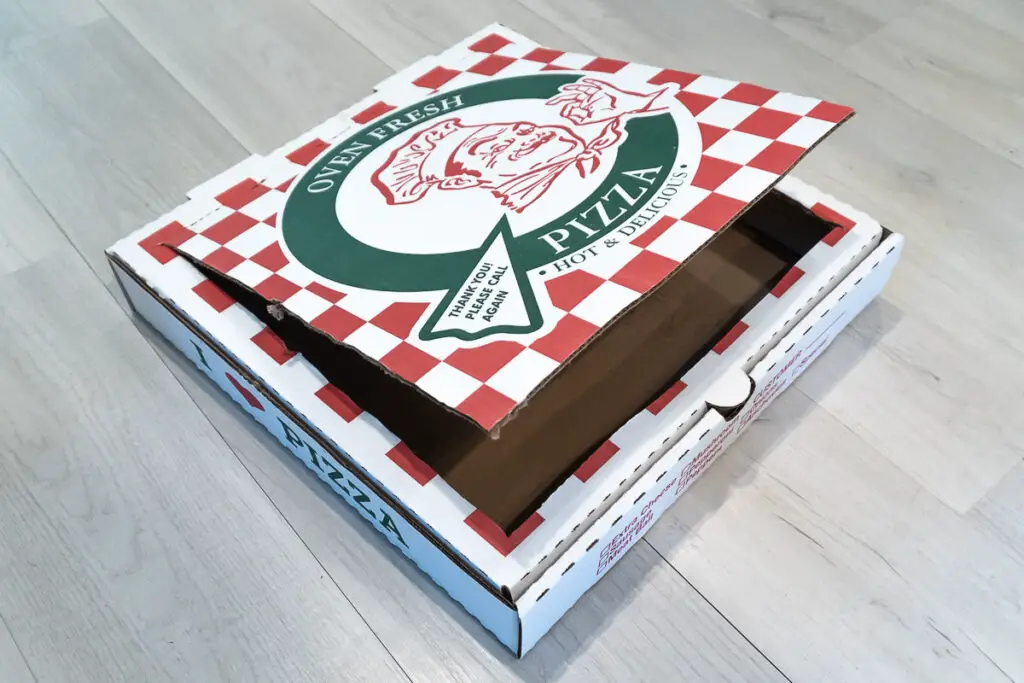
Steps:
- Use the utility knife or scissors to cut a flap in the top of the pizza box: cut the front and two sides about an inch from the edge, leaving the back side attached to form a hinge.
- Fold the top of the lid up along the uncut backside.
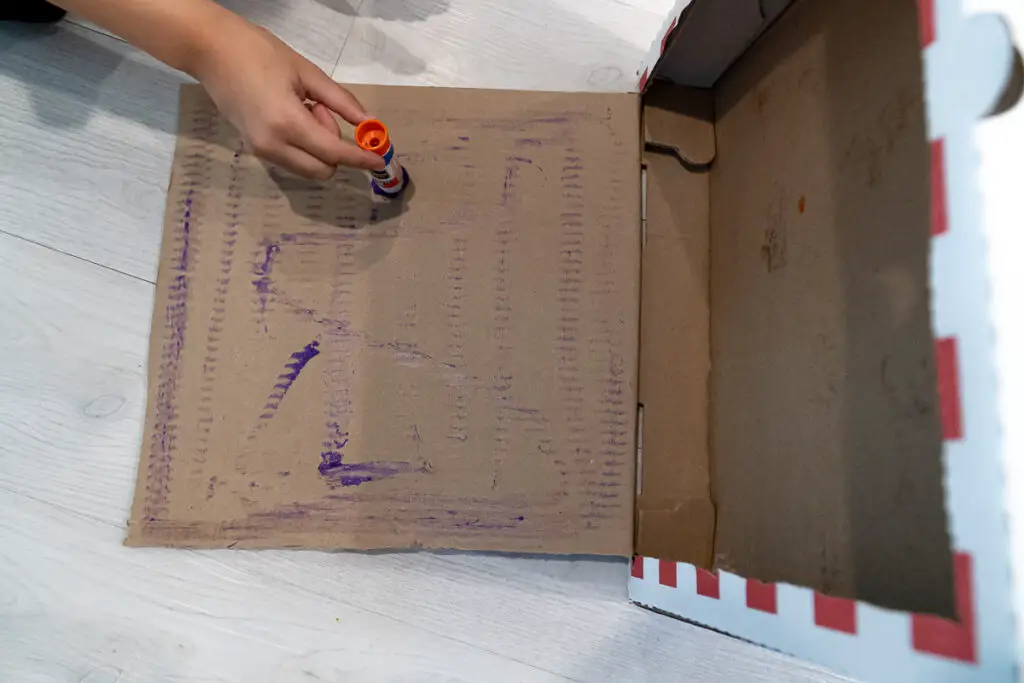
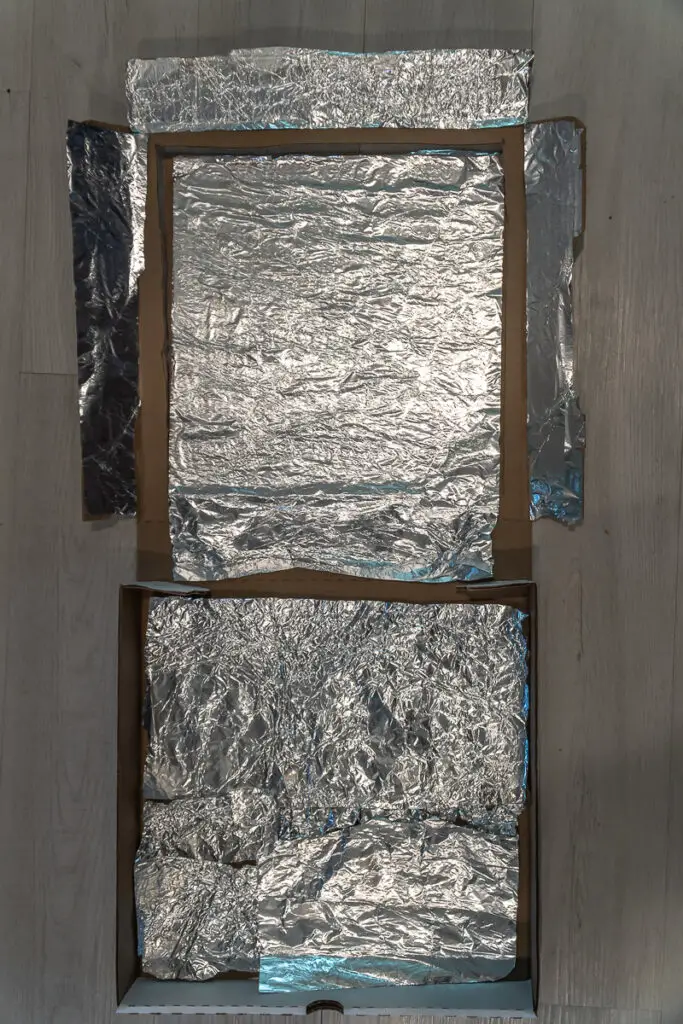
- Line the inside of the flap with aluminum foil, shiny side out.
- Line the inside of the box with aluminum foil. The glue stick or tape can secure the foil.
- Tape or glue black construction paper to the bottom of the box; this will hold the heat from the sun.
- Cover the opening created by the flap with plastic wrap, securing it with tape to create a window. Try to seal it as much as possible; this will keep the heat in our oven.
- Place s’mores ingredients inside the box and seal it shut. You can use a small piece of foil under each s’more to make less mess. (We had some leftover Easter candy, and the boys thought it would be fun to use the peeps as marshmallows!)
- Use tape or sticks to prop the foil-lined flap open at an angle that reflects sunlight into the box. We poked a hole in the box with a chopstick and used it to prop the lid open.
- Position the solar oven in direct sunlight and wait for the s’mores to melt and cook.
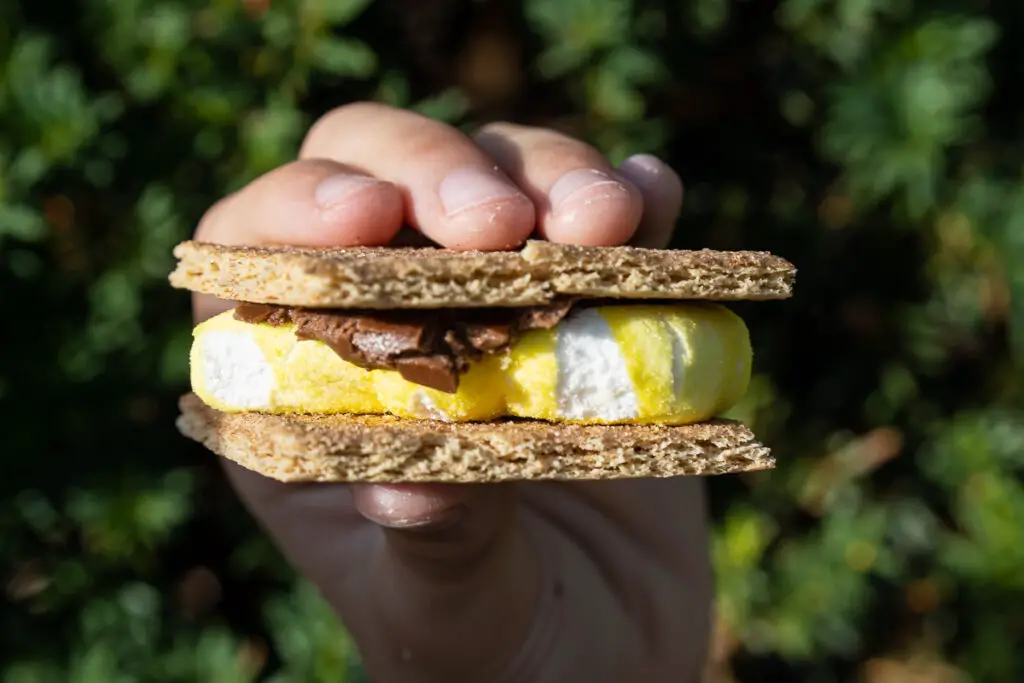
- Enjoy!
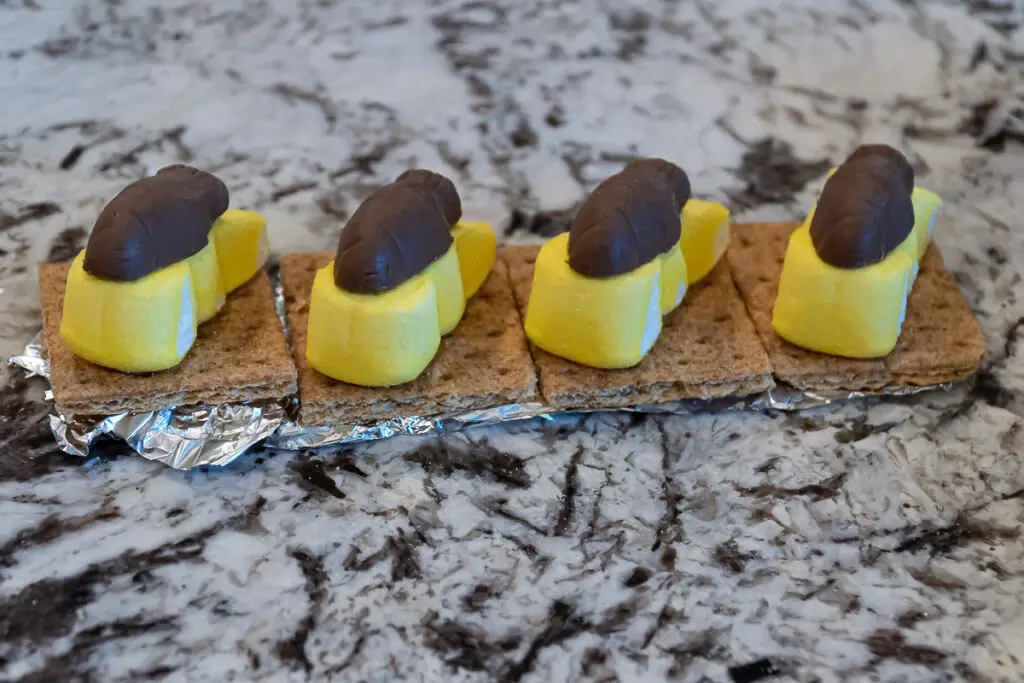

We had some marshmallow Peeps left over from Easter, so used them for our S’mores. For fun, you can use a thermometer to measure the heat in your solar oven. Ours reached 192°F pretty quickly.
Science Concepts:
- Solar energy
- Heat transfer
- Reflection and absorption of light
Don’t miss these other edible science projects!
Nature Journaling
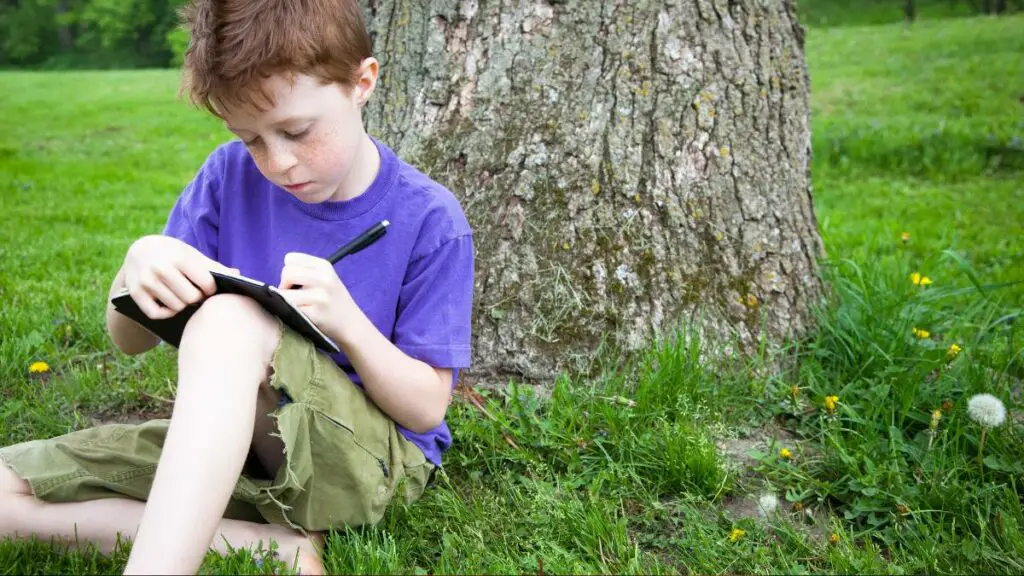
Encourage kids to become little naturalists with nature journaling. They’ll observe and record changes in plants, weather, and wildlife over the summer. This activity enhances their observation skills and helps them appreciate the environment, fostering a lifelong connection to nature.
Materials Needed:
- Notebook
- Pens, pencils, colored pencils
- Magnifying glass (optional)
Steps:
- Choose a natural area to observe regularly.
- Use the notebook to record observations of plants, weather, and wildlife.
- Draw pictures and write descriptions of what you see.
- Note any changes over time, such as plant growth or weather patterns.
- Research any unfamiliar plants or animals you observe.
Science Concepts:
- Observation skills
- Ecosystems
- Seasonal changes
Insect Observation
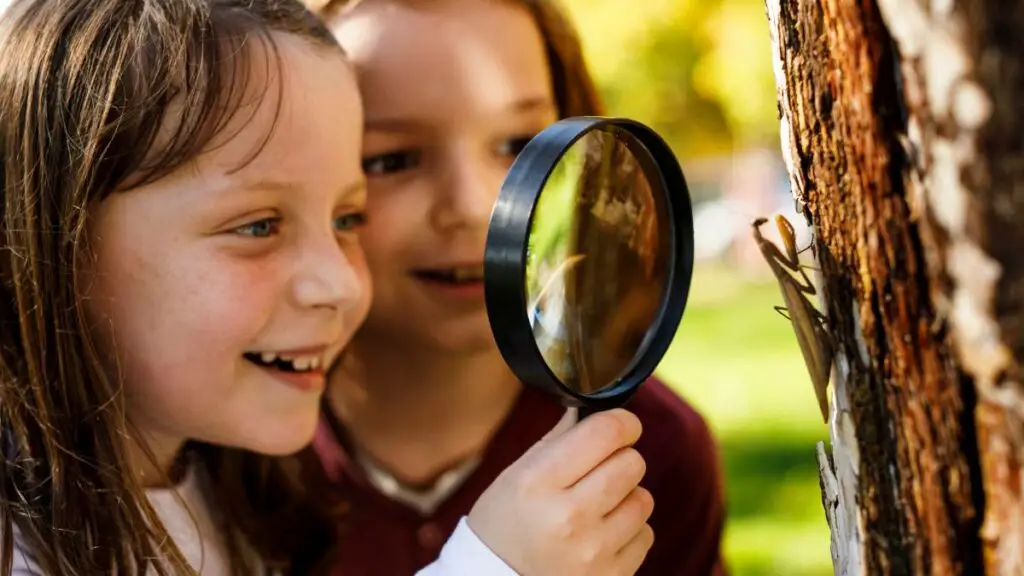
I remember long lazy days of summer, exploring and turning over rocks just to see what was underneath. A large part of science is simply observation.
Observe insects in their natural habitat to learn about their behavior, anatomy, and role in the ecosystem. This activity encourages kids to explore the diversity of insect life, enhancing their understanding of ecology and biology.
Materials Needed:
- Notebook and pen
- Magnifying glass (optional)
- Jar with holes in the lid (for temporary observation)
- Field guide to insects (optional)
Steps:
- Find a natural area like a garden, park, or backyard.
- Use the magnifying glass to observe insects closely.
- Carefully catch insects in the jar for temporary observation.
- Note the insect’s physical characteristics, behavior, and habitat.
- Release the insects back into their environment after observation.
- Record observations and sketches in the notebook.
Science Concepts:
- Insect anatomy
- Ecosystems and habitats
- Observation skills
- Biodiversity
Bee Hotel: Creating a Habitat for Bees Using a Glass Jar
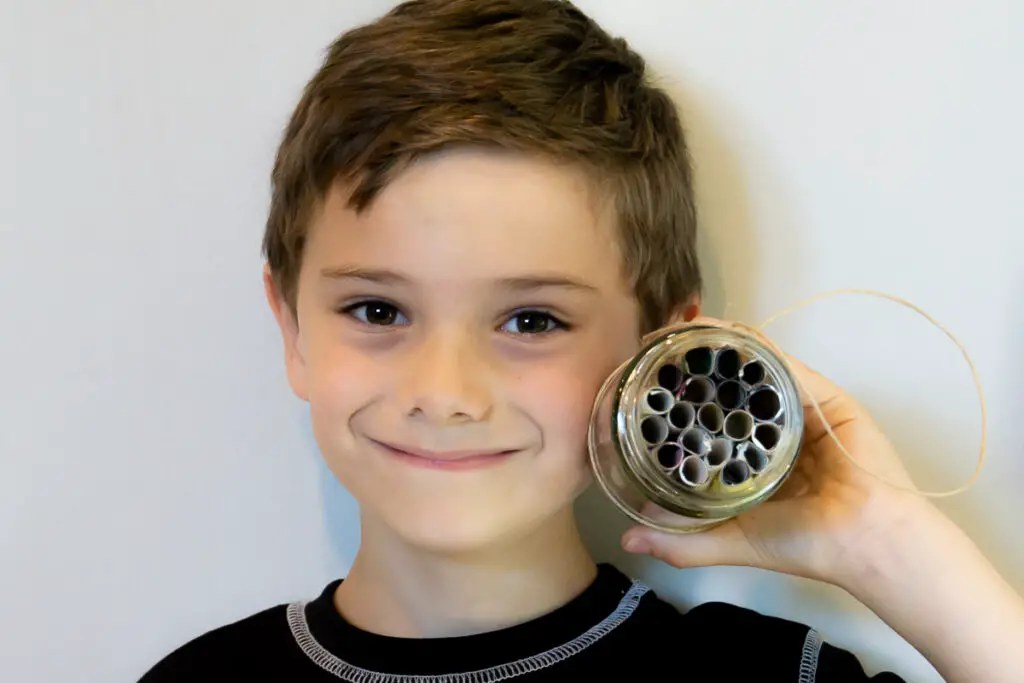
Why not observe some insects in a habitat you built yourself? Build a bee hotel using a glass jar to provide a safe nesting place for solitary bees. This project helps kids learn about bee habitats, the importance of pollinators, and biodiversity.
Materials Needed:
- Clean glass jar (mason jar or similar)
- Paper to roll into tubes
- Scissors
- String or wire
- Tape (optional)
Steps:
- Prepare your paper tubes: Cut and roll your paper into tubes to a length slightly shorter than the height of the glass jar. Ensure the ends are smooth and open. The bees will go into these tubes, so they should be about a half inch wide.
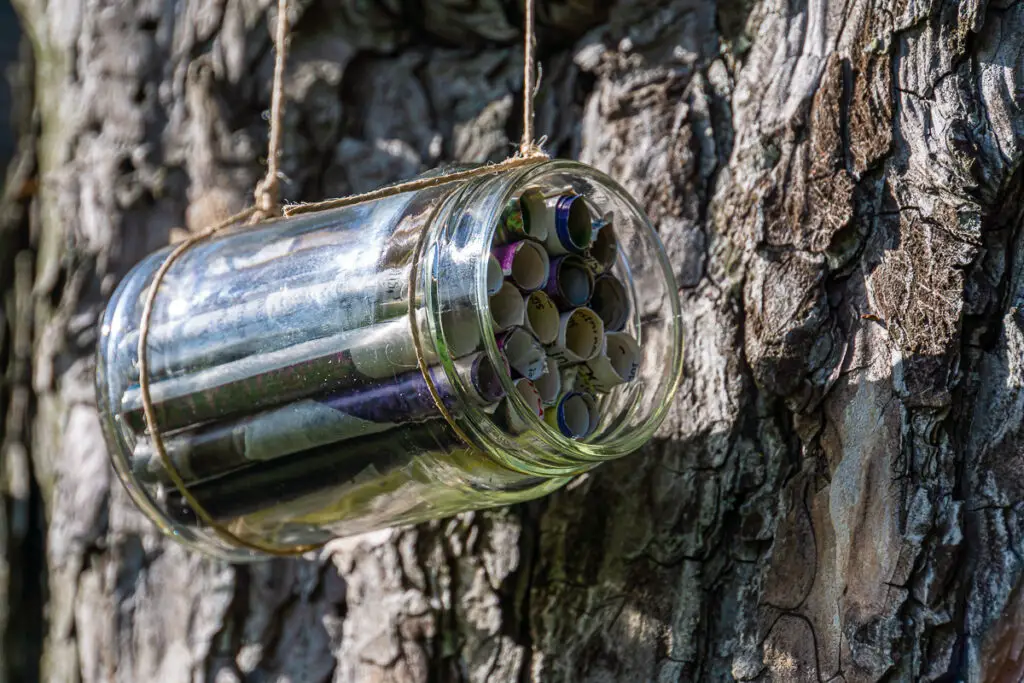
- Fill the Jar: Pack paper tubes tightly into the jar, making sure they fit snugly and do not fall out. The tubes should be arranged so that the open ends face outward.
- Hang the Bee Hotel: Attach string or wire around the neck of the jar, forming a loop for hanging. Choose a location that is sheltered from heavy rain and direct wind but receives plenty of sunlight, such as under the eaves of a building or on a tree branch.
- Monitor and Maintain: Check the bee hotel regularly to ensure it remains intact and clean. Replace any damaged or clogged tubes as needed.
Science Concepts:
- Bee Habitats: Learn about the natural nesting preferences of solitary bees and how creating suitable habitats can support their populations.
- Pollination: Understand the crucial role bees play in pollination and maintaining biodiversity in ecosystems.
- Conservation: Explore the importance of conserving pollinator species and promoting biodiversity through small-scale interventions like building bee hotels.
- Ecology: Gain insights into the interactions between living organisms and their environment, emphasizing the interconnectedness of ecosystems.
Firefly Lantern Jar
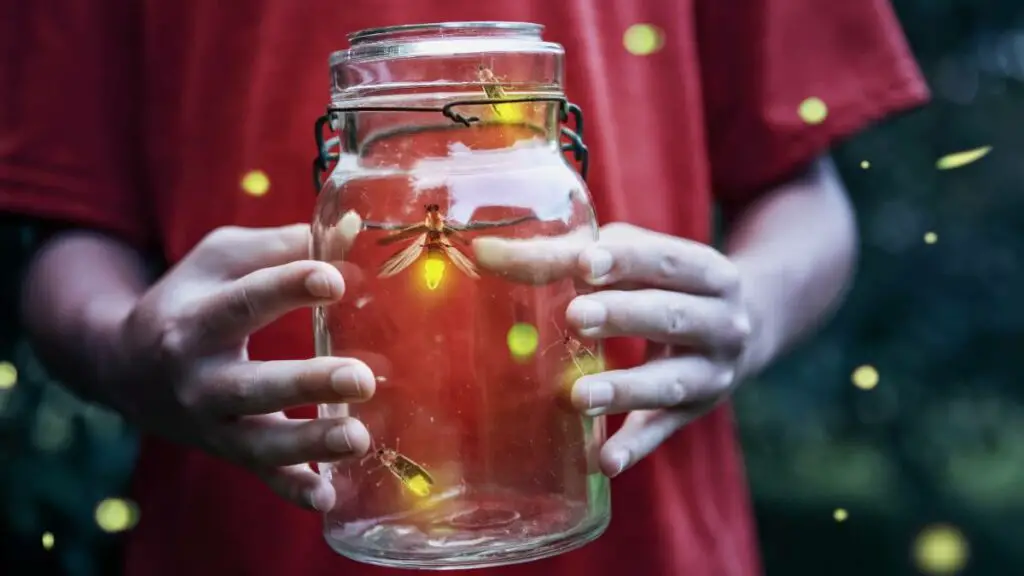
Description: Create a magical firefly lantern jar to observe and enjoy the natural glow of fireflies. This activity teaches kids about bioluminescence and the behavior of these fascinating insects.
Materials Needed:
- Clean glass jar with a lid (mason jar or similar)
- Small nail and hammer (or a drill) to make holes in the lid
- Fireflies (gently captured from your backyard or a park)
- Small amount of moist soil or grass (optional)
- Flashlight (for capturing fireflies)
Steps:
- Prepare the Jar: Use a nail and hammer or a drill to make several small holes in the jar’s lid. This allows air to circulate inside the jar. Make the holes small enough so the fireflies don’t escape but have enough air.
- Capture Fireflies: In the evening, gently capture fireflies using a flashlight to locate them.
- Create a Comfortable Environment: Place a small amount of moist soil or grass at the bottom of the jar to mimic the fireflies’ natural habitat. This is optional but can make the fireflies more comfortable.
- Transfer the Fireflies: As you catch your fireflies, gently place them into the jar.
- Observe the Glow: Watch as the fireflies illuminate the jar with their natural bioluminescence. Enjoy the soft glow and observe their behavior.
- Release the Fireflies: After observing for a short period, release the fireflies back into their natural habitat.
Science Concepts:
- Bioluminescence: Learn that fireflies are able to produce light, known as bioluminescence.
- Insect Behavior: Observe the behavior of fireflies, including their flashing patterns, which are used for communication and mating.
- Ecosystems and Habitats: Gain insight into the importance of preserving natural habitats for fireflies and other wildlife. Discuss the impact of habitat loss and pollution on firefly populations.
- Conservation and Ethics: Emphasize the importance of handling fireflies gently and returning them to their environment to promote ethical treatment of wildlife and conservation efforts.
Backyard Summer Scavenger Hunt
Description: Engage in a fun and educational scavenger hunt in your backyard to discover and learn about various plants, insects, and natural objects. This activity helps kids develop observation skills and gain a deeper appreciation for nature.
Materials Needed:
- Scavenger hunt list (customizable)
- Bag or container for collecting items (or a simple checklist)
- Field guide to local plants and insects (optional)
Steps:
- Create a Scavenger Hunt List: Make a list of items commonly found in your backyard. Examples include:
- A leaf with jagged edges
- A smooth rock
- A flower
- An insect
- A bird feather
- Something round
- Something green
- A pinecone or seed pod
- Gather Materials: Provide each participant with a copy of the scavenger hunt list, a bag or container to collect items, and a magnifying glass for closer inspection.
- Start the Hunt: Set a time limit and let the kids explore the backyard to find items on the list. Encourage them to observe their surroundings carefully.
- Collect and Observe: As items are found, place them in the bag or container. Use the magnifying glass to examine small details and record observations in the notebook.
- Discuss Findings: Once the scavenger hunt is complete, gather everyone to discuss their findings. Use a field guide to identify any unknown plants or insects.
- Reflect and Learn: Talk about the different items collected and their roles in the ecosystem. Encourage kids to think about how each item contributes to the environment.
Science Concepts:
- Observation Skills: Enhance kids’ ability to observe and identify various natural objects and organisms in their environment.
- Nature Appreciation: Foster a sense of wonder and respect for nature, encouraging kids to spend more time outdoors and learn about the natural world.
Make DIY Popsicles
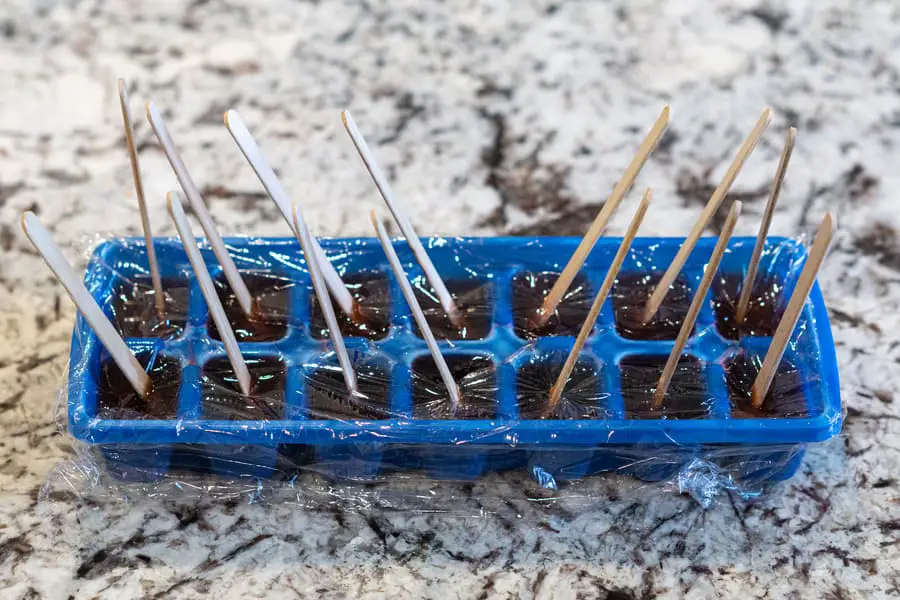
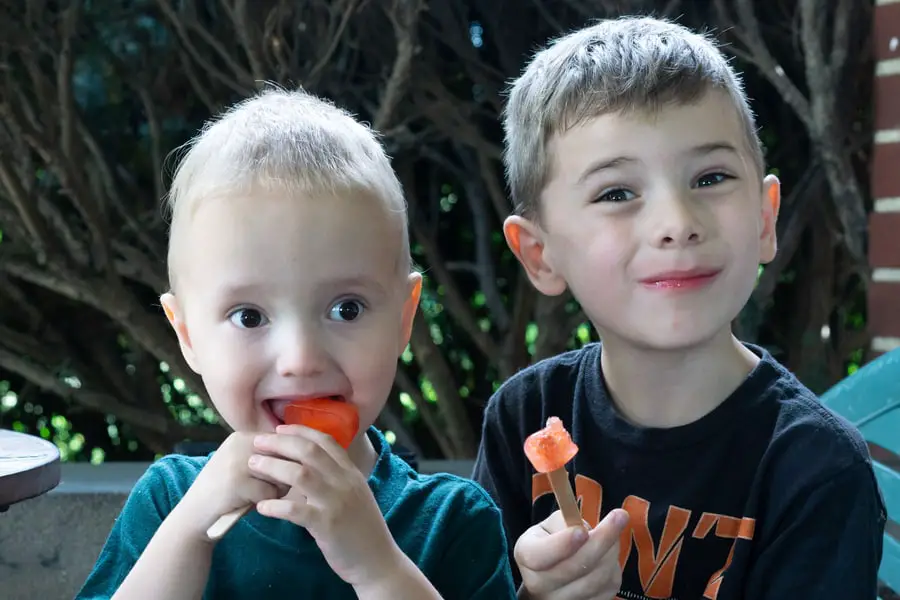
As the temperatures rise, summer is the perfect time to cool off with a delicious and refreshing treat. Making DIY Popsicles is a fun and simple activity that kids can thoroughly enjoy. These homemade delights are not only a great way to beat the heat, but they also offer a chance to learn about changing states of matter.
Materials Needed:
- Fruit juice or drink
- Ice cube tray
- Popsicle sticks
- Plastic wrap
Steps:
- Fill the ice cube tray with your juice
- Pull the plastic wrap firmly over the top of the tray
- Poke a popsicle sticks through the plastic into each cube (you may need to cut with a knife or scissor if it’s difficult to do it with just the stick.)
- Carefully place the tray in the freezer
- Enjoy!
We use recycled popsicle sticks for this. You can buy popsicle or craft sticks, though make sure to look for food grade ones.
Science Concepts:
- States of Matter: Your juice will change from a liquid to solid when it hits its freezing point.
Homemade Ice Cream
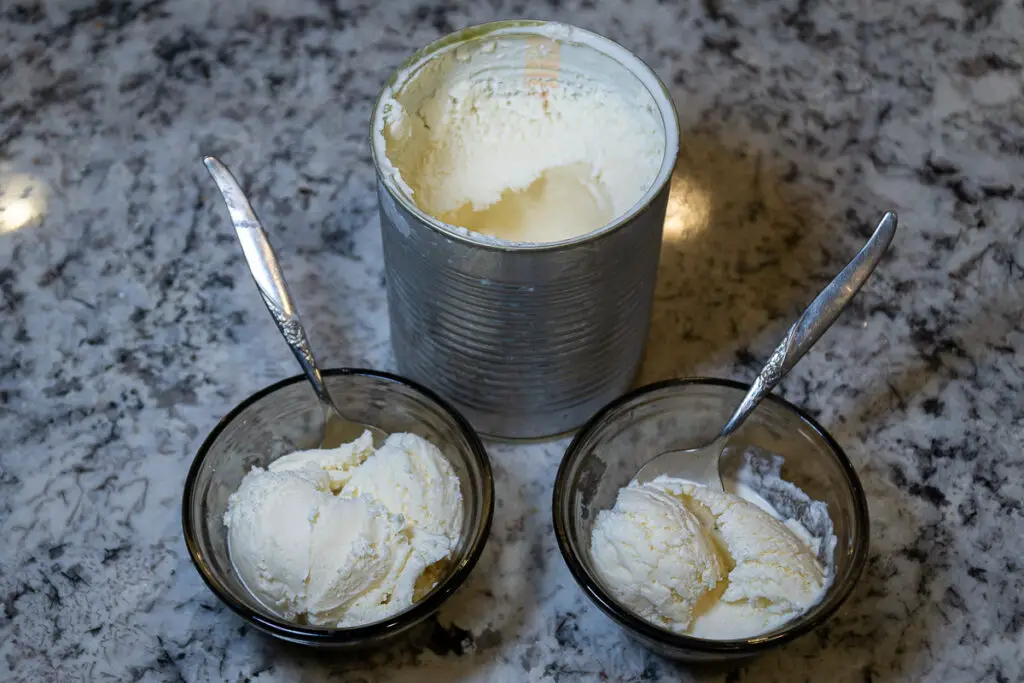
Make delicious ice cream in a bag and learn about phase changes in the process. This simple experiment involves shaking a mixture of half-and-half, sugar, and vanilla inside a bag surrounded by ice and salt. Kids explore the concepts of freezing point depression and thermal energy transfer while enjoying a sweet treat.
Materials Needed:
- Half-and-half or milk
- Sugar
- Vanilla extract
- Ice
- Rock salt
- Small and large zip-lock bags
- Towels or gloves
Steps:
- In a small zip-lock bag, mix half-and-half, sugar, and vanilla extract.
- Seal the bag tightly, removing excess air.
- Fill a large zip-lock bag halfway with ice and add rock salt.
- Place the small bag inside the large bag and seal it.
- Shake the bags for 5-10 minutes, wearing towels or gloves to protect your hands from the cold.
- Check the consistency of the ice cream, then remove and enjoy.
Science Concepts:
- Freezing point depression
- Phase changes
- Thermal energy transfer
Check out more activities with food.
DIY Kite

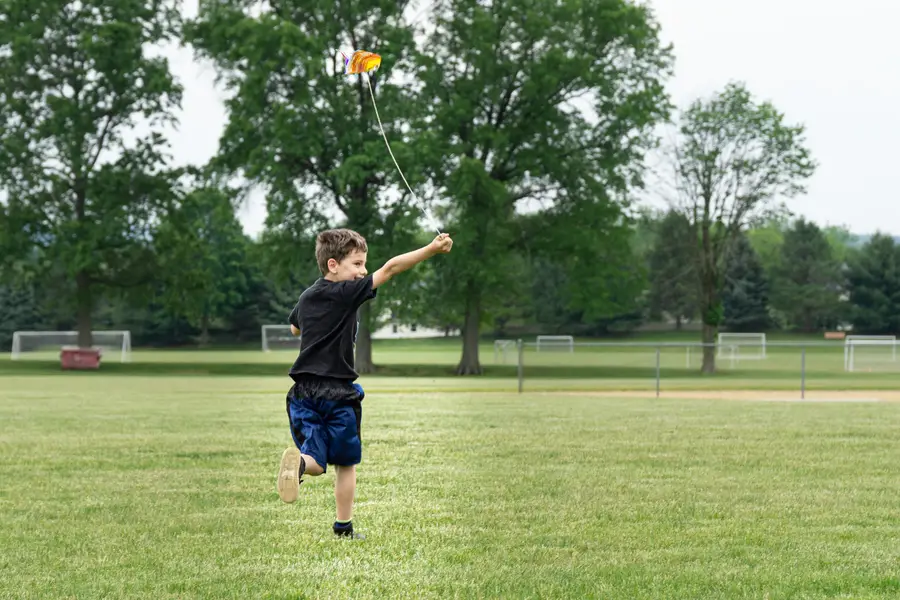
We made some simple kites with just paper and string. The kids had a blast coloring and decorating their kites before we took them to a local park to fly. Check out this and more activities you can do with just paper.
DIY Weather Station
Turn your backyard into a mini meteorological center with a DIY weather station. Kids can create simple weather instruments like a rain gauge, anemometer, and barometer to track local weather patterns. This hands-on project teaches about measurement and data collection while making weather observation exciting.
Materials Needed:
- Plastic bottle or jar (for rain gauge)
- Ruler
- Plastic cups, straws, and protractor (for anemometer)
- Balloon, jar, and straw (for barometer)
- Tape, scissors
Steps:
- Rain Gauge: Cut the top off a plastic bottle or jar, invert it to act as a funnel, and tape it back. Mark measurements on the side with a ruler to measure rainfall.
- Anemometer: Attach four cups to the ends of two crossed straws. Mount the straws on a central pivot, such as a pencil, and use a protractor to measure wind speed by counting rotations.
- Barometer: Stretch a balloon over the top of a jar, seal it with a rubber band, and tape a straw to the balloon’s center. Measure air pressure changes by noting the straw’s movement.
- Record daily weather observations using your homemade instruments.
- Compare your data with local weather reports.
Science Concepts:
- Meteorology
- Measurement and data collection
- Atmospheric pressure
Leaf Chromatography
Discover the hidden colors in leaves with leaf chromatography. This activity involves separating pigments in leaves using chromatography paper and rubbing alcohol. Kids learn about photosynthesis and plant pigments, revealing the vibrant spectrum of colors that make up leaves.
Materials Needed:
- Fresh leaves
- Rubbing alcohol
- Coffee filters or chromatography paper
- Jar
- Pencil
- Tape
Steps:
- Tear leaves into small pieces and place them in a jar.
- Add rubbing alcohol to cover the leaves and mash them to release pigments.
- Cut a strip of coffee filter or chromatography paper and tape it to a pencil.
- Suspend the strip in the jar, making sure it touches the alcohol but not the leaf pieces.
- Observe as the alcohol carries pigments up the paper, separating them into different colors.
- Let the paper dry and analyze the different pigments.
Science Concepts:
- Chromatography
- Plant pigments
- Photosynthesis
Seed Germination


Grow plants from seeds. Kids plant seeds in different environments (light, dark, wet, dry) and observe their growth. This activity teaches about the conditions necessary for germination and helps kids understand plant biology and environmental science.
Materials Needed:
- Seeds (e.g., beans, sunflower)
- Soil
- Small pots or cups
- Water
- Light source
- Dark box or cupboard
- Notebook and pen
Steps:
- Plant seeds in small pots with soil.
- Place some pots in a well-lit area and others in a dark place.
- Water some pots regularly and leave others dry.
- Observe and record the growth of the seeds over time.
- Compare the growth in different conditions and discuss the necessary factors for germination.
Science Concepts:
- Germination
- Plant growth
- Environmental conditions
Check out some more activities with plants and photosynthesis!
DIY Sidewalk Chalk with Egg Shells

Make eco-friendly sidewalk chalk using recycled eggshells. This fun and creative project introduces kids to the concepts of recycling and chemistry as they transform everyday kitchen waste into colorful drawing tools.
Note that this one takes a bit of effort to crush (and accumulate) the eggshells and some time for the chalk to dry. Plan ahead before chalking your walk!
Materials Needed:
- Eggshells (cleaned and dried)
- Flour
- Hot water
- Food coloring (optional)
- Mortar and pestle or a rolling pin
- Mixing bowls
- Molds (small paper cups or silicone molds)
Steps:
- Crush the eggshells into a fine powder using a mortar and pestle or rolling pin.
- In a bowl, mix 1 teaspoon of flour with 1 teaspoon of hot water until it forms a paste.
- Add the eggshell powder to the paste and mix until you get a thick, dough-like consistency.
- If desired, add food coloring to the mixture.
- Press the mixture into molds and let it dry for several days.
- Once dry, remove the chalk from the molds and use it for drawing on sidewalks.
Science Concepts:
- Recycling and sustainability
- Chemistry (mixtures and compounds)
- States of matter (solidification)
Bubble Activities

For more summer fun, check out these awesome activities with bubbles. Make your own bubble wands, experiment with different shapes, make a bubble snake, giant bubbles, and learn how to make your own DIY bubble solution!
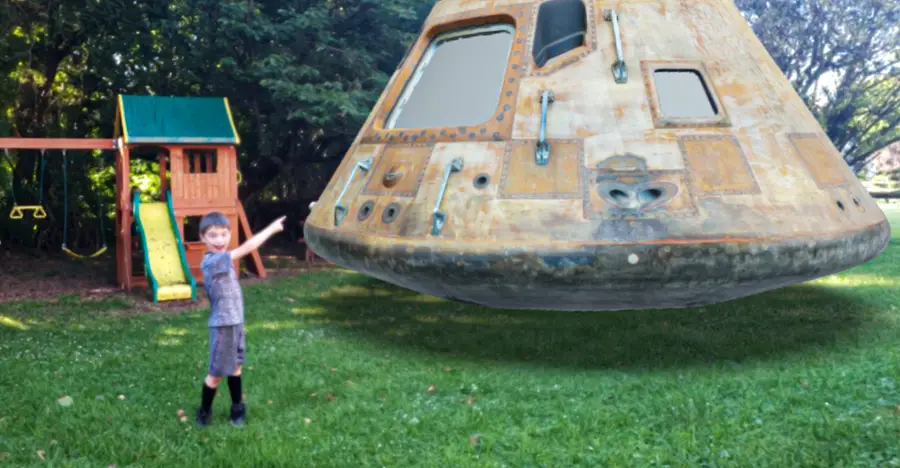
Play with Augmented Reality
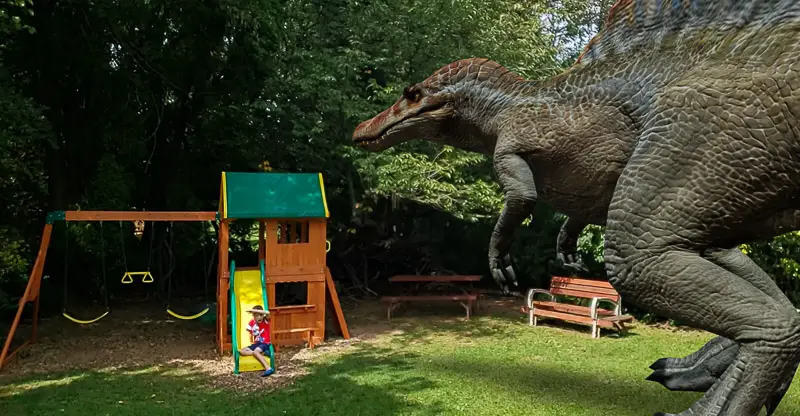
Our kids will never forget the summer when the Spinosaurus came crashing through our backyard or that day when a space module landed next to the swing set. Make your own adventures with augmented reality apps that can run on your phone.
Wrap Up – Summer Science Projects
As the summer sun sets, the memories of awesome summer science experiments and discoveries linger, leaving a lasting impression on young minds. These hands-on activities can keep the kids occupied while planting seeds of curiosity and a passion for learning that can grow throughout the year.
By engaging children in fun and educational science projects, we create opportunities for them to explore the world around them, ask questions, and find joy in the process of discovery.
Through activities like building solar ovens, creating balloon rockets, and investigating the hidden lives of insects, kids gain a deeper understanding of scientific principles while developing critical thinking and problem-solving skills.

One response to “Fun Summer Science Activities for Kids”
I admire your commitment to quality.