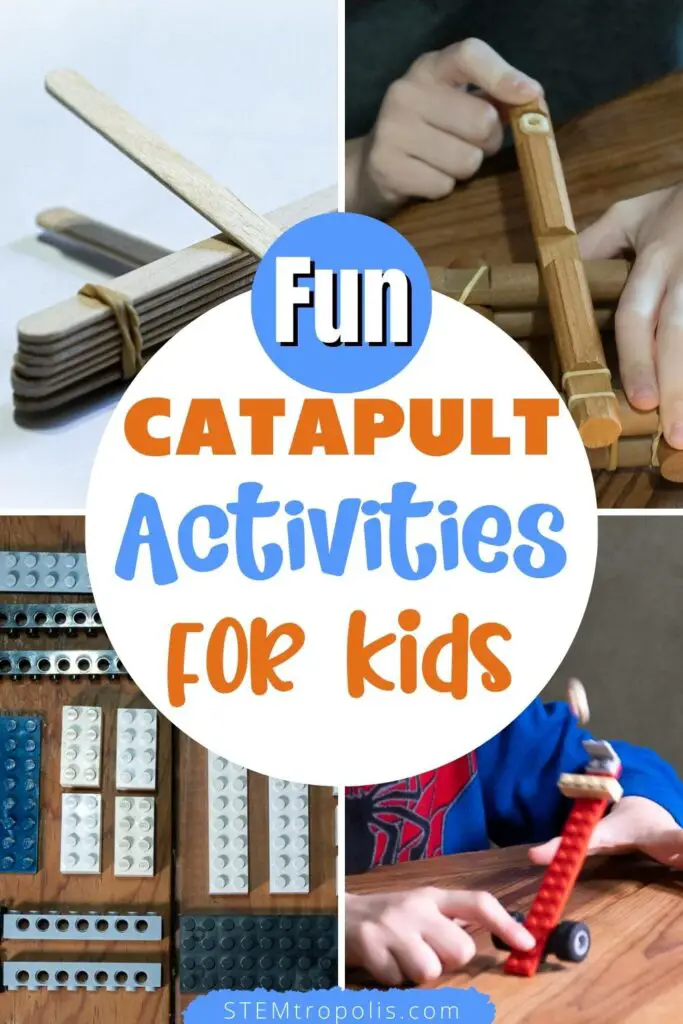
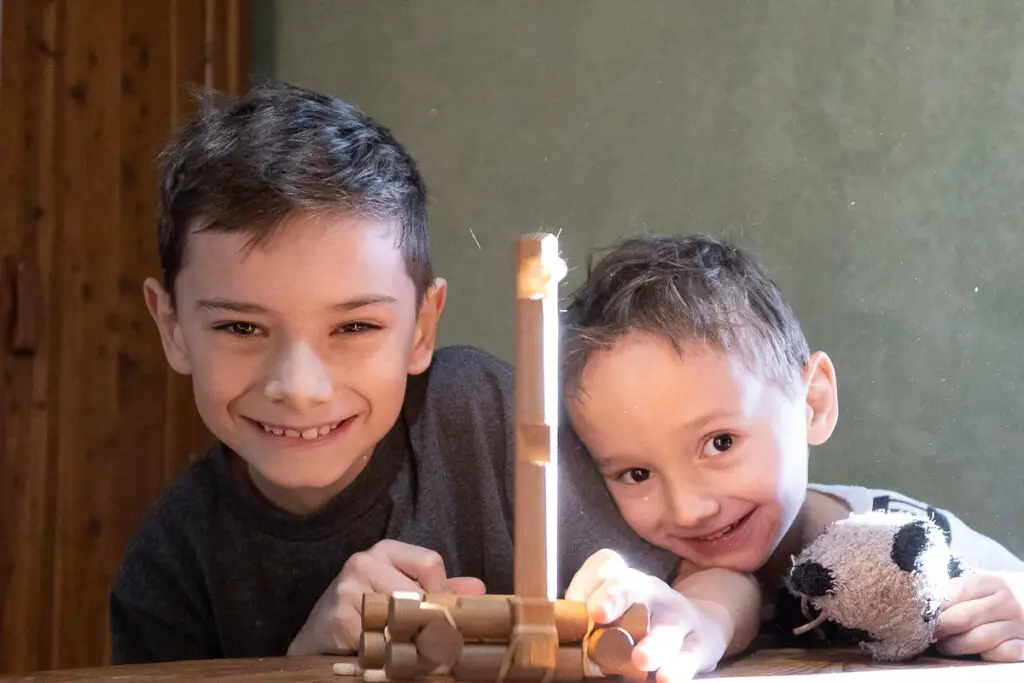
Are you looking for a fun STEM activity to do with your kids at home or in the classroom? Building a catapult is a fun project that combines creativity, problem-solving, and hands-on learning. Whether you have a box of Legos, a stack of popsicle sticks, or just a few basic materials on hand, there are plenty of ways to create your own unique catapult.
Join us while we explore a variety of catapult project ideas that you can make at home or school using simple materials like cardboard, popsicle sticks, rubber bands, toilet paper tubes, and more. Grab your materials let’s get launching with these exciting catapult activities for kids.
Jump to your favorite catapult activity:
Catapult Projectiles
Toilet Paper Tube Catapult
Popsicle Stick Catapult
Lego Catapult
Lincoln Log Catapult
3D Printed Catapults
Ideas for Catapult Challenges and Games
How do Catapults Work?
Catapult Books
Catapult Toys
*We’re an affiliate – we may earn a commission through qualifying purchases from the links on this page. As always, thanks!*
A Word on Catapult Projectiles
Historically, catapults were commonly used to launch stones at castles and cities to breach the walls and defenses. In short: they were weapons of war.
When choosing your projectiles, keep it safe. Yes, these little launchers can fling marbles or ball bearings, but you don’t want these flying around your house or classroom with any kind of force or velocity.
You want an object with a bit of weight and mass to it, but won’t hurt someone, crack a window, etc. Mini marshmallows are perfect. We’ve also used cheerios, fruit snacks, gummy bears, etc. If you’re worried about small food items getting launched into hard to find places, try some pom poms and sparkle balls for non-food items. (Our cats loved chasing the sparkle balls!)
Toilet Paper Tube Catapult
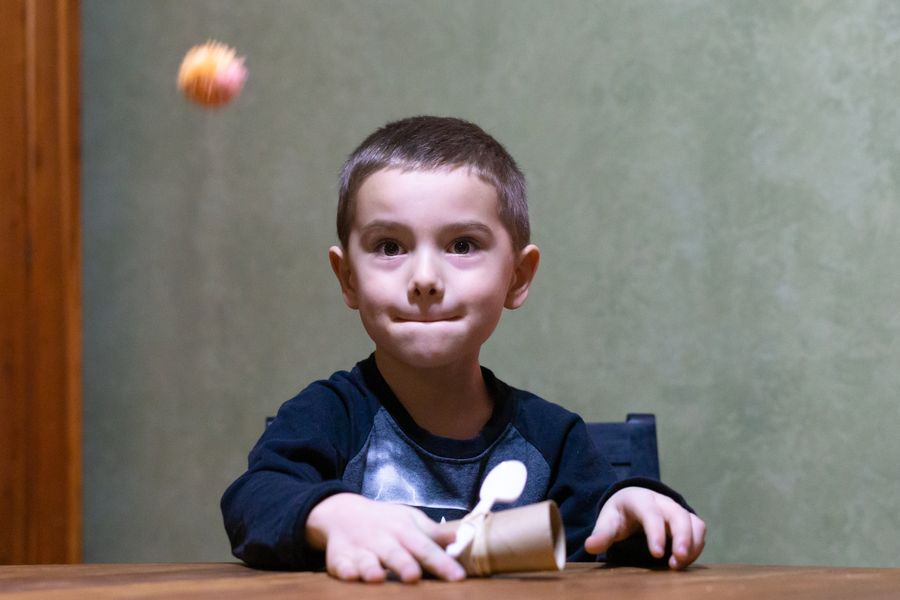
It doesn’t get much simpler than this catapult, and you probably have everything you need to make it at home:
- cardboard tube
- Rubber Band
- Plastic Spoon
All you need to do is use the rubber band to attach the spoon to the cardboard tube. Now find something (safe) to launch. Mini marshmallows, cheerios, pom poms are good choices.
We show you how to make this over on our post of activities with toilet paper tubes.
Make a Simple Catapult with Popsicle Sticks
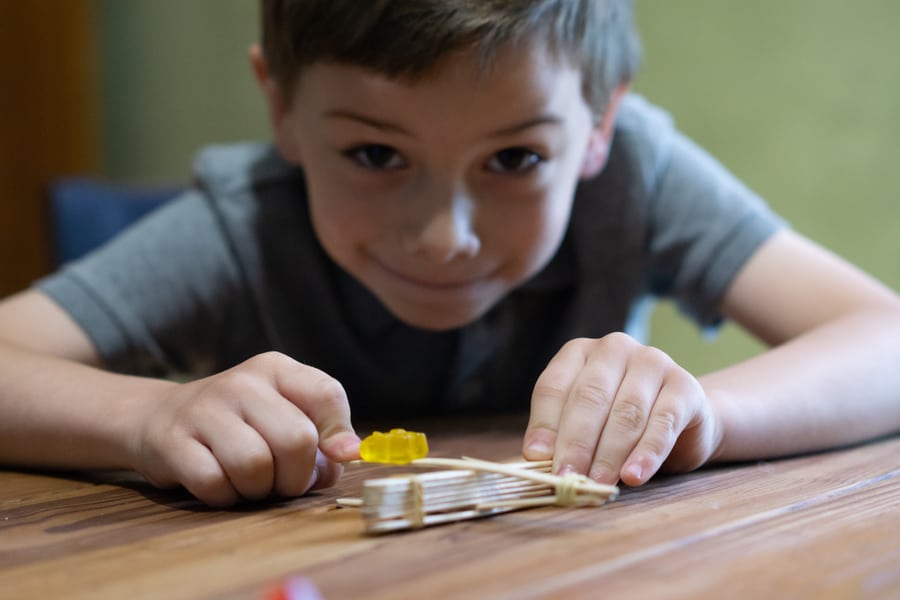
This catapult is easy to make and fun to play with! You don’t need tools to construct it, just some popsicle sticks, rubber bands, and a little creativity. If you want to make it fancy, you can add a bottle cap to act as a basket for your projectile.
How does a simple craft stick catapult work? The physics behind a popsicle stick catapult is pretty simple. By bending back a popsicle stick and stretching the rubber band you store up some potential energy. Place a projectile on the end of the stick (or in the bottle cap if you added it.) When you release the stick, your projectile goes flying.
You’ll find the step for this one, along with other fun activities, in our post about STEM Activities with popsicle sticks.
If you’re doing this for a class project, here’s a kit that includes everything you need to make 30 craft stick catapults!
If you want to make a pencil catapult, you could use a similar design and structure with a few pencils on the base and one for the catapult arm.
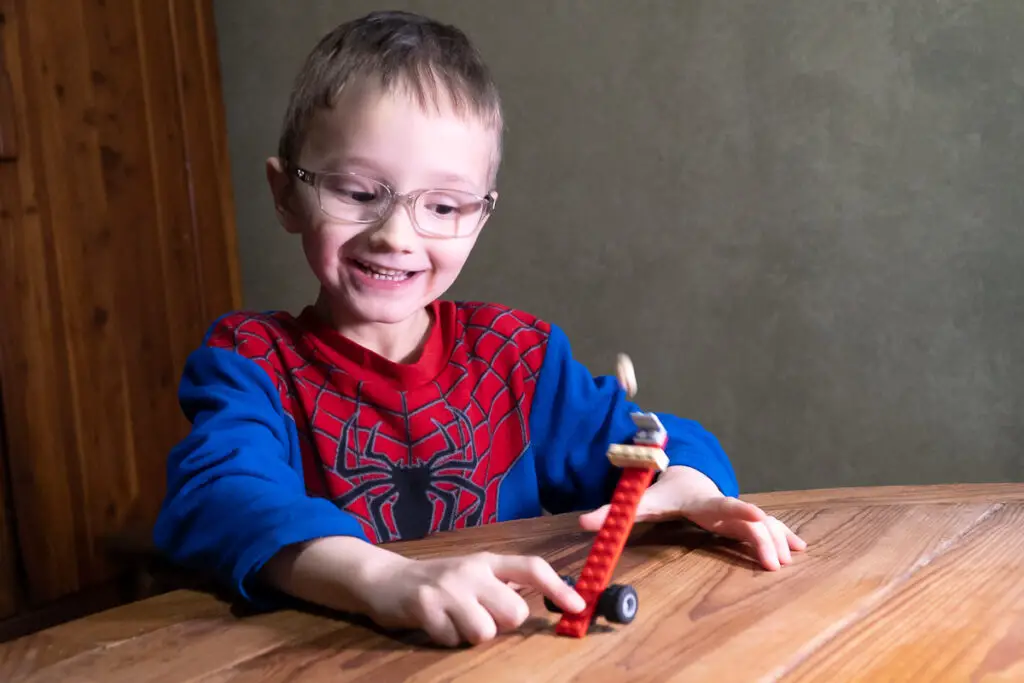
LEGO Catapult
Our kids love Legos, and it’s one of our favorite STEM toys. You can use Legos to make just about anything, including building a catapult.
As versatile as they are, you can create a few different designs with different launch mechanisms. We’ll show you how we built ours, and you can follow along as best as you can with what you have. You may need to put on your engineering hat and improvise, depending on what bricks you have on hand.
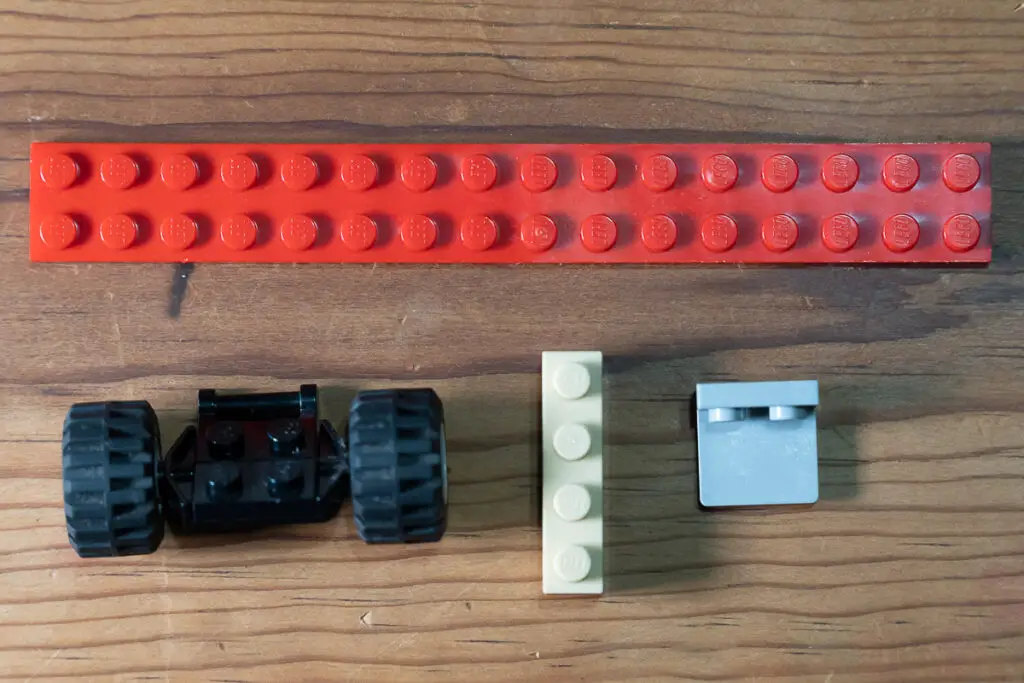
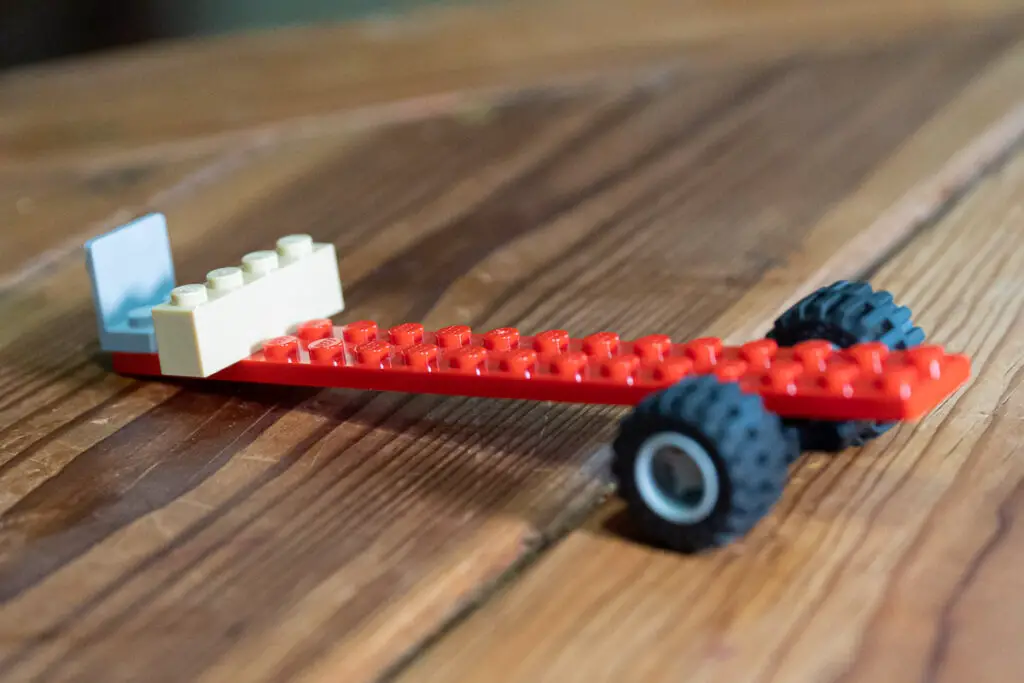
The simplest design is a lever system for the launch mechanism. To build this type of catapult, you only need a few parts.
Grab the longest plank you have; this will be your lever. If you have a wheel piece, this will act as a fulcrum. We used a small “L” shaped angle piece to hold the projectile.
- Gather the necessary pieces, such as Lego bricks, plates, and connectors.
- Attach the plank to the wheels about 1/3 to 3/4 of the length
- Add your piece to act as a shelf for the projectile
- push down on the edge of the plank and launch!
Related Post: Are Legos a STEM Toy?
For a more complex build, we gathered some pieces to create a base and a launch arm. If you have some of the “Technic” beams with the holes in them, these work great to make a moveable arm.
Here are the parts we used. The base pieces are on the right and the arm pieces are left of center:
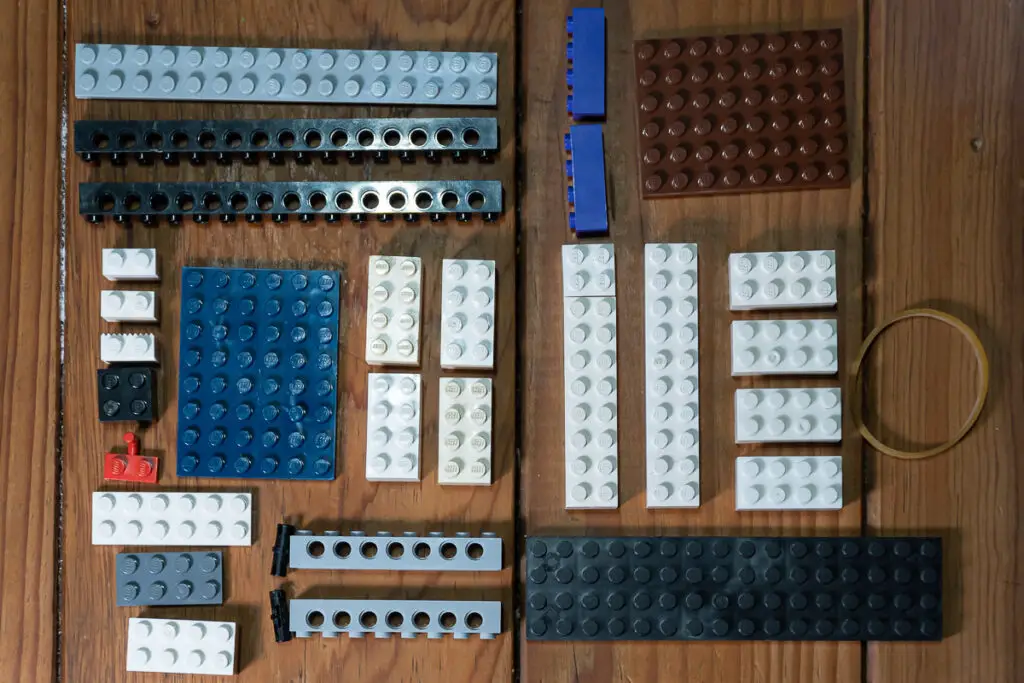
To make a Lego catapult, kids can follow these steps:
- Gather the necessary pieces, such as Lego bricks, plates, and connectors.
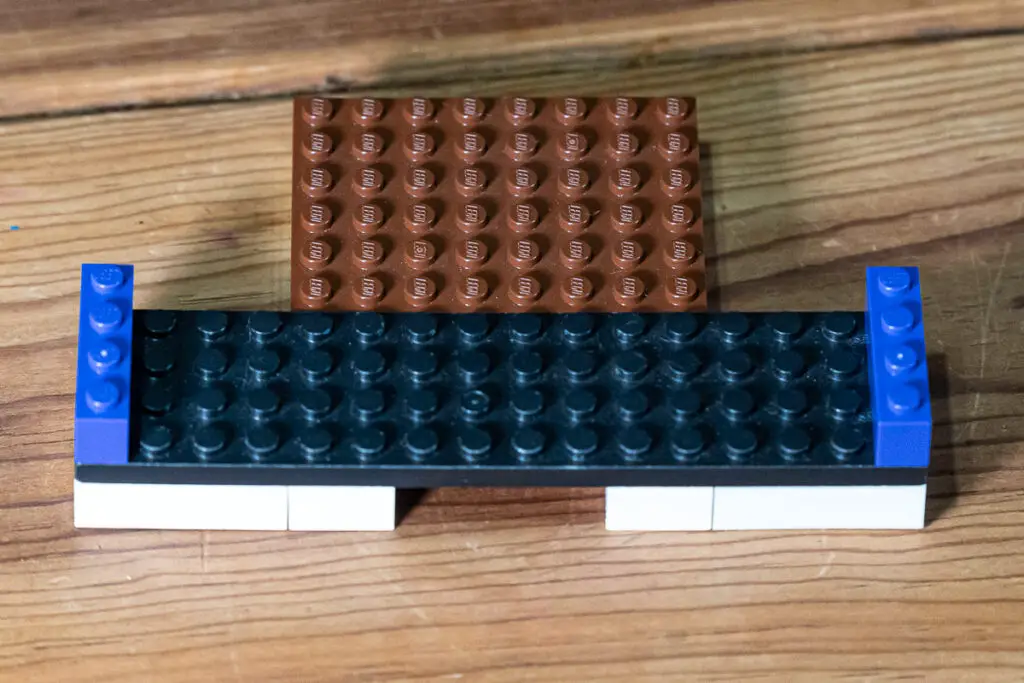
- Build a base for the catapult using Lego bricks. You want to build something sturdy enough to hold together under tension. We allowed a channel under the base for the rubber band to run underneath and hook in the back.
- Construct the arm of the catapult. We used 2 long Technic bricks and a 2×10 plate. We added a few 2x bricks at the top to fashion a basket for the projectiles.
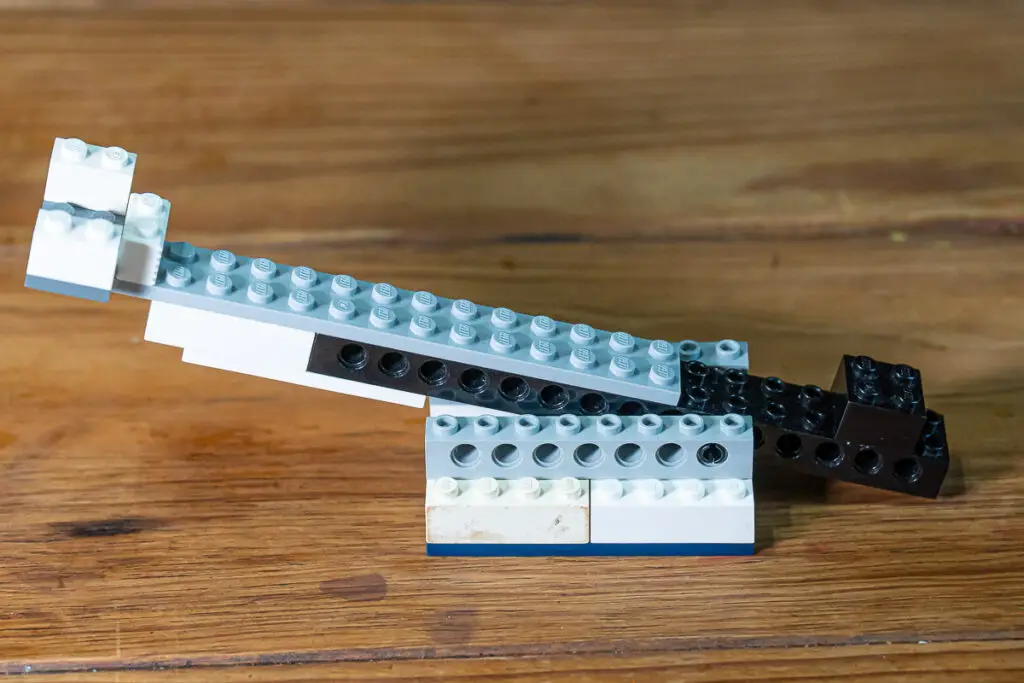
- Attach two long Technic bricks to the base, running parallel 2x apart. Use pins to attach the arm of the catapult
- Connect a third, shorter Lego beam to the top of the two long beams, running perpendicular to them. This will be the throwing arm of the catapult.
- Attach a rubber band to the top of the throwing arm and to the bottom of the base. We ran the rubber band through a channel in the bottom of the base and connected it to a hook behind the arm. This provided content tension on the arm and held it in an “up” position.
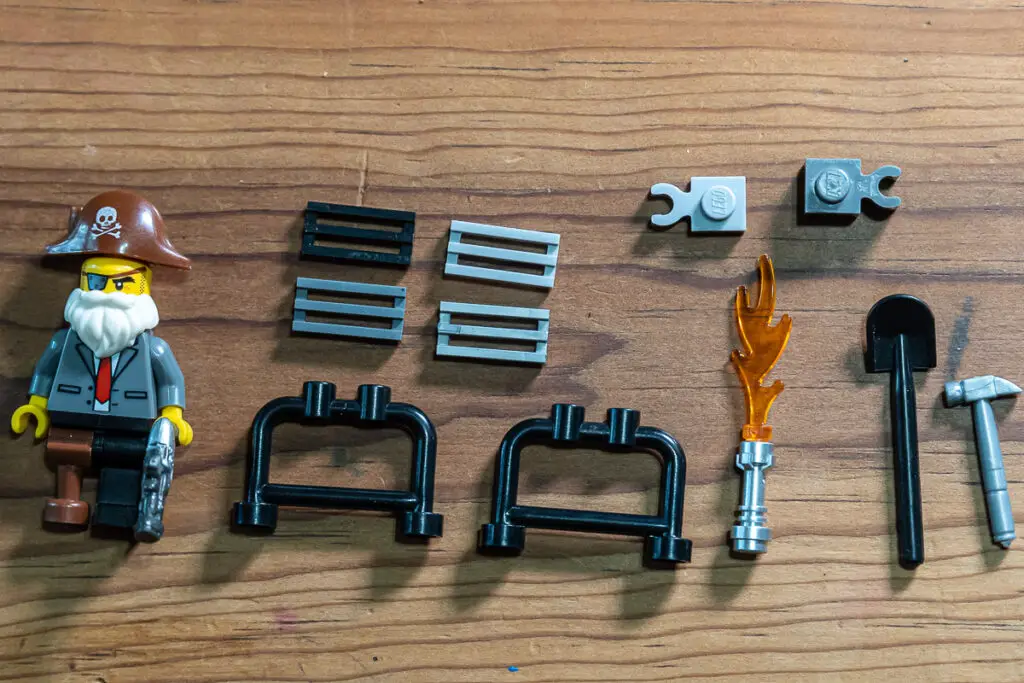
- Add some “greebles” to make it look cool. We added a few gates, clips for tools, a lever, grill tiles, and torches that do nothing for the functionality, but make it look more detailed. Add a minifig for some fun.
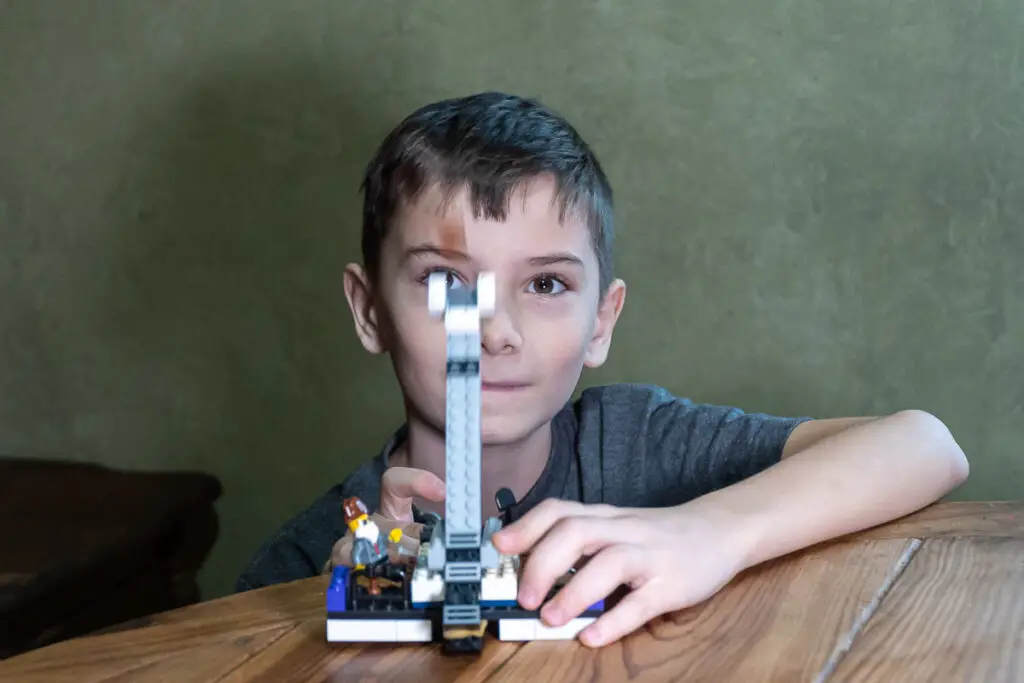
- Load up your projectile and push down on the arm.
- Release and launch!.

This Lego catapult uses tension from a rubber band to launch the projectile. The rubber band is attached to the front end of the throwing arm and to the back of the base. By pushing down the throwing arm, the rubber band is stretched and energy is stored in it. When the throwing arm is released, the rubber band contracts and propels the projectile forward.
During the build, we found that when we launched, there was enough force that the throwing arm flew right off the catapult. We had to add some addition plates and pieces to secure it. Use the pieces you have available to make your design sturdier or more effective. This is where critical thinking and problem solving skills get a bit of a workout.
It’s important to note that the distance the projectile will travel and the speed it will travel at will depend on the tension in the rubber band. The more tension in the rubber band, the more force it will exert on the throwing arm and the farther the projectile will travel.
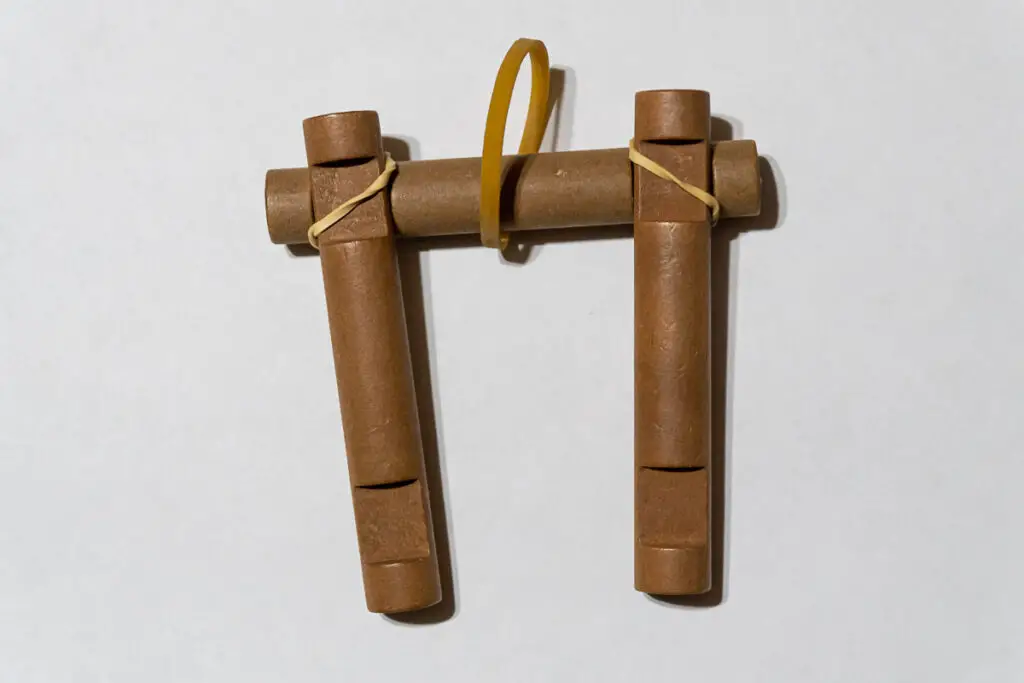
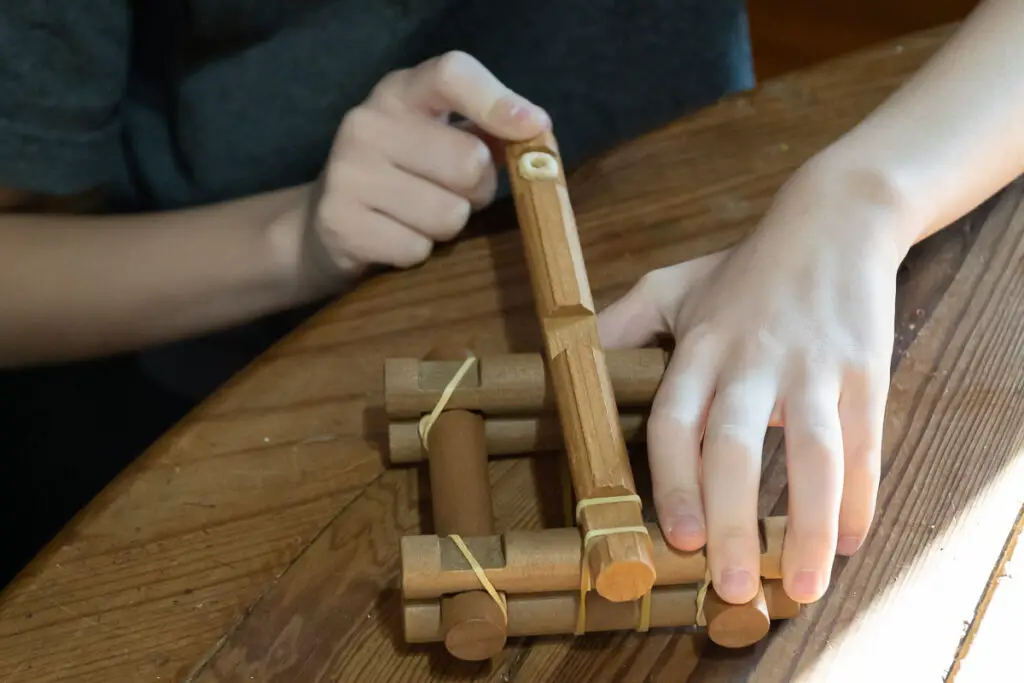
Lincoln Log Catapult
Most kids build little cabins or houses with Lincoln Logs. We know they have more potential (and potential energy)
This one has a small list of materials:
- Lincoln Logs
- small rubber bands
- projectile
- Build a square base for the catapult using Lincoln Logs, make sure that it is stable and can support the weight of the structure.
- Loop a rubber band around the log of the bottom back as you’re building. This will pull back the launch arm.
- Once you have your base 2 or 3 levels high, use rubber bands to secure the corners so your catapult holds together under the tension we’re going to apply.
- Use a long log to create the lever arm of the catapult by attaching it to the front with a rubber band. Make it tight enough to hold in place, but loose enough so it can pivot.
- Loop the rubber band that’s around the back log around the bottom of the throwing arm.
- You can place a projectile in the groove at the top of the throwing arm. We found it kolds a cheerio perfectly. (If you want to get fancy, you can us a rubber band to attach a plastic spoon.)
- Push down on the arm to stretch the rubber band and launch the projectile
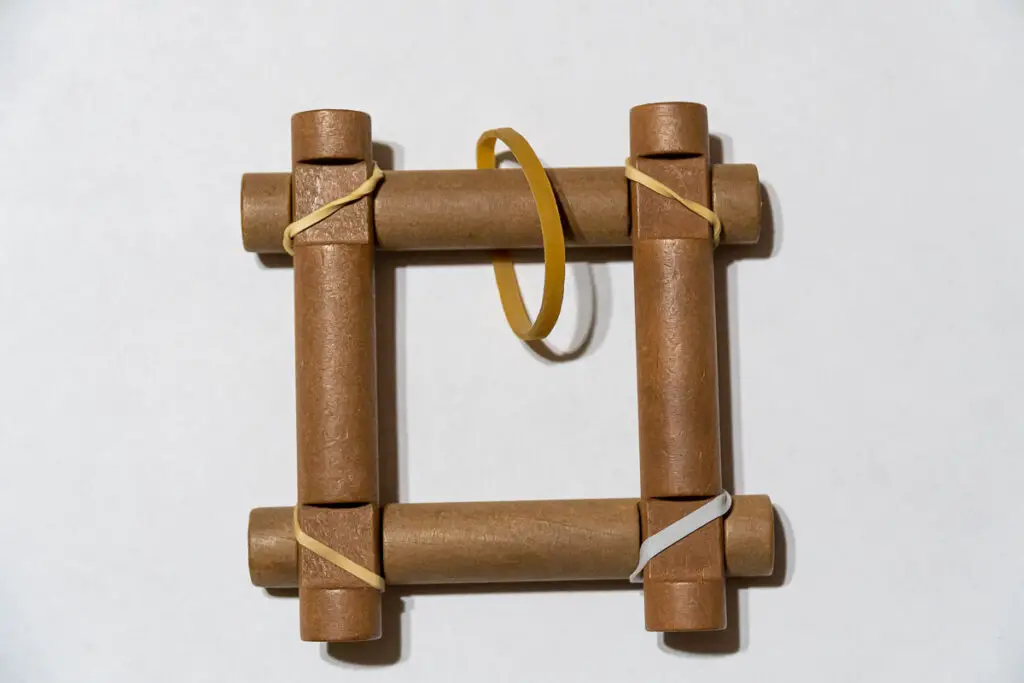
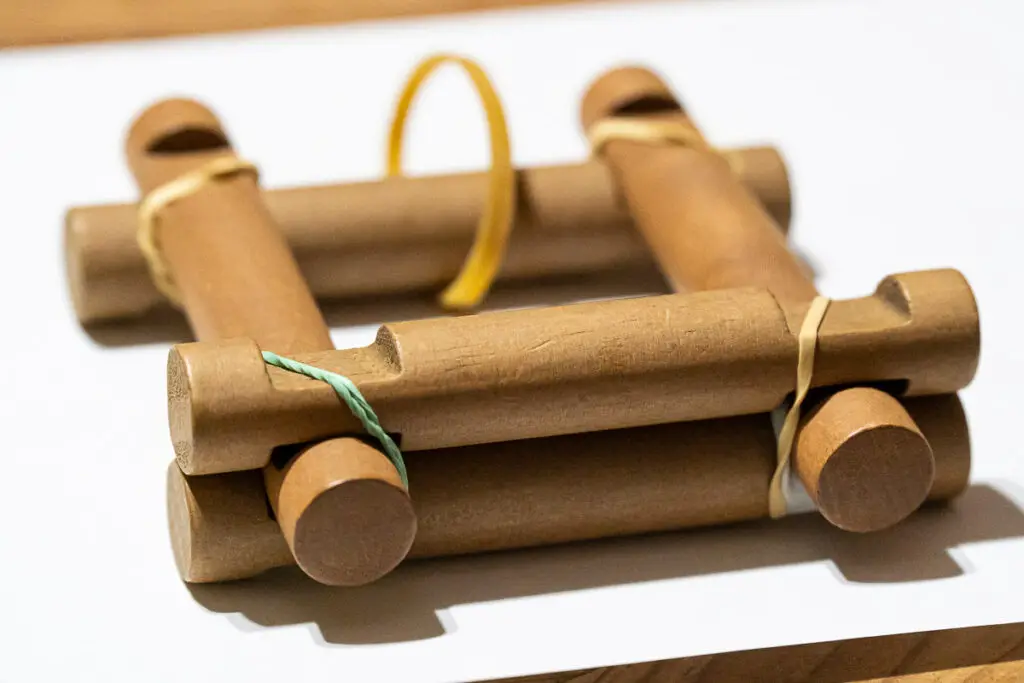
This design uses the arm to stretch the rubber band, which will then exert a force on the throwing arm, launching the projectile. This design allows for a stable and consistent launch and can be adjusted by changing the length of the arm, or applying more or less pressure.
The Lincoln Logs provide a sturdy structure for the catapult and can be adjusted and modified as needed. The distance and speed of the projectile will depend on the tension in the rubber band and the force applied to the lever arm.
3D Printed Catapults
We love our 3D printer and, no surprise, you can easily find some designs for 3D printed catapults online. We tried several, and like this one on Thingiverse the best. It’s a free download, so go grab your STL file and get printing!
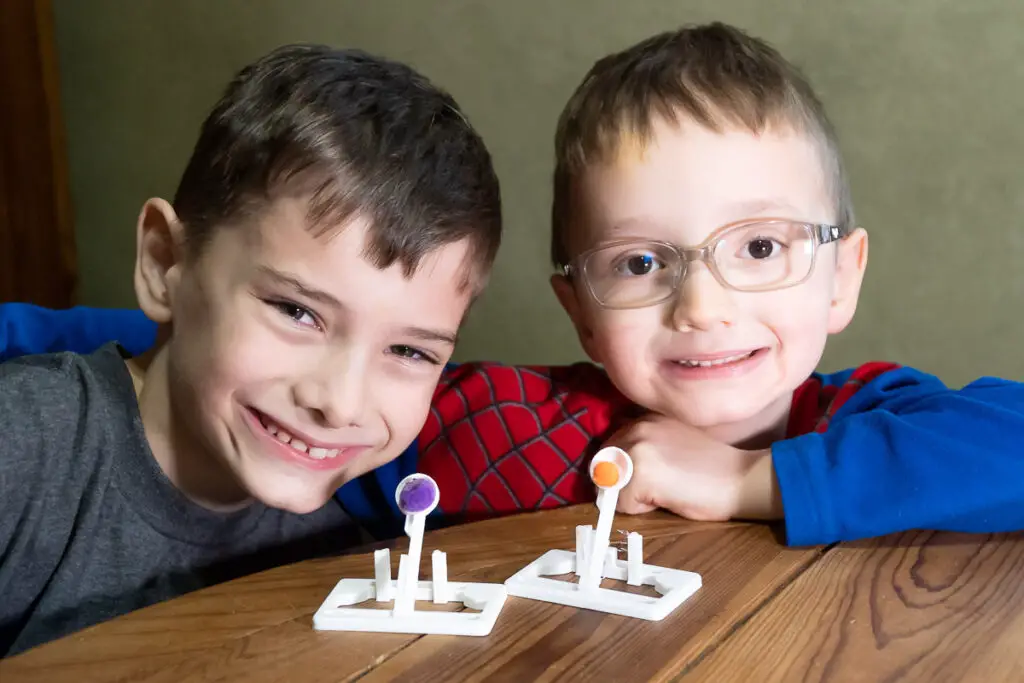
If you’re new to 3D printing, check out our elementary guide to 3D printing to give you an understanding of the basics.
This is another fun catapult design that prints as a card. You can punch out the pieces and assemble it! These are great for party favors (and games) or a class gift.
Ideas for Catapult Challenges and Games
While it’s fun just launching stuff, you can have more fun by playing some catapult games. Now that you’ve got several different kinds of catapults, let’s put them to work!
Here are a few ideas that can test your designs and builds, as well as your skills and accuracy. Work on those math skills by measuring distances and tallying up scores. Here’s a few ideas to get you started:
Distance Challenge
The catapult distance challenge is simple. Who can launch the furthest? Which projectiles fly the furthest?
Now try launching the same objects from different types of catapults an note the results. Which goes further – the toilet paper catapult of the popsicle stick? How does the 3D Printed or Lego catapult compare?
Now for the fun part -Why? What properties allow one catapult to launch further (or higher) than the others. Why do some projectiles go further or faster than others.
Catapult Target Challenge
This challenge is all about hitting your mark. You’ll need a target. For this we use the top of a pizza box, though you can just use a piece of paper if you like.
- Draw a few circles on you pizza box or paper to make a target. (We made 2 rings and a bullseye)
- Position your catapult a few feet away, and try to hit the target.
- You can keep score and see who get the highest in 5 shots.
Make it more competitive with 2 targets and play catapult horseshoes.
The Siege of Tube City
Catapults were used in ancient times as a means of launching projectiles over long distances to know down castle walls or launch stones or flaming projectiles over the walls. We’re going to lay siege to own own little city.
This one’s just for fun. I started using a variety of carboard tubes to build cities with our kids when they were toddlers, and they had great fun knocking everything down. Set it up, knock it down.
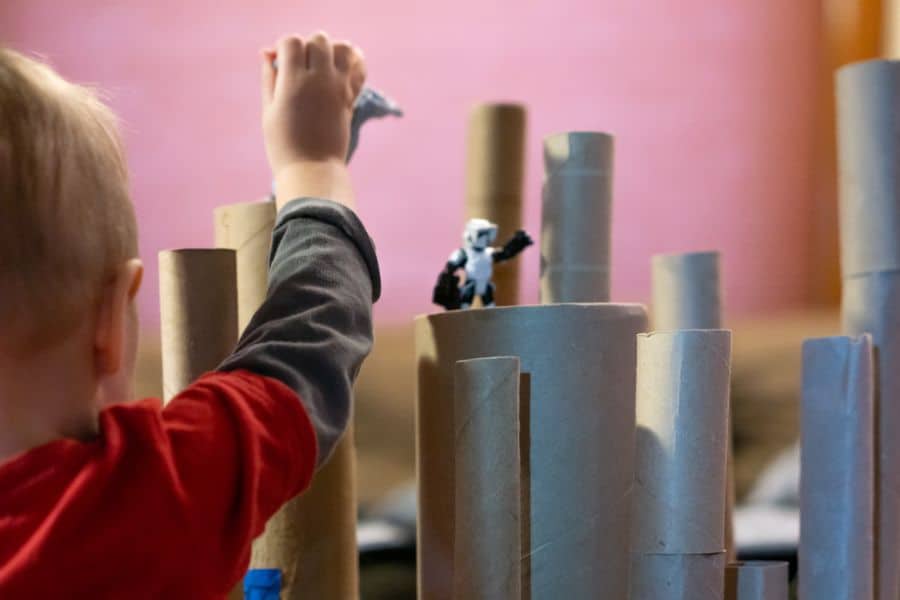
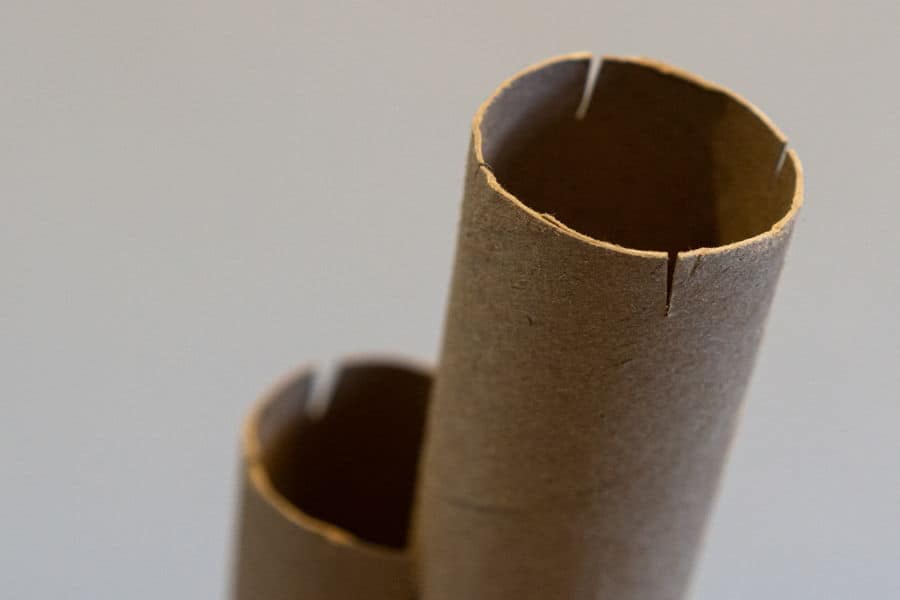
So, gather as many tubes as you can and build your own tube city. Get creative. Cut the tubes to different sizes, stack them inside of one another, etc. You can even make a few cuts at the end of each tube and use them as building blocks (read more in our post on cardboard tube activities.)
Once you have your tube city built, grab your catapult of choice and launch away to know down the tubes. Better yet – make it a challenge. Have several kids make their own tube city and square off to take turns trying to know down each other’s tubes. Last tube standing wins!
How do Catapults Work?
A catapult is a special machine that can throw objects really far. They use the energy stored in a flexible material, such as a twisted rope or a bent tree branch, to launch a projectile over a long distance. The energy stored in the flexible material is known as potential energy. Potential energy is bottled up and waiting to happen. When the material is released, it converts the potential energy into kinetic energy, which is the energy of motion. The projectile is then launched out of the catapult.
Catapults and conservation of energy
The conservation of energy is a fundamental principle in physics that states that energy cannot be created or destroyed, only changed from one form to another. In the case of a catapult, as the device releases the potential energy stored in the flexible material is converted into kinetic energy as the projectile is launched.
The amount of kinetic energy that the projectile has when it leaves the catapult depends on the amount of potential energy that was stored in the flexible material. The more potential energy that is stored in the flexible material, the more kinetic energy the projectile will have when it is launched.
Catapult Books
If you’re interested in catapults, want some larger scale plans, or want to dig more into the history and science, check out these books.
The Big Book of Catapult and Trebuchet Plans
If you enjoyed catapult science experiments on this page and want to build something on a larger scale, this is the book for you. It includes step by step plans for 9 catapults designs. Build a trebuchet, onager, ballista, or scorpion launcher!

The Art of the Catapult
This book digs into the history of siege machines and famous battles where they were instrumental, with plans for 10 catapults. Want to build something for pumpkin chucking? Take a look at the plans here.

Catapult Toys & Games
Want to play with catapults, but don’t want to make it a full on science activity or project for kids? There are some toy catapults you can check out:
Leonardo da Vinci Catapult Kit
Da Vinci was an engineering genius and way ahead of his time. This kit includes pre cut wooden pieces to build his catapult design. Be carful indoors with this one – it can launch objects quite a distance.


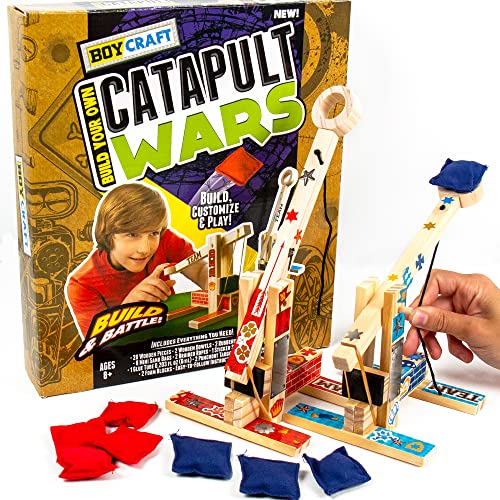
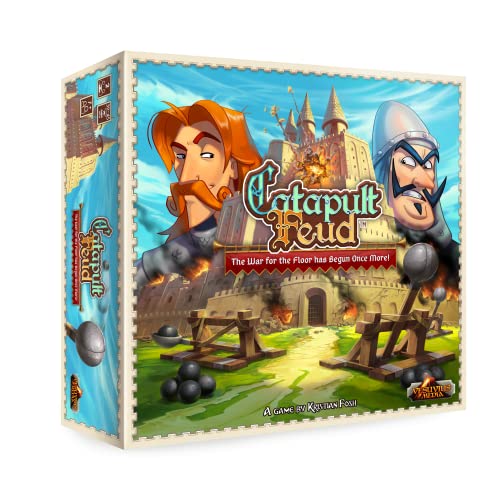
Catapult Feud or Catapult Wars Games
If you want some catapult fun in a box without the DIY crafting, these board games may be what your looking for. Both have a similar concept. Catapult Wars is more a a craft/construction kit, while Catapult Feud is a strait up board game.


GraviTrax: Catapult Construction Toy
If you’ve got some Gravitrax, the catapult expansion will make a nice addition for launching your designs to the next level.

Wrap up – Building Catapults for Kids
These are just a few catapult designs you can try for a fun activity for kids. The goal of these lessons is to help students understand the basics of physics and engineering with some fun homemade catapults. By building different types of catapults, kids can learn about the engineering design process. They’ll also learn about Newton’s Laws of Motion and simple machines.
They’re developing some engineering skills and learning some physics by figuring out and comparing the designs and figuring how much force to apply to hit a target.
While they may not realize it with all the projectiles zipping around, kids are learning about the principles of force, motion, and energy while constructing a working model of a catapult. And yes, launching stuff!