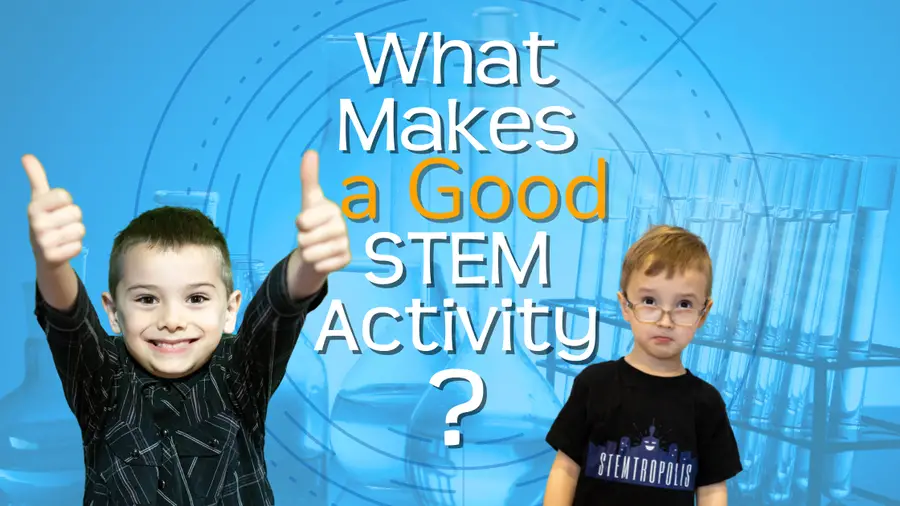
STEM – Science, Technology, Engineering, and Math – is a growing education trend. Sometimes educators, parents, caregivers, and guardians take the STEM acronym too literally, narrowing the focus on what counts as STEM. What counts as a STEM activity is broad and, often, a fun learning opportunity. So what does make a great stem activity?
Good STEM activities and lessons are hands on, relevant to children’s interests and everyday problems, integrate STEM themes, and involve problem-solving, critical thinking. Most of all, a good STEM activity should be fun and engaging. Great STEM activities often don’t have a single answer, encouraging creative and innovative solutions.
There are some characteristics that great STEM activities share, such as being hands on. Of course, not every STEM activity has to nail all of them. For example, in the classroom, it’s good to have students collaborate. Sometimes, that’s difficult to achieve while homeschooling a single child. However, there are various components to use in a great STEM activity.
9 Characteristics of a Great STEM Activity
STEM is more than certain subjects at school, like science and math. It encourages skills in a developing child, such as curiosity, critical thinking, creativity, leadership, innovation, learning through mistakes (failure), and problem-solving. Great STEM activities promote these skills and attributes. Great STEM STEM challenge is:
Hands On
STEM isn’t supposed to be about memorizing formulas, theories, and concepts. The idea is to be these things into practice and do. Kids need to be encouraged to roll up their sleeves and get their hands on stuff.
Try to build a hamster bridge out of balsa wood, try to make a robot using recycled products, can you make a boat from aluminum foil that will keep a pack of gum afloat? Hands on learning is a key component of STEM.
This is why baking is a STEM activity because it encourages using math concepts (fractions and measuring) and understanding how ingredients interact (we told our children baking was chemistry you can eat). It’s messy, fun, and tasty, but…can also go wrong.
Sets a Challenge
There should be an obvious challenge to solve, one a child can relate to in our everyday world.
For example, an activity can be to build and aluminum foil boat; the challenge could be design a vessel that can “carry” a pack of gum in a body of water. Easy, right? How about using the same principles to carry coins? Who can build a boat that can hold the most change?
Or take astronauts in space (our kids love to check in on the ISS live feeds from time to time to see what the astronauts are doing.) Astronauts need to stay fit, and weights don’t work the same without gravity. Can the kids come up with ideas for staying in shape while in space?
Uses Math and Science
A good STEM activity is helping a child explore a concept. Math can be simple counting or tallying the data. Science can be explored by asking how or why.
Back to the aluminum foil boat in the example above: there are lessons in density and mass. Kids should be encouraged to measure things like the weight of the pack of gum or coins, the weight of the foil used, the volume of water. If done in a group setting, they can count the change and compare see who’s boat carried the most money. If you dissolved salt in the water, how would it affect the way the boats floated or sank. Why?
There is math involved in activities like baking; but you can make it harder by asking them to halve a recipe or double it.
Related Post: The Scientific Method for Kids (with activities!)
Uses the Engineering Design Process
An excellent aim for a STEM activity is to involve the Engineering Design Process. Try to encourage kids to follow the seven steps:
- Ask
- Research
- Imagine
- Plan
- Create
- Test
- Improve
Uses Technology
Technology doesn’t mean a computer or screen has to be involved, although it can be. Something as simple as a measuring device, like a thermometer or a scale, is technology; a gear or wheel or tool is technology.
Opportunity for Failure
A good STEM activity should teach valuable lessons when it goes wrong, not just be an X and a few points deducted on a worksheet. The answer isn’t supposed to be right or wrong. Instead, it should encourage a child to wonder: why is this working or not working? Also, “It’s working, but can I make it work even better?”
If the activity was to make an aluminum foil boat and it sinks…why? What if you just made it wider? Or longer? Or both? What happens? Does the water level impact the boat’s success? How about folding the foil into a different shape?
Get kids to explore their “failure” so that it isn’t about right or wrong, but about learning theories and concepts such as mass, density, and design. Then, use that information to try again and improve.
Related Post: Is it okay to fail?
Fun and Interesting
Education doesn’t have to be boring. Learning (and teaching) are so much easier when it’s fun. Great STEM projects are engaging and spark interest.
Baking, for example, tastes good and is often messy. Baking doesn’t always have to happen in the kitchen. I recall a chemistry teacher would have students make peanut brittle using only science equipment: scales, thermometer, Bunsen burner, and beakers. It’s also a real world application of STEM principles.
Not only was it tasty once we were done, but questions came up through the process. Burnt sugar is hilarious when you are young but also interesting because salt doesn’t burn (boring). That leads to another question: why does sugar burn but not salt?
Collaborative
Sometimes independent discovery can be great. But a lot of STEM careers require people to work in teams. Thus, it is important to try to encourage kids to work together toward a common goal.
Certain activities, like coding, may seem like a solo effort. A project like building a computer game can be done collaboratively despite the children not being in the same room (or city) thanks to advances in remote learning and tools like Zoom, email, Skype, WhatsApp, etc.
Related Posts: If you’re interested in coding, check out some FREE resources, find out a good age to start coding, or how to teach kids to code.
Encourages Creative Approaches and Innovative Solutions
The activity should encourage creativity and have more than one solution.
When building a balloon car, aluminum foil boat, or paper airplane, there isn’t ONE right way to do it. (There is currently a rather large pile of paper airplanes – all folded differently – in my son’s room to support this theory.) Kids can get creative and experiment with different designs and test what works best.
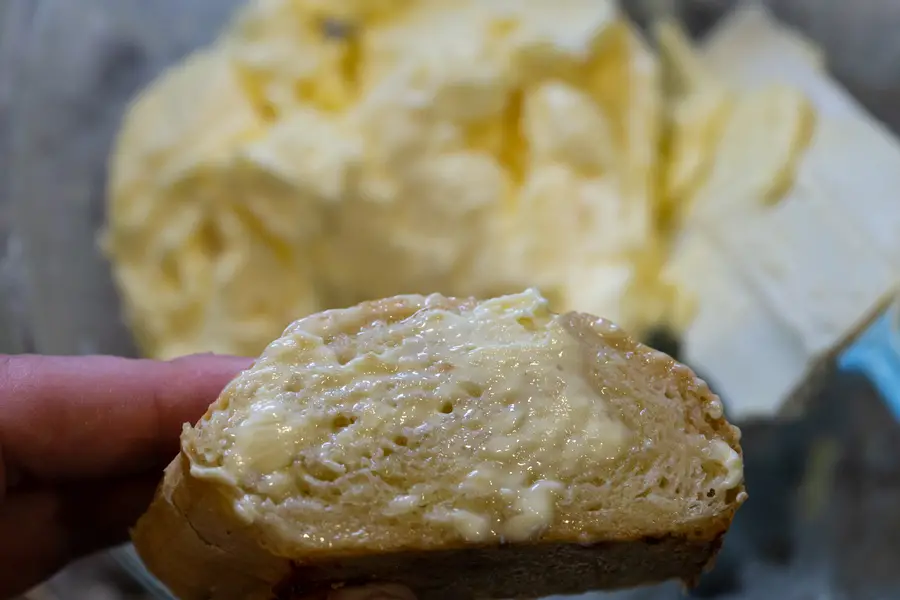
Even with baking, some ingredients could be reduced, increased, eliminated, and substituted. What if somebody is allergic to eggs? Which substitutes did you try? What were the pros and cons? How did it affect the taste or texture? We made some DIY butter below – check it out and try it yourself.
Related post: Is Cooking a STEM Activity? (Spoiler alert – it is! It’s also a STEM activity. Find out how cooking is related to STEM and some fun kitchen experiments in our post.)
8 STEM Activities for Kids
Here are a few simple STEM activities to do with kids. They can work equally well for home school or in a classroom setting, and we frequently do activities like these at home “just because.” The kids enjoy the hand on activities, and are usually having so much fun they don’t realize they are learning along the way.
They’re always proud of themselves when they figure out something that was stumping them and do or build something cool.
Candy City Challenge
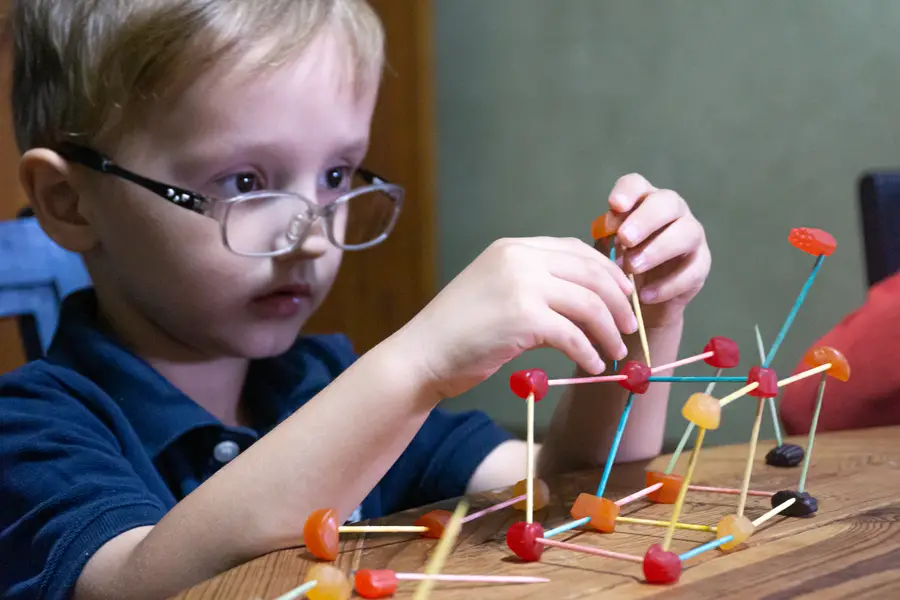
Aim: To design and construct towers using various candies and toothpicks.
Equipment:
- Toothpicks
- Several Types of Candy: e.g. Jelly Beans, Mini Marshmallows, Gumdrops, fruit snacks, etc.
Instructions: Have the children make three buildings. Each building uses toothpicks and one type of candy.
Make it harder:
Change the challenge so that the buildings will be required to hold a small weight. For example, weights could be e a small box of tea, or piece of cardboard with an eraser, or a bag of chips.
Discussion:
Have the children discuss what it was like working with the three different candies. Were some easier than others? Why or why not?
If the designs had to be weight-bearing, which worked, which didn’t? What if they had to be taller? Would they make any modifications?
Breezy Bus
Aim: To design a “bus” that can move independently by the power of the wind.
Equipment:
A fan that operates on more than one speed. Also, provide various materials for the child(ren) to use to design and construct a car with a sail. Suggestions: bottle caps (wheels), wooden skewers, toothpicks, straws, pipe cleaners, construction paper, cereal boxes, egg cartons, wax paper, tissue paper, string, glue, stapler, tape.
Adult: you or a supervised child will need a sharp nail and a small hammer, or a hobby knife to make holes in the wheels.
Instructions: using the materials, the child(ren) needs to design and create a “bus” that can move using the wind.
Discussion:
Ask where the axles are on the bus.
Discuss designs, their weaknesses, and strengths. If time allows modifications, have them make adjustments to their design and see if that helps or hinders. Would a tissue paper sail work or tear vs. one made of a plastic bag or construction paper? Do some materials do better as a sail for certain fan speeds?
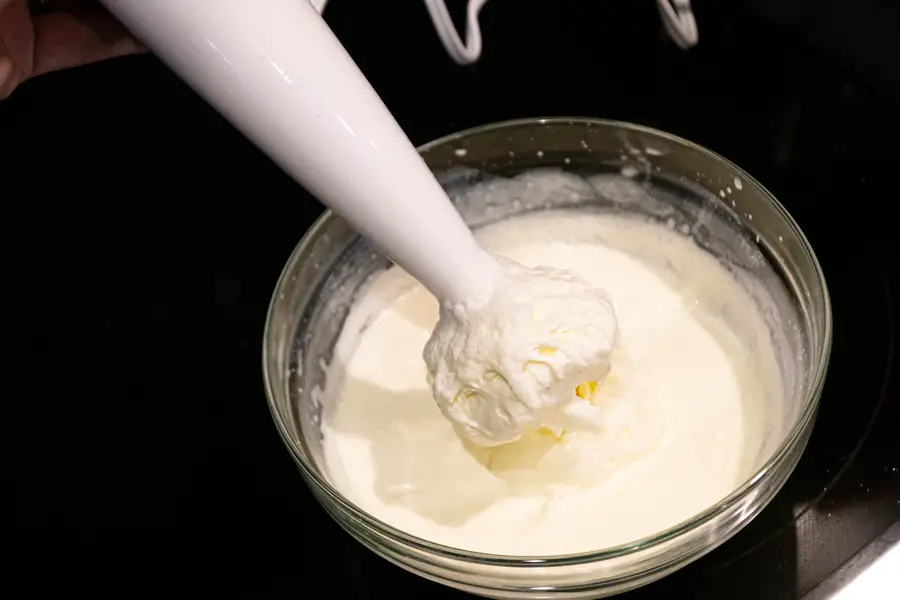
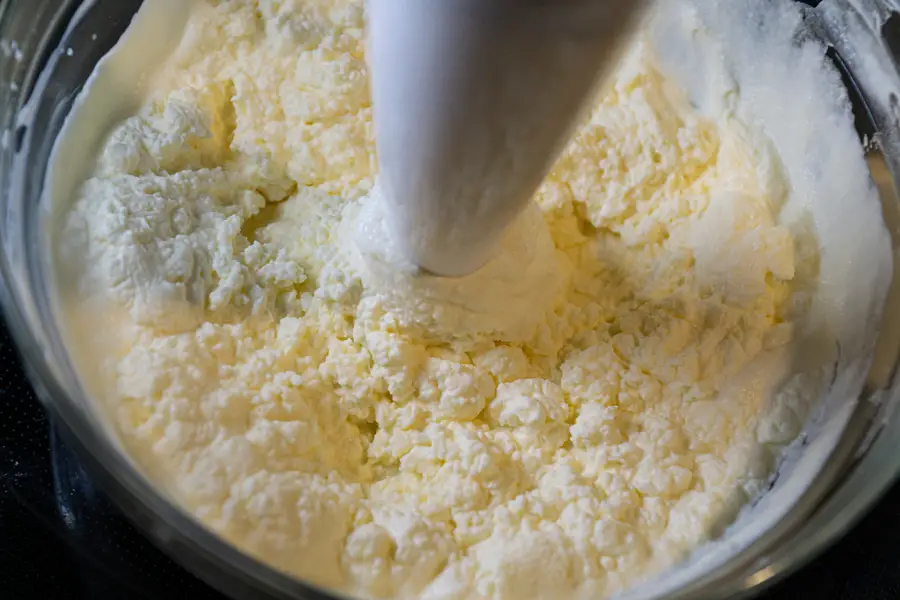
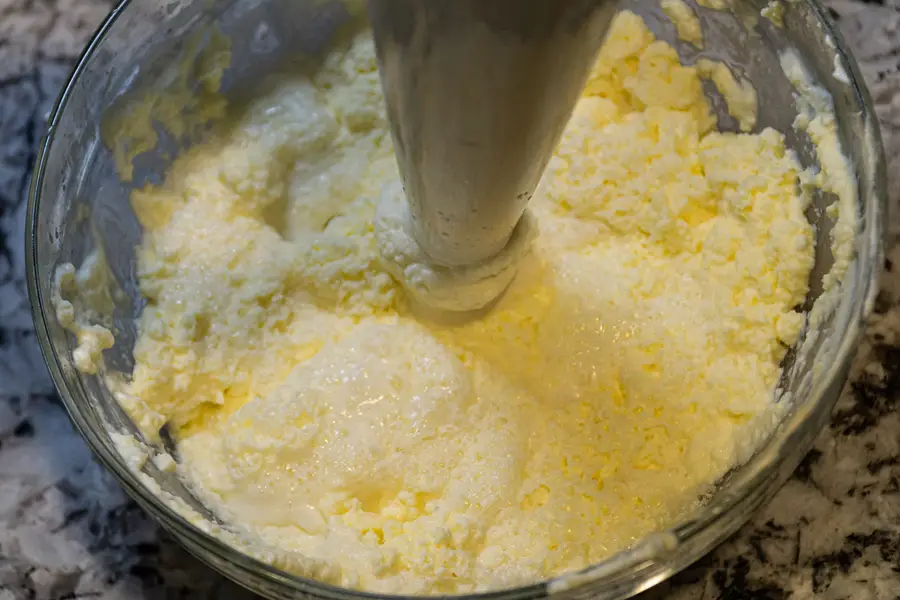
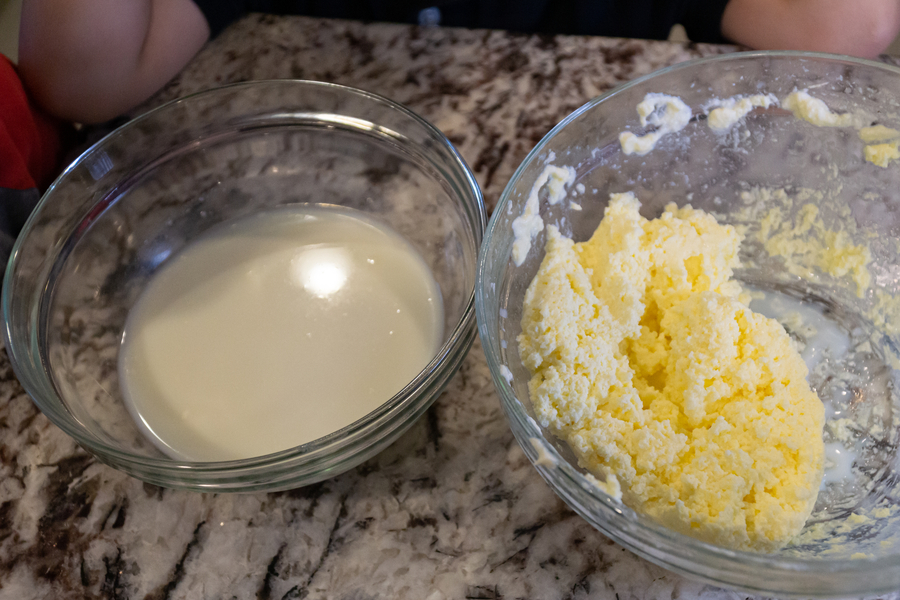
Homemade Butter
Aim:
Demonstrate how fat molecules (lipoprotein membranes) break down and clump together as air and agitation are added.
Equipment:
- Heavy Whipping Cream (we used a 1 pint carton)
- Salt
- Strainer
- Jar with a Lid OR
- Bowl and Electric Whisk (the electric whisk tends to be faster and easier).
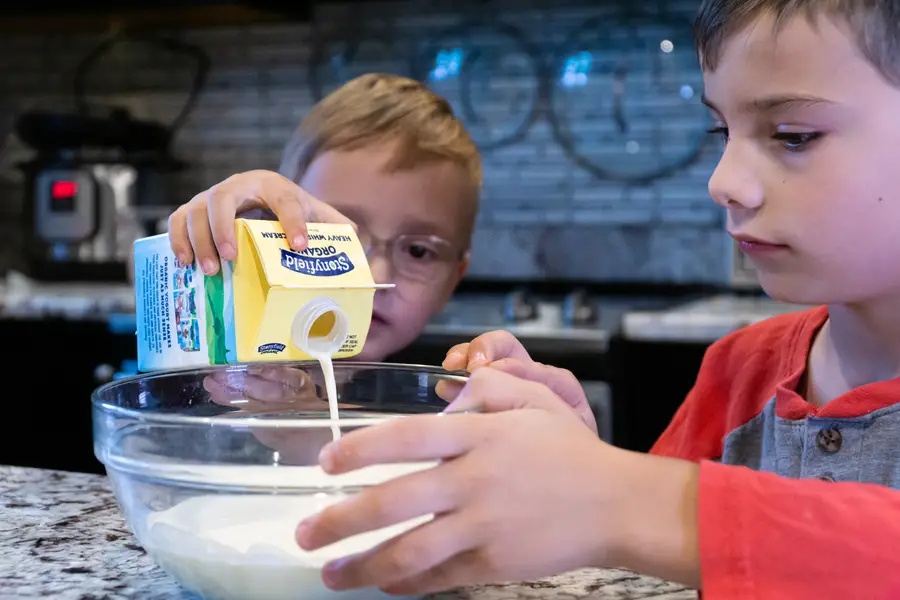
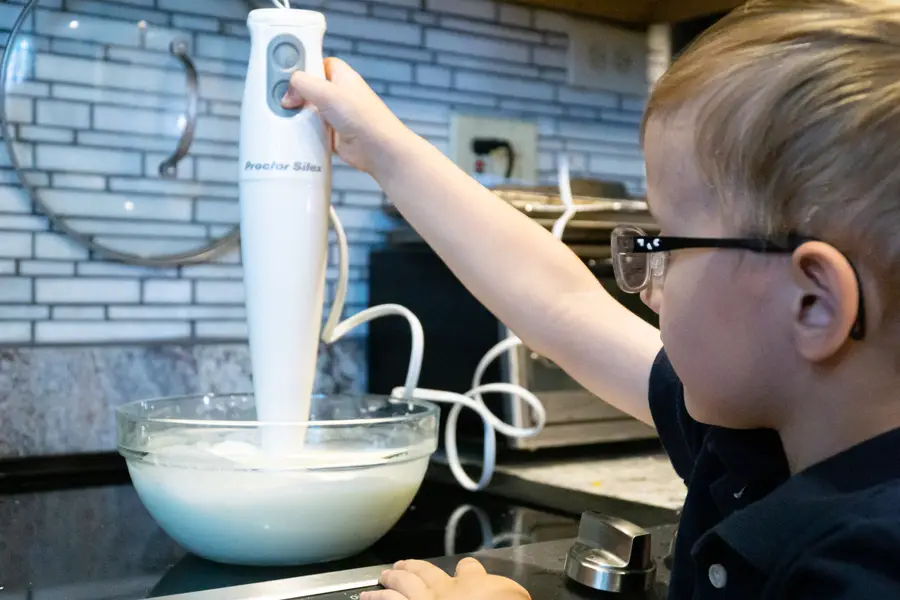
Instructions:
- Pour the heavy cream into the bowl. As this is the main ingredient, the exact quantity isn’t critical. The more you mix, the more butter you’ll have.
- Carefully use the hand mixer to agitate the cream and watch as it thickens.
- Pause occasionally as you mix and observe as it transforms.
- Add the salt to taste
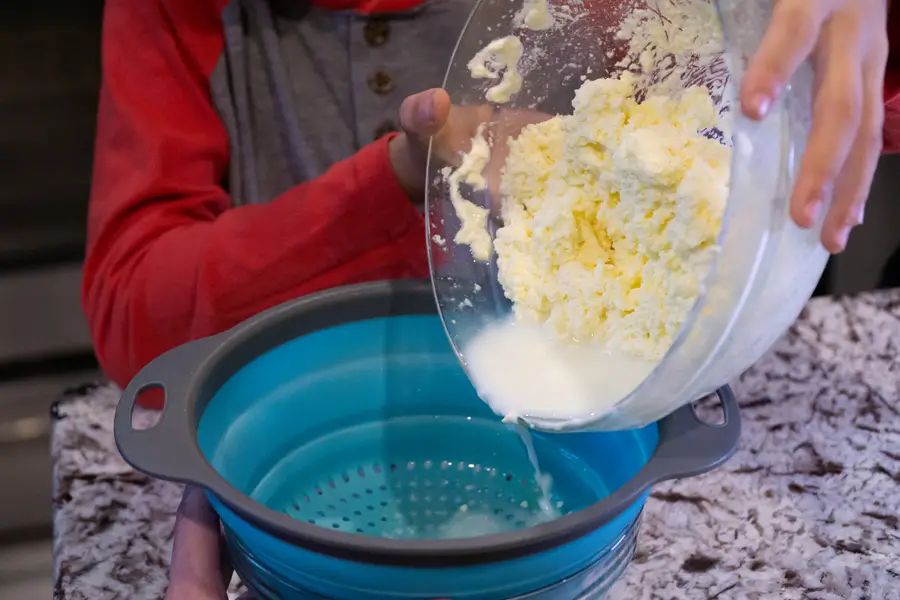
- Strain when finished.
This is what it should look like through the mixing process:
If you don’t have an electric hand mixer, don’t worry; you can still make your own butter with just a jar and lid. It’s the same process, you’re just shaking it up instead of using the hand mixer:
- Add heavy whipping cream and a pinch of salt to the jar and put the lid on tight.
- Shake and shake and watch the cream begin to clump.
- Stop between stages, such as when it becomes whip cream, starts to clump, and as the clump becomes bigger and bigger.
- Strain when finished.
Make it harder:
Have older children make butter with the cream at room temperate and do it with cream that has been kept cold.
Discussion questions:
Is it a chemical change or a physical change?
Do they think this would work with whole milk, 2%, or non-fat milk? Why or why not?
How do they think this differs from making ice cream? What would need to change?
Does the temperature of the heavy cream (room temperature vs. straight from the fridge) impact the process?
Related Posts: Find out if Cooking is a STEM Activity, learn about Kitchen Science, or try some edible experiments
Egg Nest Plummet
Aim: This is the classic egg drop experiment. The goal is to design one (or more) ways to protect an egg from breaking when dropped.
Equipment: Raw Eggs, Tape, Bag Twist Ties, String, and Various Bags, Containers, Various Construction Material and Padding
Examples of various materials: trash bags, plastic bags, paper bags, plastic containers, toilet paper rolls, paper cups, cupcake liners, straws, pipe cleaners, sponges, bubble wrap, popcorn packing, cotton balls, old newspaper
Instructions:
Tell the children to use the provided materials to make a “nest” for their egg that will keep the egg safe when it is dropped from three specific heights.
Make it harder:
Have the children make multiple designs but with limits.
Example:
Construction one: Design can be made from any of the provided materials.
Construction two: Design cannot use any pre-made bags or containers.
Construction three: Design cannot use any pre-made padding, such as sponges, bubble wrap, cotton balls, or popcorn packing.
Discussion Questions:
How well did each design work, and from which heights?
What were their design’s strengths?
What did they feel they could have improved on their design?
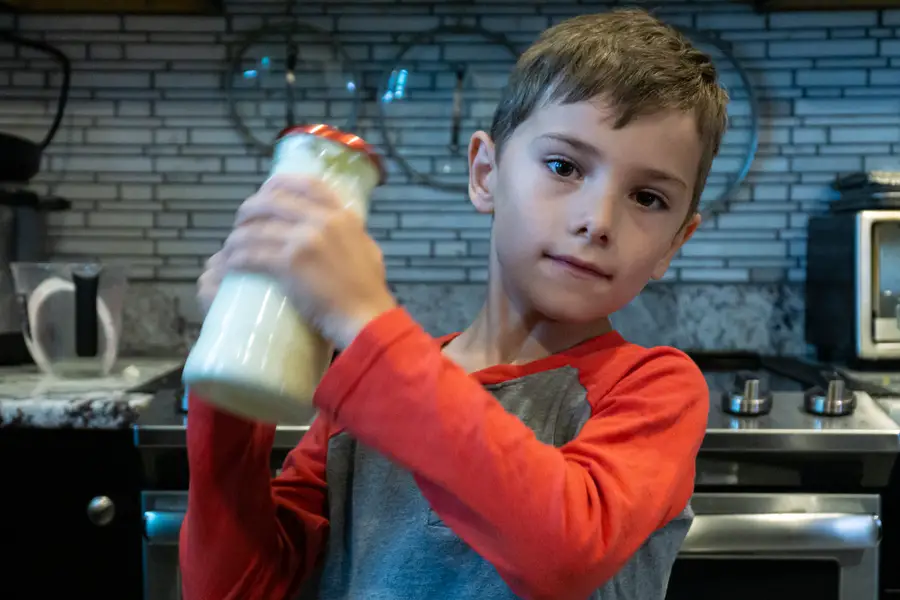
Milky Swirling Surface Tension Experiment
Aim:
This teaches kids about surface tension. When the milk’s fat binds with the grease-fighting properties of the soap, it causes the colors to swirl. Less fat in the milk and less “grease-fighting” properties in soap will change how much the food coloring moves.
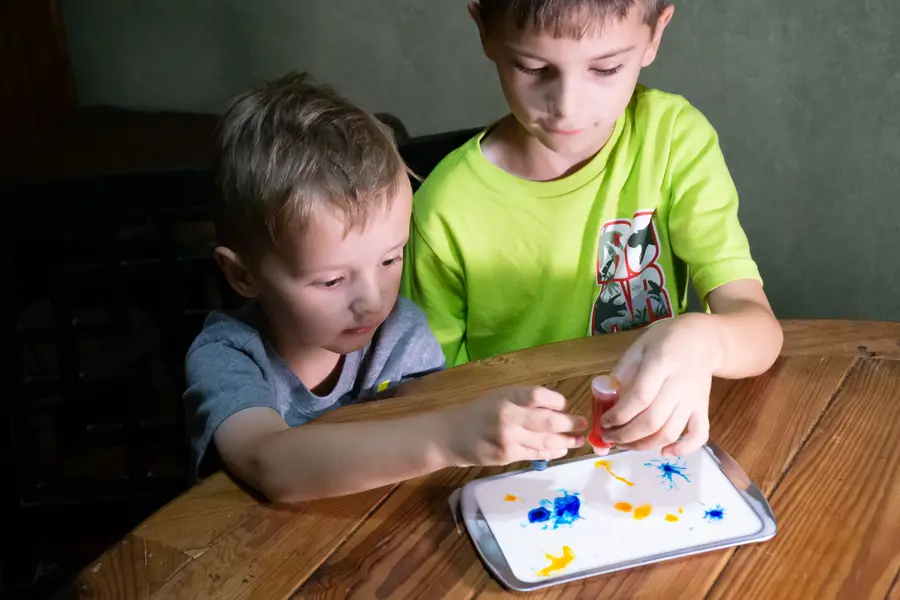
Equipment:
- Tray
- Milk (Whole is best, but you can use 2%)
- Food Coloring
- Liquid Dish Soap (make sure it isn’t earth-friendly)
Instructions:
- Pour milk into the tray
- Add drops pf food coloring around. We used a bit of yellow and blue.
- Add a dab of liquid dish soap and watch the colors swirl.
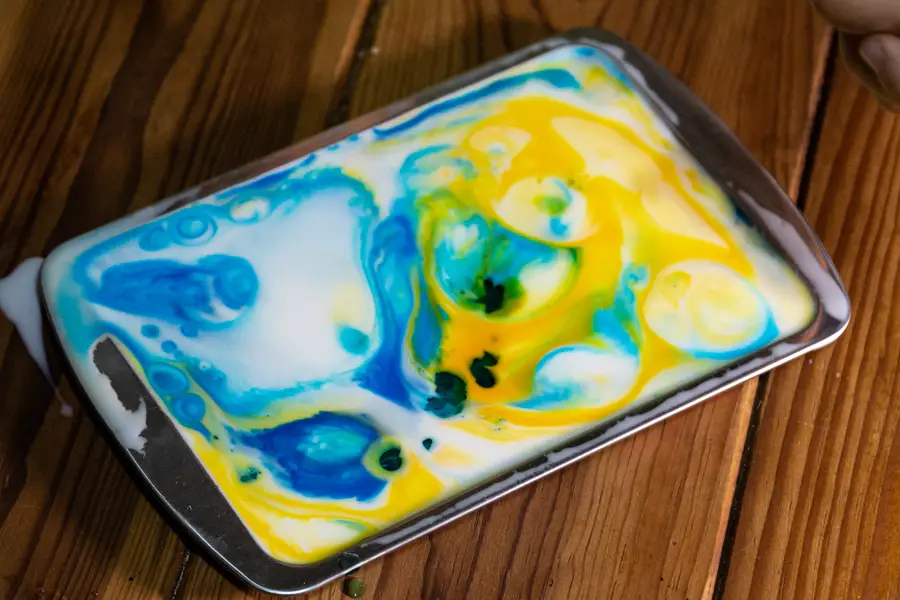

This was like a living, moving acrylic painting. The colors kept swirling around on their own once we dropped in the soap. It kept moving and mixing until after about 20 minutes it was less swirly and more a tray of green soapy milk.
Make it harder:
Have the child(ren) try it with different kinds of milk: whole, 2%, non-fat.
Then have them do the same but trying different soaps – earth-friendly dish soap, powder soap, shampoo, hand soap.
Discussion questions:
Ask them why some milk and soaps worked better than others.
Talk to them about surface tension and why fat in the milk matters.
Fizzy Winter Paintings
Aim: A fun and artistic way to show the chemical reaction between baking soda and vinegar while demonstrating the lack of chemical reaction between sugar and vinegar. This is also a great STEAM activity.
Equipment:
- Baking Soda
- Vinegar
- Powder Sugar,
- Water
- Blue Food Coloring
- 2 Cups
- Spray Bottle
- 2 Brushes
- Heavy Paper.
Instructions:
Put equal parts baking soda in water into one cup. Mix. Add blue food coloring. Mix.
Have children paint the paper blue. Let dry.
Put two parts powdered sugar to one part water into the second cup. Mix.
Have children use a second brush or fingers to paint a large snowflake or many small snowflakes on the blue paper.
When finished, have the children gently spray their painting with vinegar.
Discussion Questions:
Which paint fizzes? Which doesn’t? Why?
Is the reaction a chemical reaction or physical reaction? Why?
Salty Sea Painting
Aim:
This is another fun STEAM activity where we’ll create some art and explore salt’s properties. Salt is hygroscopic, meaning it has a net positive charge of its chemical components and can attract water, which has a negative charge. The salt will absorb water on the paper and in the air and create some interesting effects.
Equipment:
Heavy Watercolor Paper, Watercolor Paints (blue, purple, green, and yellow), Flour, Salt, Water, Tempera Paint, Brushes, Squeeze Bottles.
Day 1: Have the children paint a “sea” background using blue watercolor. They can add dashes of purple, green, and yellow to make it more sea-like. Once done but still damp, sprinkle salt over the surface and watch what happens.
Day 2: Whisk together equal parts salt, flour, and water, then add 1-2 tablespoons of tempera paint. Add to a squeeze bottle. Do this for as many colors as desired. Then use the puffy paint to draw sea creatures (or seaweed, coral, mermaids, or submarines) on top of their “sea” background. When finished, the paintings will take 24-72 hours to fully dry.
Make it harder:
Add flour only to some tempera paint and have the children use it too to compare how the paint looks and feels compared to the puffy salt paint.
Discussion questions:
Why did the salt alter the watercolor paint?
What purpose does the salt serve in the puffy paint?
How does salt puffy paint differ from salt-free flour paint?
Cleaning Up an Oil Spill
Aim: This demonstrates the challenges faced when trying to clean up an oil spill. This one involves a bit more setup than some of the other challenges, though we’re simulating a real world problem that regularly makes the news.
Equipment:
Tub (pot, large bowl, deep tray), Water, Cooking Oil, Feathers, Spoons, Child’s Beach Shovels, Toothbrushes, Ruler, Various Absorbent Materials (sponges, paper towels).
Instructions:
Pour some oil into the tub of water, then add feathers and mix. Once mixed, try to get the children to remove the oil and feathers while minimizing water loss. Try to get them to also clean the feathers without damaging them. You can use the ruler to judge how much water is lost during the cleaning process.
Make it harder:
Use a bigger tub and provide pieces of foam (such as cutting up a pool noodle). Encourage children to use the foam to make a “boom” to contain the spill to a section of the tub. Could even let them try absorbents such as sawdust and peat. You could also do it with water that has salt added to see if it makes clean up easier, harder, or no different.
Discussion Questions:
How hard did they find it? What do they think could make it easier? What are the pros can cons of their proposed solutions? Do they believe their method of cleaning the feathers would still work if the feathers were attached to a live bird?
Wrap Up – What makes a great STEM Activity?
When looking for STEM activities for kids, there are a few things to keep in mind. STEM education isn’t about memorizing a bunch of facts and regurgitating them for a test. Instead, STEM lessons tend to be hands on activities where kids can experiment and try different ideas to approach the task at hand.
You want to include some engineering design elements and look at the scientific properties at work (e.g. physics, chemistry, etc…) and have the student try to explain WHY things happened.
If an activity bombs the first time, it’s okay. “Failure” isn’t a big deal, it’s just part of the process, and the lessons learned provide valuable information to make the next try easier.
Doing things in a group can make it a collaborative effort and kids can brainstorm and build off of each other’s ideas. Or it can be a competitive challenge to see who can achieve the best results.
Above all – it should be FUN. Some of the best lessons occur when kids don’t realize they’re learning because they’re focused on the process itself. So go, engage, explore, experiment, and have some fun!
Make sure you’ve got everything you need to make your own STEM makerspace!

-
STEM Projects Using Recycled Materials

Spread the loveTeaching children the importance of sustainability while they learn the fundamentals about Science, Technology, Engineering, and Math (STEM) is a great way to combine recycling and upcycling with fun interactive lessons. What better way to teach kids important concepts than with STEM projects using recycled materials? One way to recycle items such as…
-
Awesome Plant Activities: Botany and Gardening for Kids
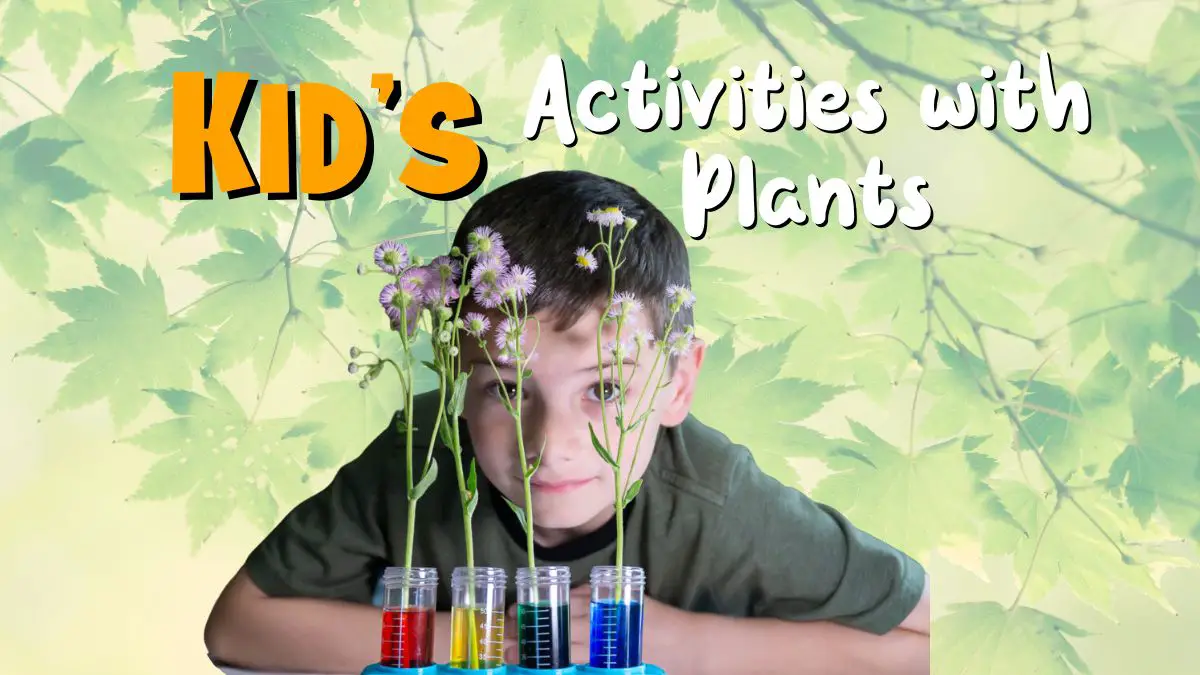
Whether you’re looking for something educational or just fun plant activities, these botany and gardening projects will get your kids excited about plants.
-
9 STEM Projects using Popsicle Sticks: Fun Kids Activities
Popsicle sticks should be a staple item in every craft bin or makerspace. They’re inexpensive, easily sourced, and versatile. We’ve gathered a list of some of our favorite STEM projects using popsicle sticks to share with you.