Popsicle sticks should be a staple item in every craft bin or makerspace. Popsicle Sticks are inexpensive, easily sourced, and versatile. We’ve gathered a list of some of our favorite STEM activities using popsicle sticks and craft sticks to share with you. Let’s explore!
Jump to your favorite Popsicle Stick Activity:
Make a Popsicle Stick Catapult
Popsicle Stick Rubber Band Gun
Build a Bridge From Popsicle Sticks
Popsicle Stick Architecture
Popsicle Stick Bomb/Grenade
Popsicle Stick Chain Reaction
Popsicle Stick Boat
DIY Popsicles
Make Magic Wands
Need some sticks? You can eat a lot of popsicles, or you can save some time and money and pick up a bulk box of “craft” sticks. You can find them in your local craft store or online like this box of 1000 sticks on Amazon (affiliate link), which should keep you busy for a while. Then again, so would eating 1000 popsicles!
If you’re looking for sticks that are a bit bigger and colorful, check out this pack of 500 craft sticks.
Make a Popsicle Stick Catapult
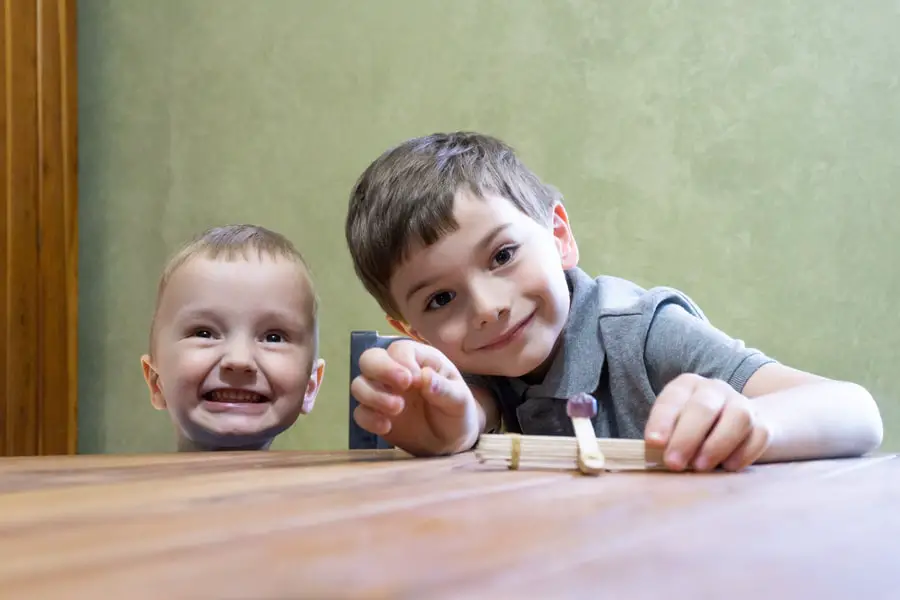
Kids love a good catapult. Which is to say they love launching things into the air and watching them take flight. For a simple popsicle stick catapult – or craft stick launcher – you will only need a few items:
- Popsicle Sticks (8-10)
- 3 Rubber bands
- Scissors (optional)
- Projectiles (mini marshmallows, Gummy Bears, Sparkle Balls, Cheerios, or other soft objects work great)
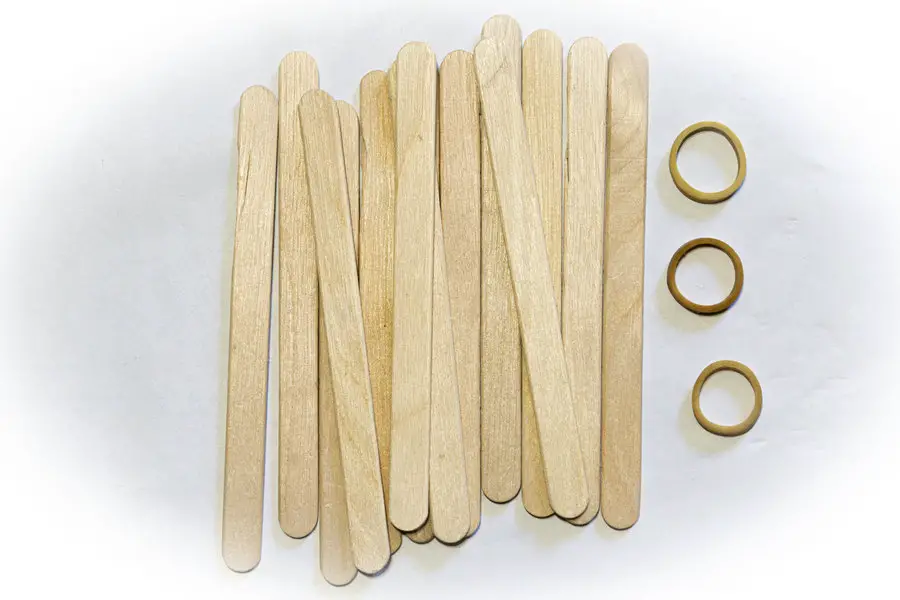
- Stack some popsicle sticks (we used 7) and use rubber bands to secure both ends of the stack. The more sticks you use in the stack, the more tension your catapult will have.
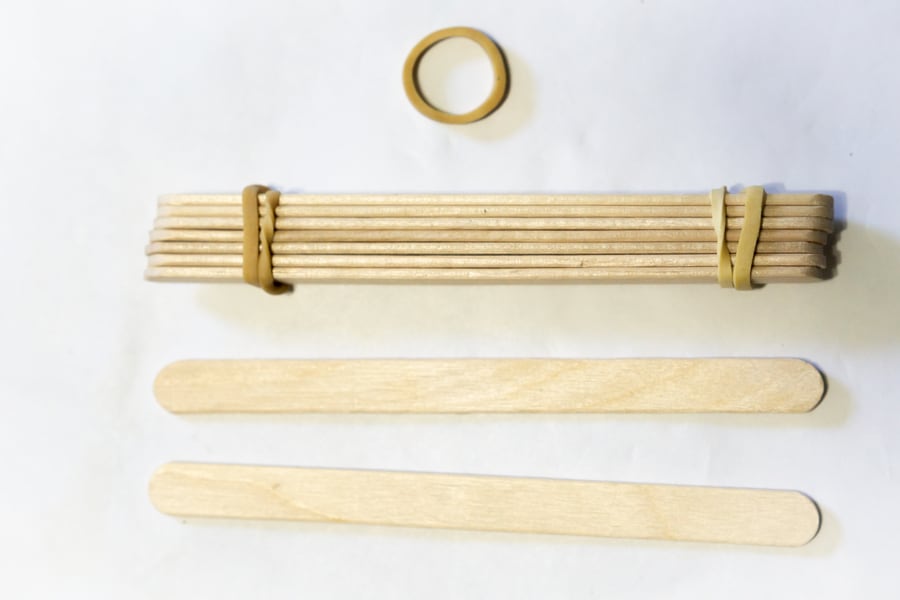
- Stack 2 sticks on top of each other, and secure one end of them together with another rubber band. If you feel the rubber bands sliding and need a rig a bit more secure, you could notch each side with the scissors to make a groove for the rubber band to sit into. (We did not need to notch our sticks in this build.)
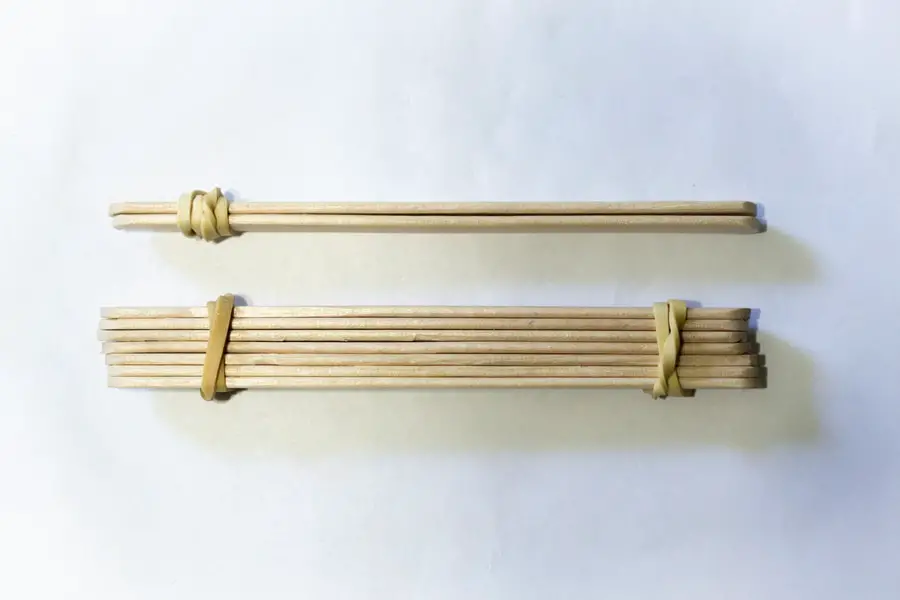
- Slide the bundle of sticks between the other 2. We inserted our bottom stick between the first and second stick in the stack so it held in place.
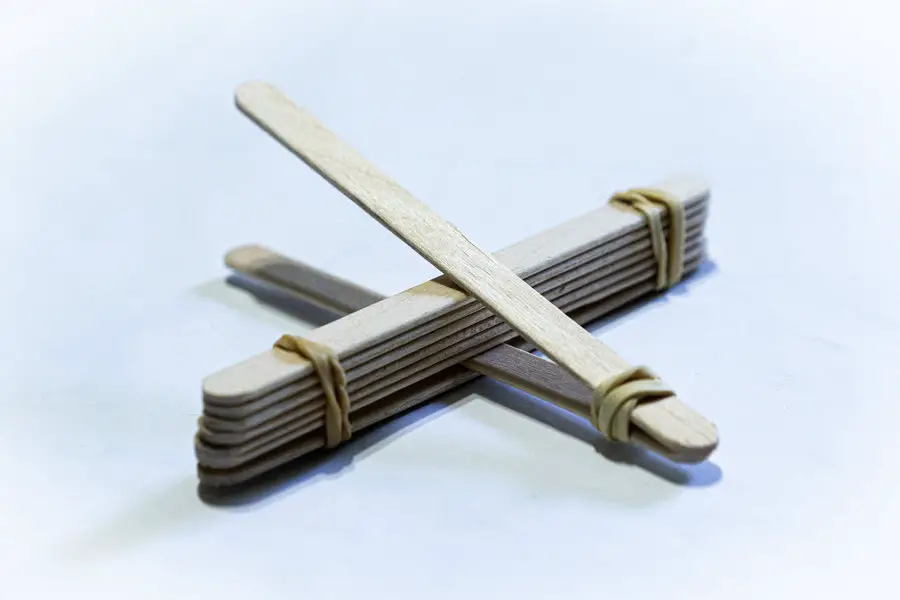
- Place your projectile of choice on the top stick (we used Gummy Bears)
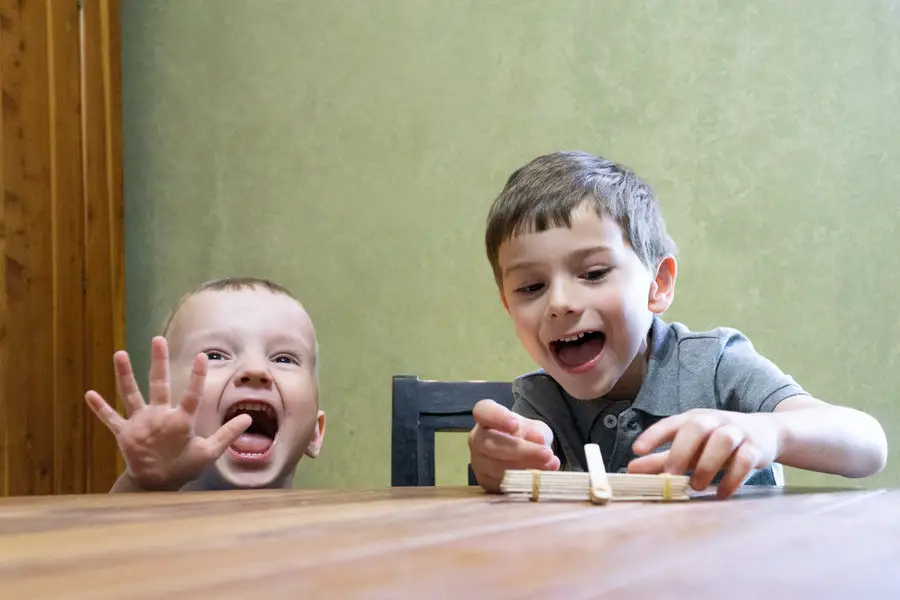
- Bend it down and release!
Things to try:
You can adjust the position of the bundle closer to the rubber band or further back to create more or less tension. Experiment with how the placement affects the height and distance of the catapult.
Experiment launching different projectiles from your popsicle catapult. Which travels further – lighter or heavier objects?
If you want to get fancy, you can glue a bottlecap to the top stick to hold your projectiles in place.
Our kids loved trying to use the catapult to launch Cheerios into a bowl.
If you like the Popsicle Stick Catapult, don’t miss our post on catapult designs or the Toilet Paper Tube Catapult (and other Toilet Paper Tube Activities.)
Popsicle Stick Rubber Band Gun
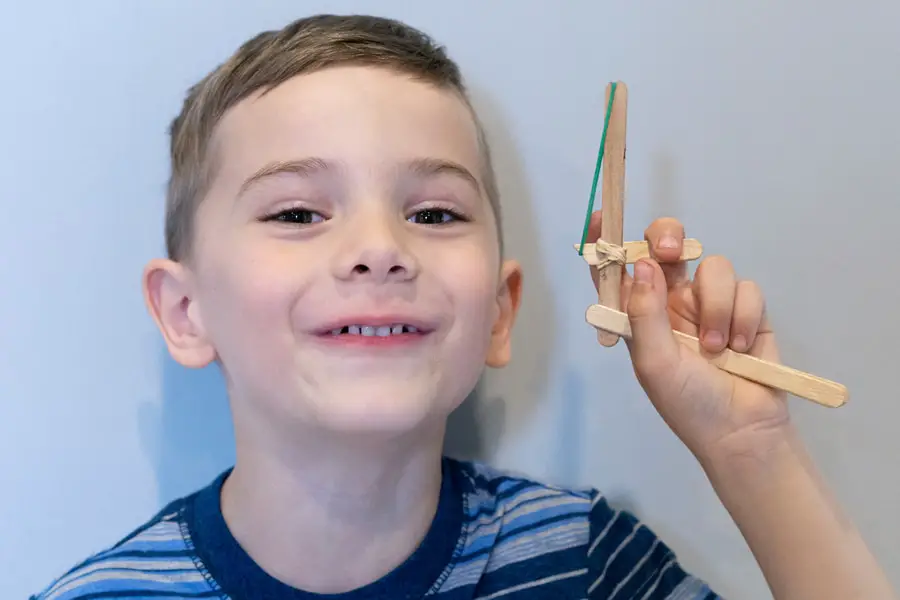
We’ve tried two different designs of rubber band guns using popsicle sticks. One was fairly simple, and another a bit more complex. Both did the job, and were fun to build. You’ll need:
- 4 Popsicle Sticks
- Rubber Bands
- Glue
- Utility knife
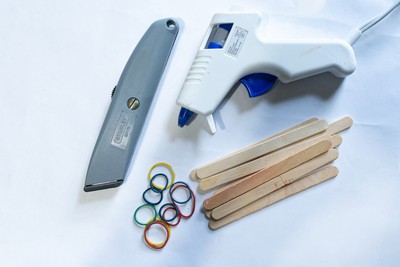
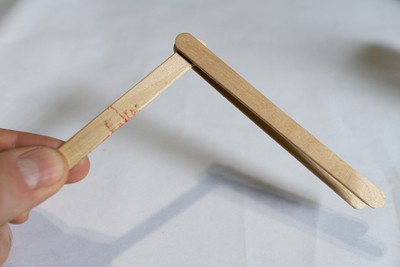
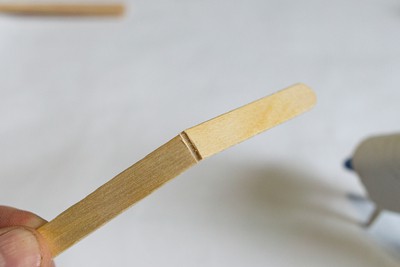
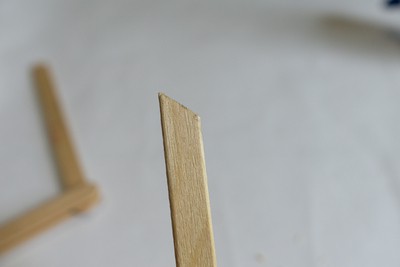
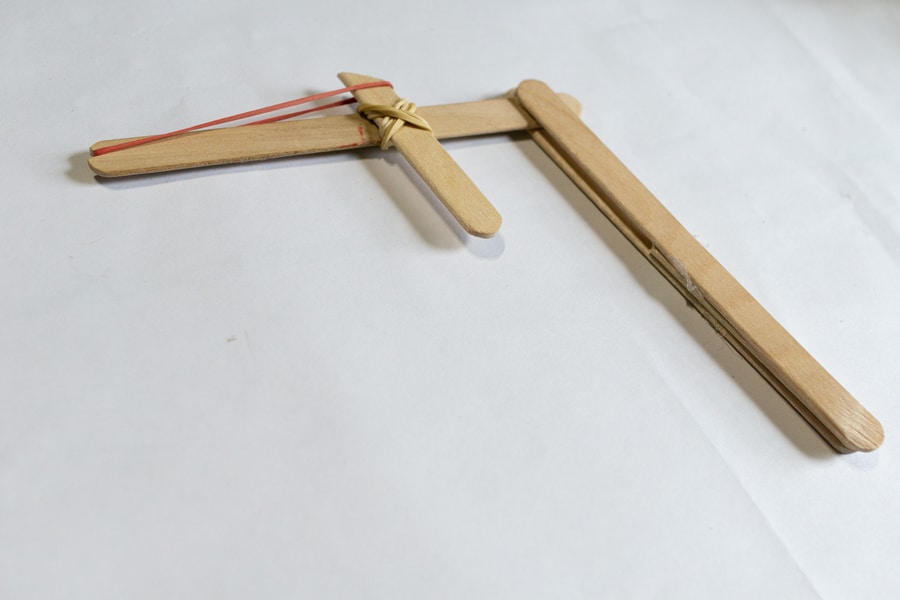
Follow these steps to make the popsicle stick rubber band gun:
- Glue the end of one popsicle stick between two others forming an “L” shape. It’s okay if the L opens a bit on the wide side, depending on how you want your grip.
- Cut the 4th popsicle stick in half. You can score it with the utility knife and wiggle the pieces apart.
- Glue half of the cut stick between the ends of the two sticks that are stacked up. This will be the grip.
- Cut a small notch at the end of the single stick which will serve as the barrel. This notch will old the rubber band when we ‘load’ it.
- Cut and angle on the remaining half stick as shown in the photo. This will be both the trigger and release.
- Using rubber bands, attach the trigger piece to the barrel. Make an “X” so there is equal tension on both sides, and make it angle slightly towards the front of the gun on the bottom.
- Lock and load: Place one end of a rubber band in the notch at the front, and stretch it over the angled part on top of the trigger piece.
- By pulling the trigger back, it moves the angle piece forward and releases the rubber band.
Ready, Aim…
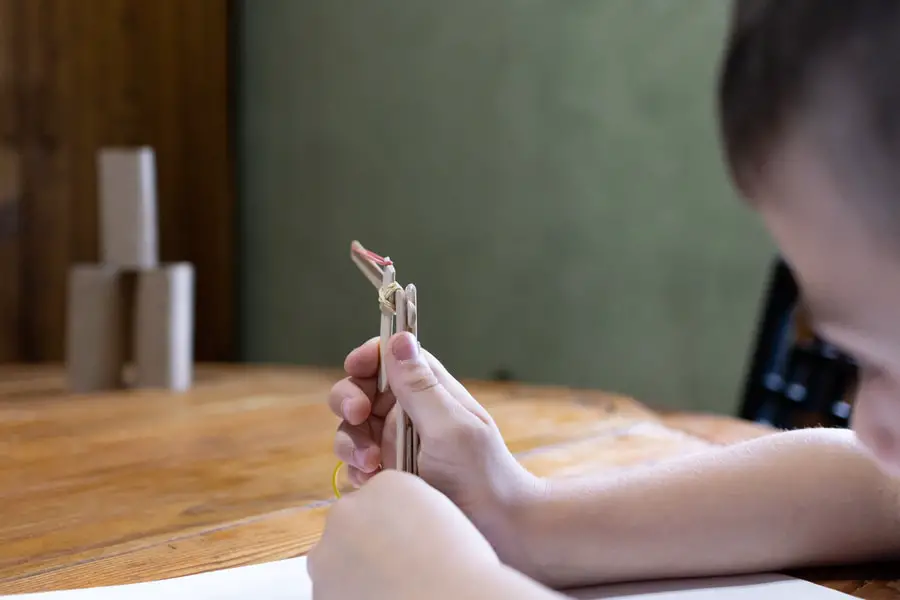
We’ve seen how popsicle sticks can be used to launch rubber bands or catapult small object, now what can we build with them?
Build a Bridge From Popsicle Sticks
Bridges are a classic engineering challenge: Build a structure that spans two points. The longer the distance, the more difficult it is to distribute the weight (especially towards the middle.)
What kind of bridge can you build from popsicle sticks? How long will it be? How much weight can it support before breaking? What can you build using only:
- Popsicle Sticks
- Glue
Start with a simple structure and a short distance to get a feel for how much weight popsicle sticks can hold. For younger kids, try using binder clips or wooden clothespins to hold the sticks together.
For older kids, it’s time to get experimental, and don’t forget about aesthetics! (Design counts; no one wants to see a bridge that’s en eyesore.)
Related Post: Check out our full post on activities with household objects for some fun things to do with items you probably already have around the house. Great no-prep ideas!
Popsicle Stick Architecture
Popsicle sticks can make great building blocks. With a bit of ingenuity, you can create some interesting structures. From a simple boxy log cabin, to tall intricate towers.
- Popsicle Sticks
- Glue
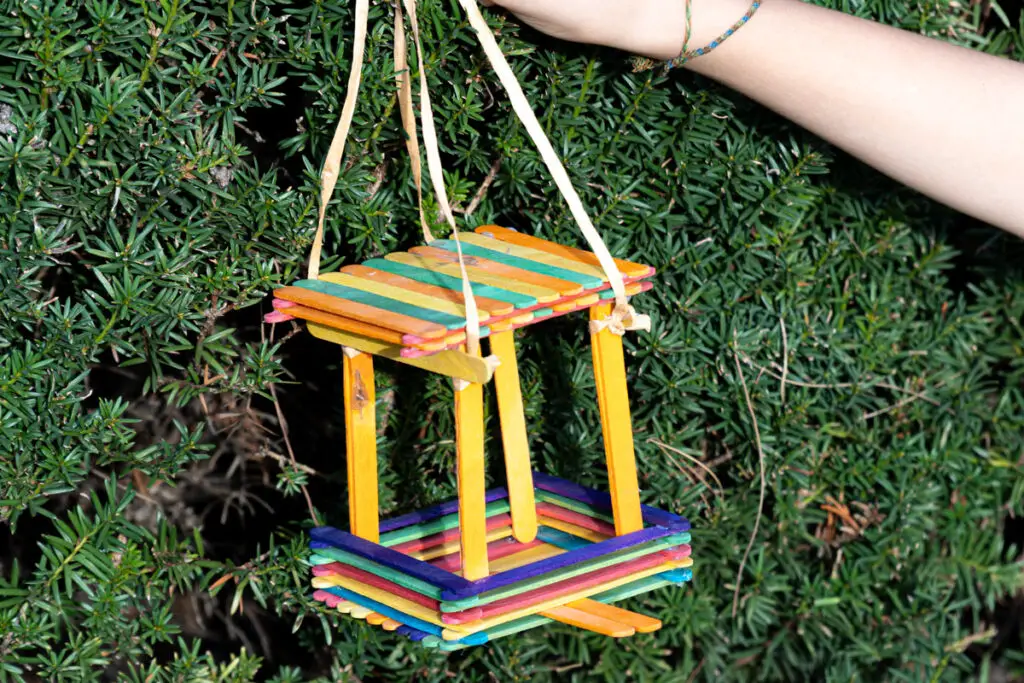
You can build things for fun, or make functional structures like this bird feeder:
If you’re interested in building, it’s worth checking out these notched craft sticks that fit together. They’re ideal for building towers and houses and work much the same way as Lincoln Logs..

Popsicle Stick Bomb/Grenade
We’ve found a few variations of this one. It’s a simple matter of weaving the popsicle sticks together and letting a slight bit of tension hold them in place. Once released, the popsicle sticks have nothing holding them together and fly apart. Our boys enjoy this (do it again!) and we wanted to share it with you.
All you need is 5 popsicle sticks to get started.
- Arrange 2 popsicle sticks in a V shape
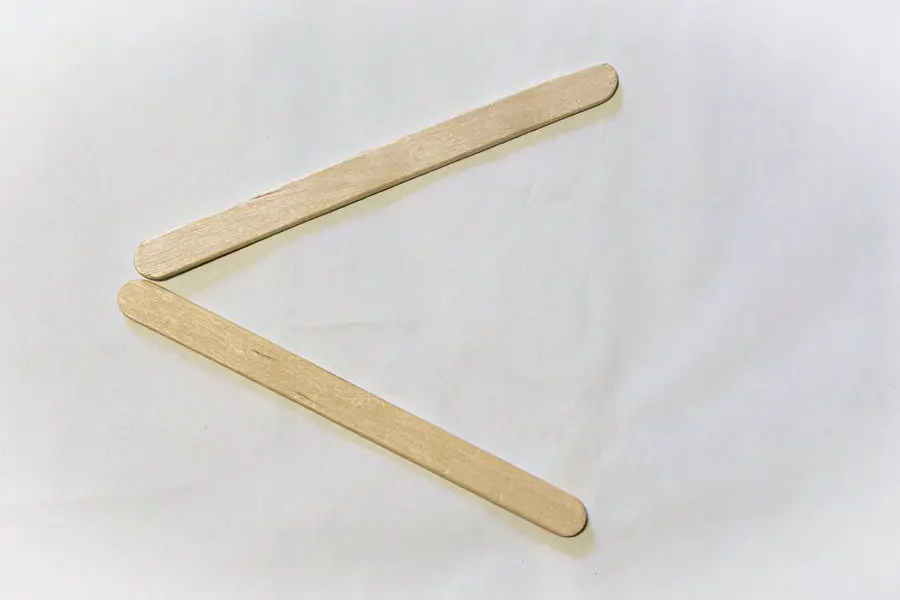
- Place a third stick between the first 2 like an arrow, with the 2 tips resting on the middle stick (not stacked up)
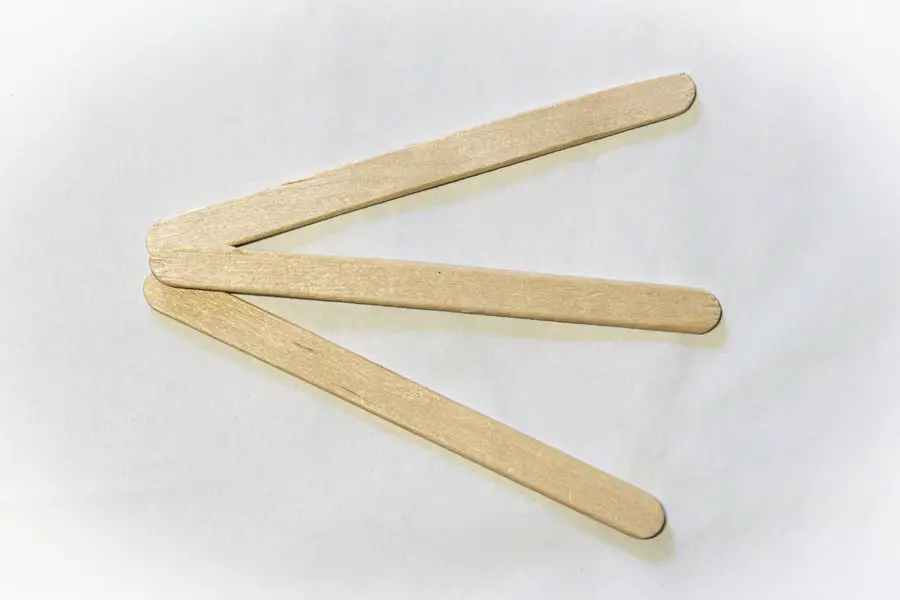
- Weave the fourth stick so it’s under the outer two sticks, but on top of the middle stick. It should be perpendicular to center stick, right about in the middle.
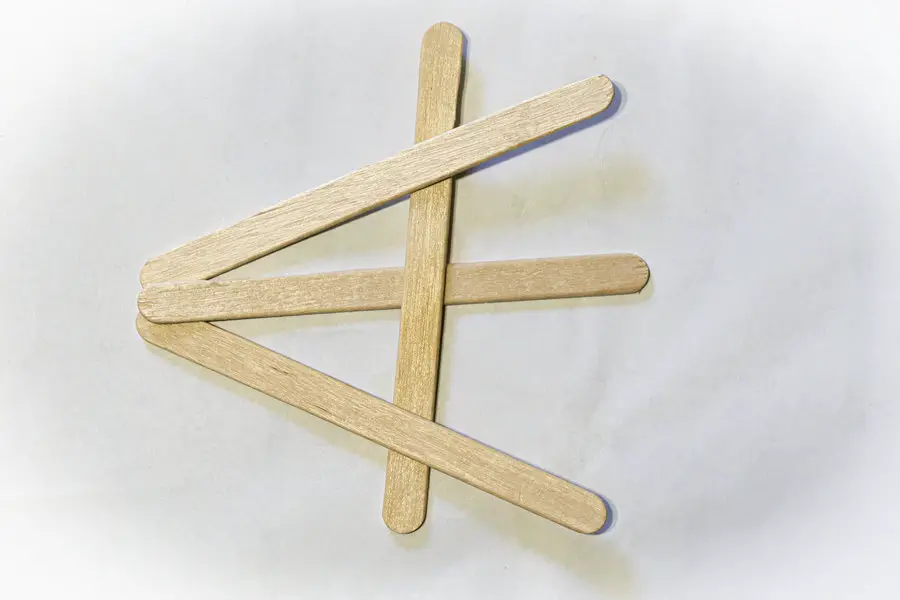
- The fifth and final stick should cross similarly towards the bottom, but this time under the center stick and over the outer sticks.
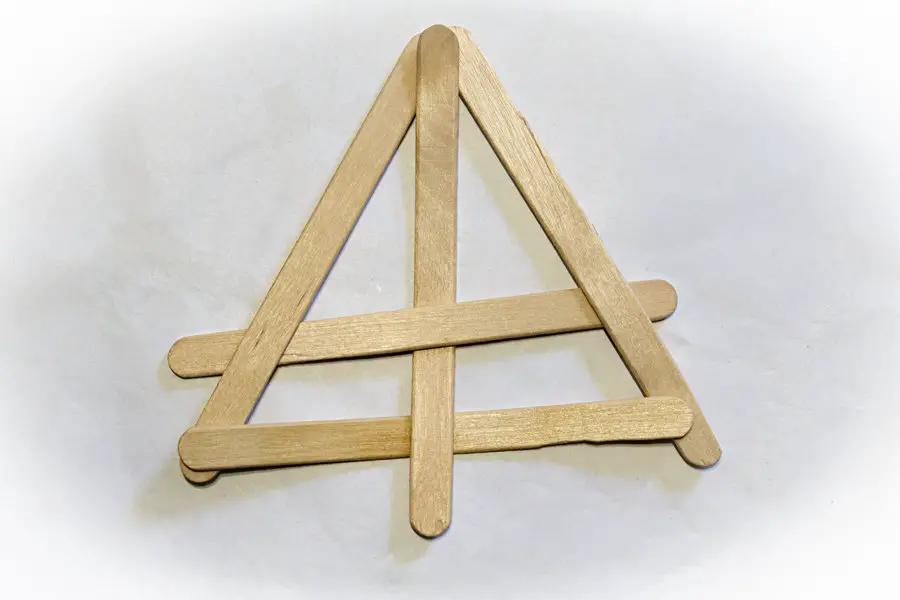
- Drop it or gently toss it so it lands flat.
- Boom!
The impact should be enough to jar the tip of the arrow shape where the 3 sticks touch. Once the tension is released, the rest of the sticks will fly apart.
By weaving the sticks together in this way, we’re storing Potential energy. They want to move and unbend themselves, but are locked in place by the other sticks. Potential energy is created due to the tension and the way the sticks are weaved together. When the sticks are jostled and “unlocked” the stored potential energy gives way to kinetic energy as they fly apart.
We sometimes found this difficult to hold together while we were adding the 4th and 5th sticks, especially when using craft sticks. The tension in the sticks made them want to slide apart. (this is a great motor skill builder – even for adults!).
It may be helpful to have an extra hand by having a friend hold down the top pieces while you weave the other sticks through.
Constructing these on a carpet or rubber gym mat also helps. We found it much easier to use actual popsicle sticks rather than craft sticks; the craft sticks were quicker to slide apart (and the kids never miss an excuse to eat another popsicle.).
Popsicle Stick Chain Reaction
You can take the Popsicle Stick Bomb to the next level and create a chain reaction in this next fun activity.
- Start by crossing two sticks in an X
- Place a third stick parallel of one of the others, with it’s end underneath the crossing stick
- Cross this with a fourth stick with its end tucked under
- Continue crossing and tucking sticks in this fashion. Be sure to hold down the end stick until you’re ready for the chain reaction
- You can “lock” it in place by wedging a stick at the end of your chain
When you remove the locking stick and release the pressure holding down the end of the stick, the whole chain will quickly unravel and release the next stick like toppling dominoes, as you can see in the above video.
Popsicle Stick Boat
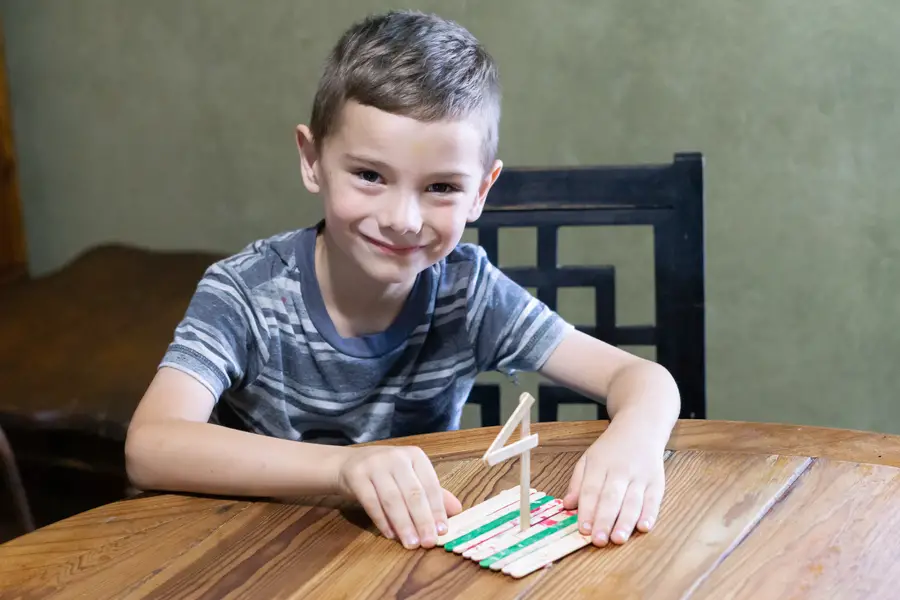
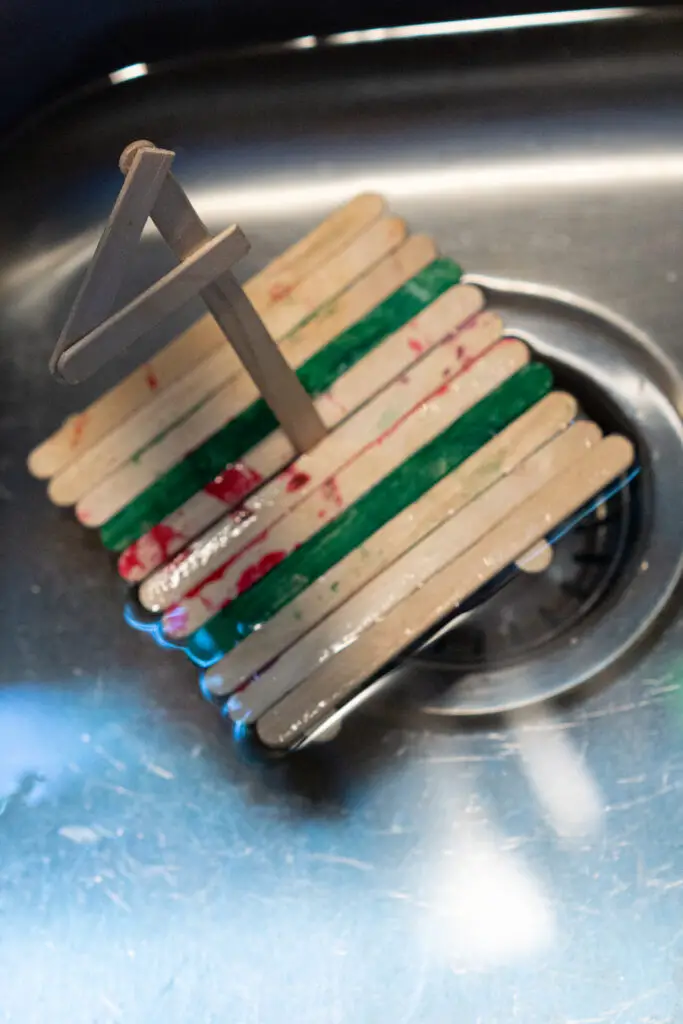
You can build a simple raft style boat, or step it up with some more complex designs.
- Popsicle Sticks
- Glue
Once you’ve got your boat built, it’s time to put it to the test: Does it float? How much weight can it hold before sinking?
DIY Popsicles
What’s the most obvious activity to make with popsicle sticks? Popsicles, of course? Of all the activities, this was our kids favorite. (Though they did really like the catapult; it was a toss up!)
- Popsicle sticks
- Juice or Drink Mix
- Ice Cube Trays or several small cups
- Plastic wrap
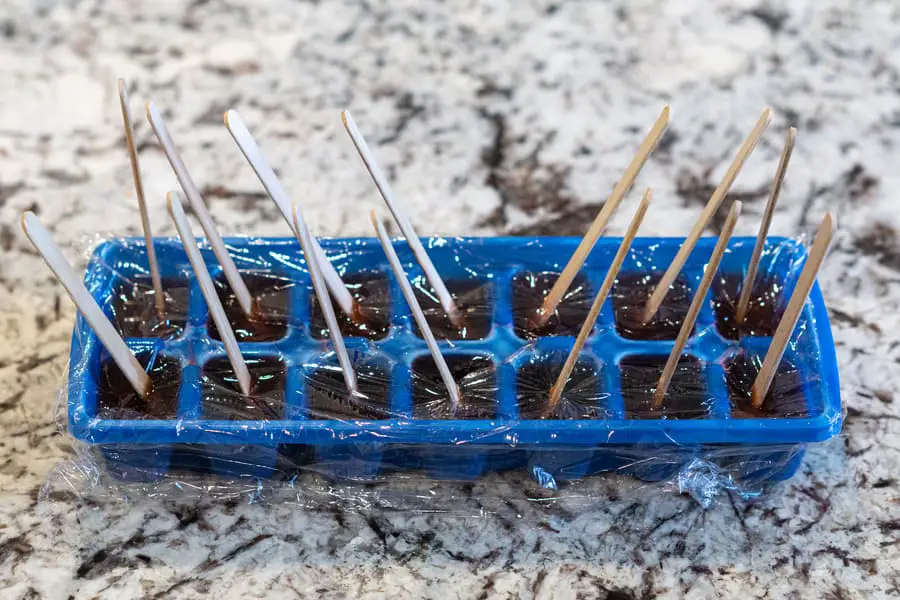
- Pour your drink of choice into the cups or ice cube tray.
- Cover with the plastic wrap
- Push the popsicle stick through the plastic wrap into the liquid. The plastic should hold the stick in place while the liquid freezes around it. (some of our sticks leaned this way or that. We’re not striving for perfection here and the kids didn’t seem to mind when enjoying their treat!)
- Place in the freezer until frozen
- Enjoy!

To make it a bit more of a STEM activity, we talked about states of matter. We’re taking our liquid drink mix and freezing it into a solid around the stick. (Find more in our States of Matter experiments.)
Note: Make sure you’re using “popsicle” sticks and not “craft” sticks for this one. Craft sticks are, as the name implies, for crafting and are not necessarily food safe.
Related Posts: If you love doing low to no prep activities with items you probably have around the home, don’t miss our posts on Awesome STEM Activities with Household Items and STEM Activities with Recycled Materials
Make Magic Wands
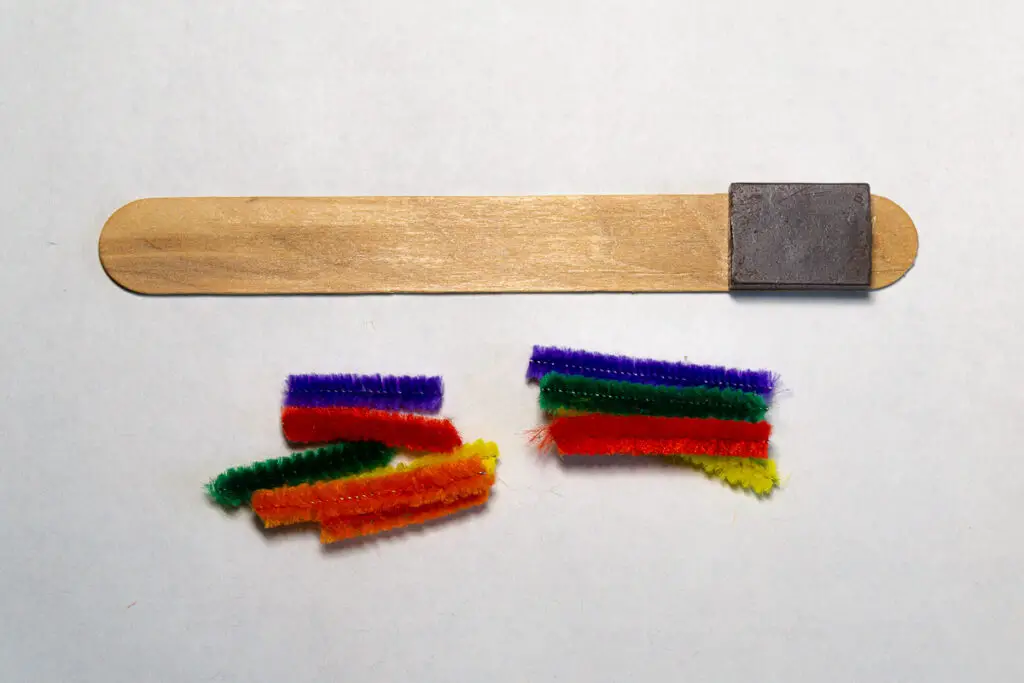
This is another simple and cool STEM activity for kids. We used a magnet to turn a craft stick into a magic want and levitate some pipe cleaners! Find the full instructions (and some other fun activities for kids) on our STEM Activities with Pipe Cleaners post.
More Fun Activities
Looking for more fun activities? Sign up for access to our free printable library for some awesome activities for home, home school, or classroom:
Wrap Up – STEM Projects using Popsicle Sticks
Popsicle sticks are cheap materials that belongs in every box of basic craft supplies or maker space.
There we have it, a collection of cool popsicle stick activities to test and grow your engineering skills and imagination. These are some fun engineering projects and STEM challenges that can scale with kid’s ages.
The older they get, the more complex structures they’ll be able to build (and catapults and popsicle stick bombs never get old!)
Kids can compete with each other (and themselves) to see if they can build a taller or stronger structure or use lessons learned to improve on a design.
We love popsicle stick activities, and more importantly, so do our kids!
Popsicle sticks belong in every STEM makerspace! Read the article and make sure you have everything you need for your makerspace.
Pin it!
Looking for your next fun STEM activity or some Science Experiments? Check out our other STEM Challenges.
-
Tin Can STEM Projects: Fun Activities for Kids
Spread the loveTin cans are in almost every home on the planet. After we have opened them and used the contents, we either toss them aside or put them in for recycling. Do you know that in your hands, you have a valuable STEM teaching tool – for free! Tin cans may be used for…
-
STEM Projects You Can Wear: Fun Activities and Designs
Spread the loveSTEM projects are not commonly associated with apparel. These are unique ways to approach STEM, and the students take great pleasure in designing something they can wear. It allows the participants the opportunity to express their individuality while learning something about STEM. STEM projects you can wear include recycled jewelry and clothes. Science…
-
STEM Projects You Can Do at Home
Spread the loveLearning doesn’t have to happen in a classroom. You can create awesome learning experiences in your home or homeschool! Here, the learning is most closely related to their everyday life, making it meaningful. We’ll share pointers to help you see endless opportunities for exploring STEM concepts on home turf. The best STEM projects…

