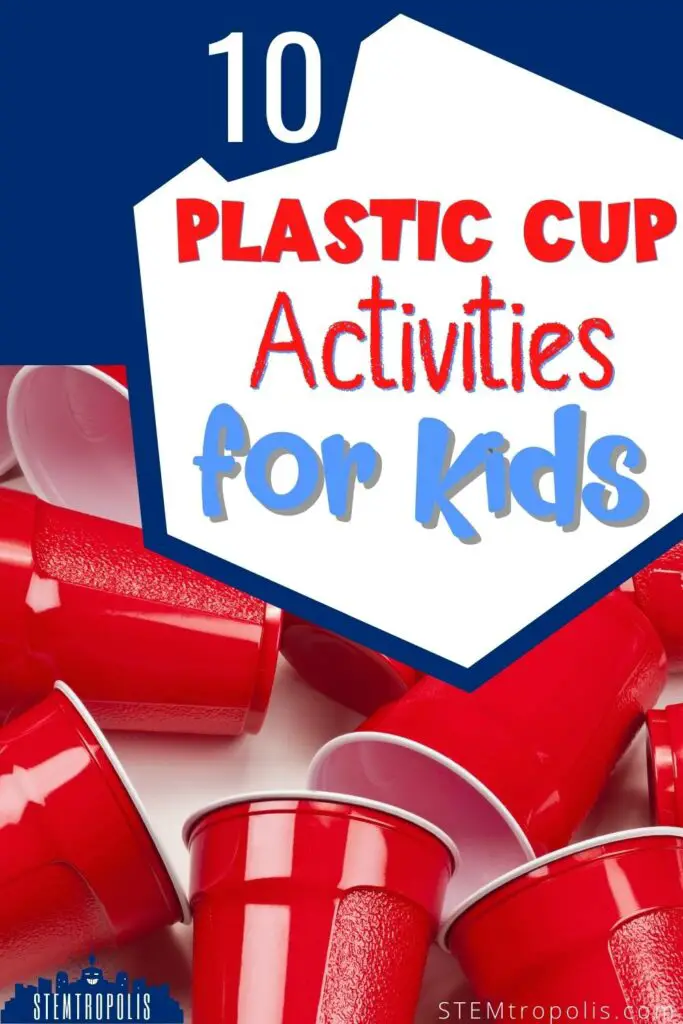
It is always helpful to use ordinary household items in STEM activities. It lowers the price of the experiment and allows kids to easily repeat fun activities.
You can do some simple STEM activities with plastic cups to help explain some fundamental concepts in science, math, and engineering.
The physics of flight and air pressure can be demonstrated with simple activities, as well as building and design concepts. Let’s explore!
Note: It is best to use the slightly more expensive, thicker plastic cups for experiments as you will get more reliable results with them.
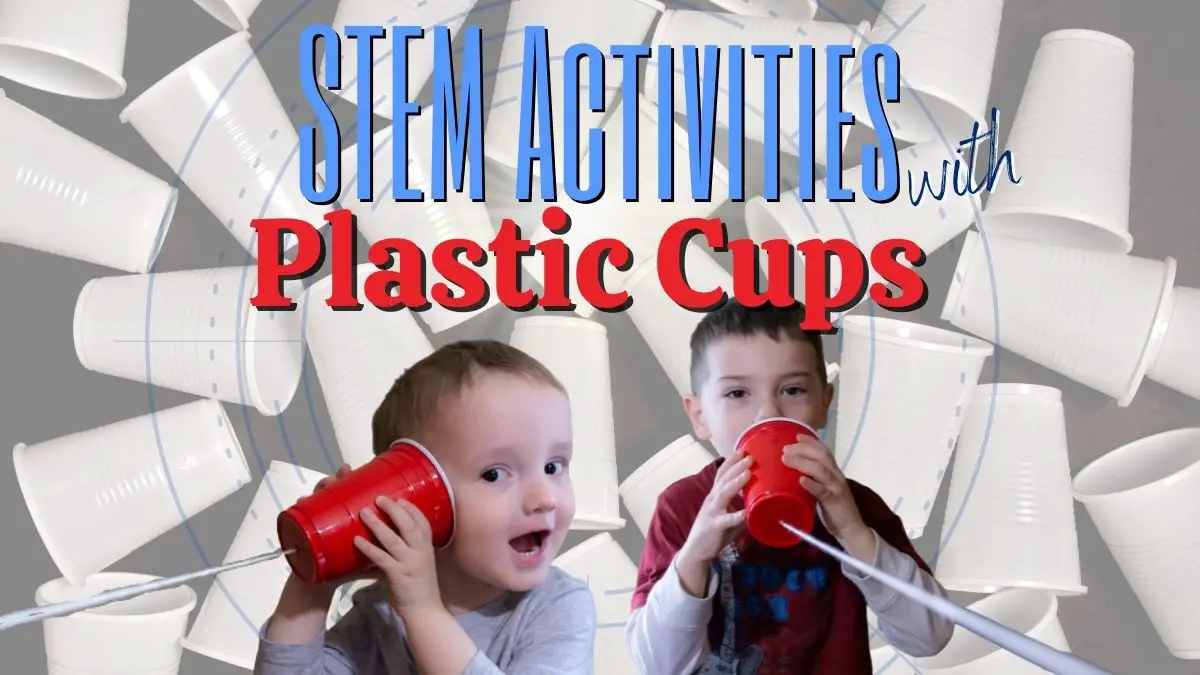
Teaching About Acoustics and Sound Waves Using Plastic Cups
Plastic cups can be used to teach about acoustics and sound waves by making a cup telephone or a squeaking cup. Sound travels in waves and needs an amplifier for the sound waves to be heard. Plastic cups provide an easy and relatable means of demonstrating this.
Plastic Cup Telephone
This is a classic activity for kids that demonstrates how sound waves travel as vibrations.
- Use two plastic cups and make a hole in the bottom of each.
- Tie a piece of string through the bottom hole so that the cups are connected by the string.
- Pull the string is taut.
- Let the kids experiment with different strings and wires to ascertain which gives the best results.
Related Posts: We did similar activities in our post on STEM Activities with Tin Cans and Science Experiments with Sound
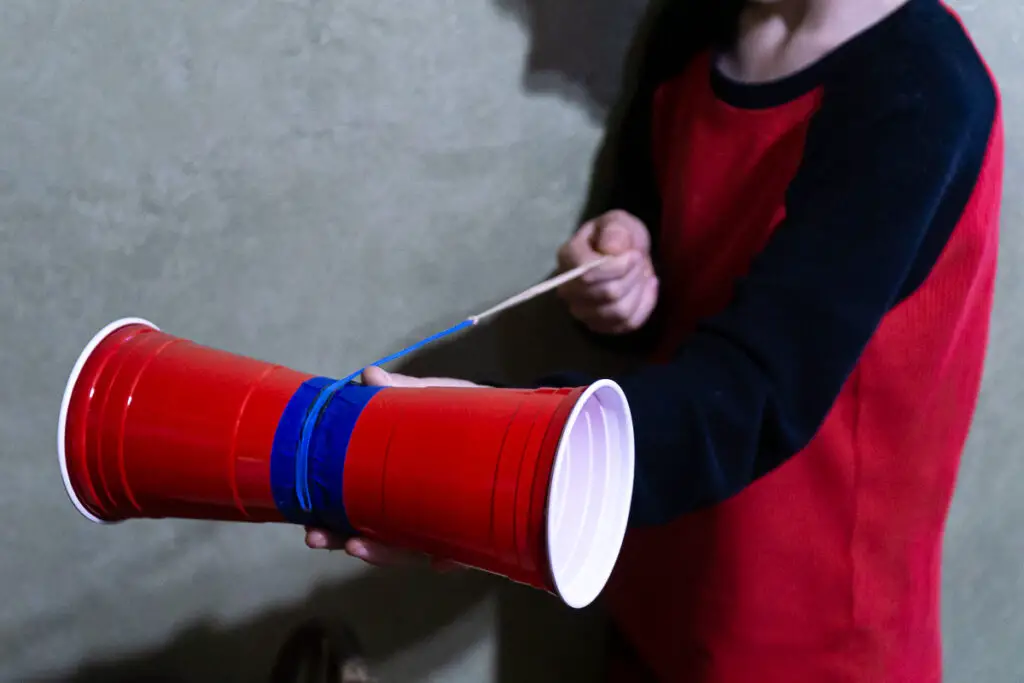
The Squeaking Plastic Cup
With the cup phone, we learned that the sound waves from our voice vibrate through the string and are amplified by the cup on the other end. We can demonstrate that same concept another way, using just one cup:
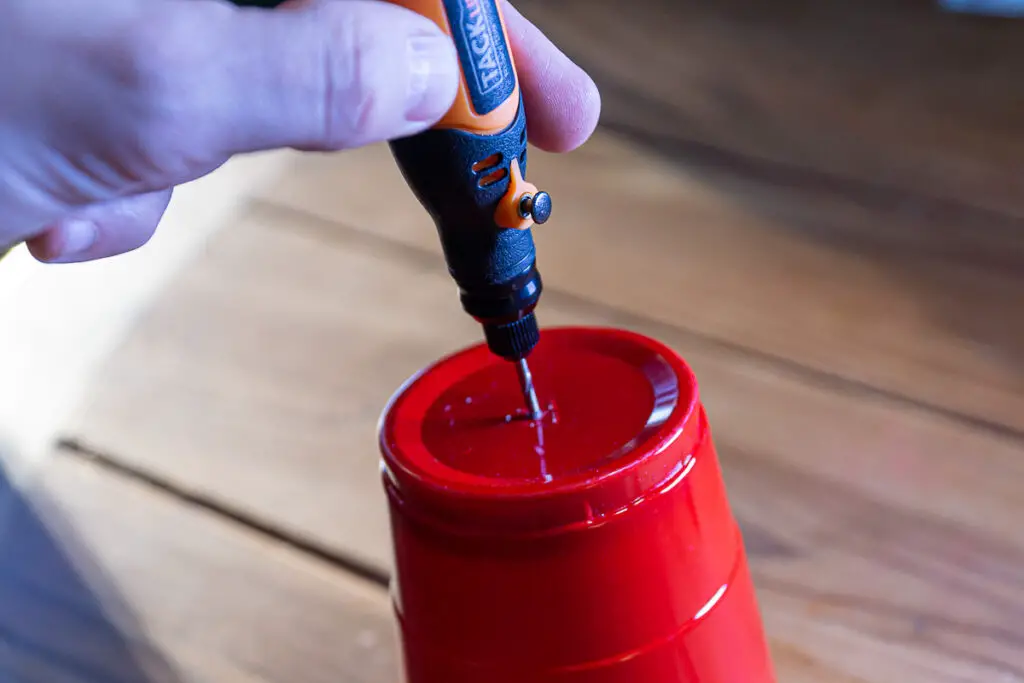
- Make a hole in the bottom of a plastic cup. We used a small rotary tool, which worked perfectly.
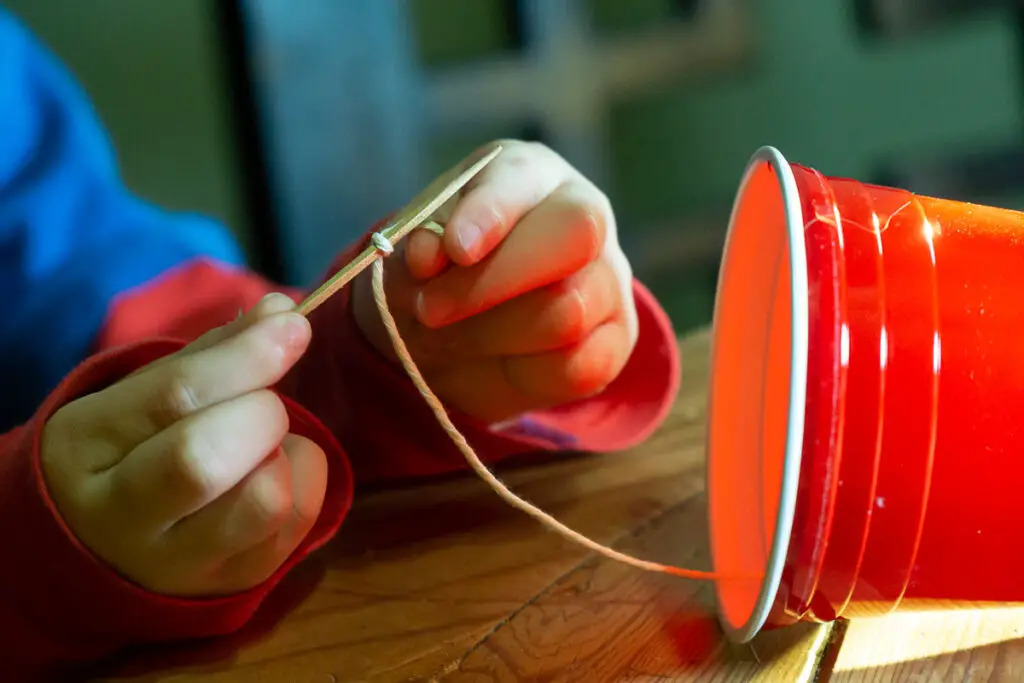
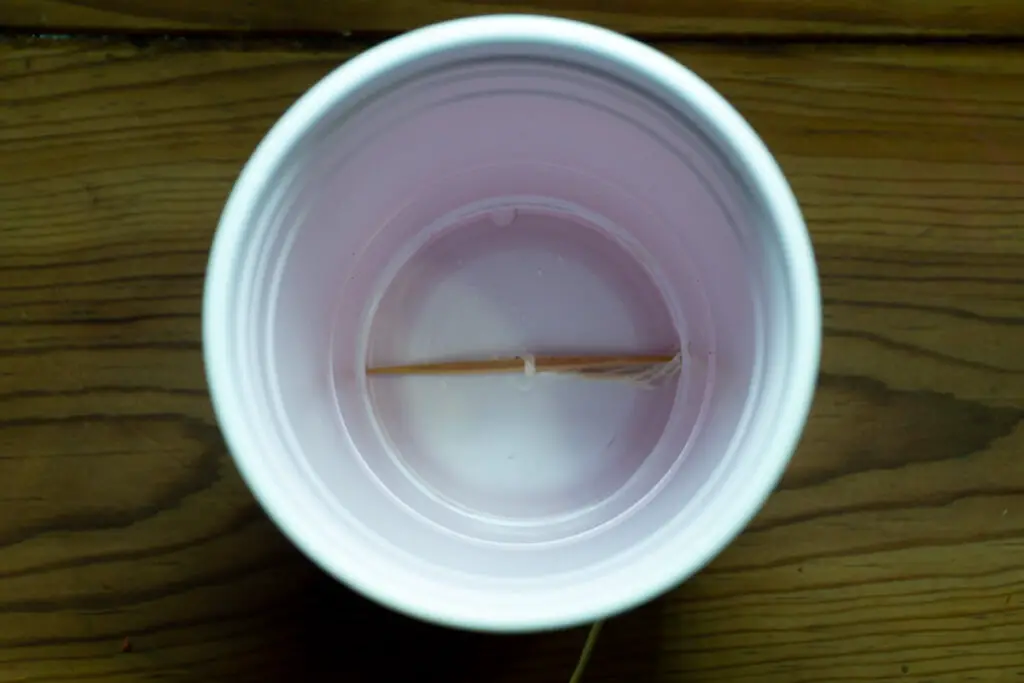
- Thread 8-12 inches (about 20 -30 cm) of string through the hole of the plastic cup and tie it around a toothpick.
- Pull the string so that the toothpick nestles in the bottom of the cup and secures the string.
- Wet the string that is hanging below the cup. Use your wet fingers or a damp paper towel and slide your fingers or the towel down the string.
- This creates a vibration in the string, which is amplified by the cup.
- Experiment with longer or shorter strings and larger or smaller cups to alter the sound.
What do you notice about the sound of longer vs shorter strings? How does it alter the sound if you don’t wet the string? What happens to the sound if you use a different sized cup?
Show Air Pressure Using Plastic Cups
Air pressure is a challenging concept to explain to students, and it is always best to demonstrate it.
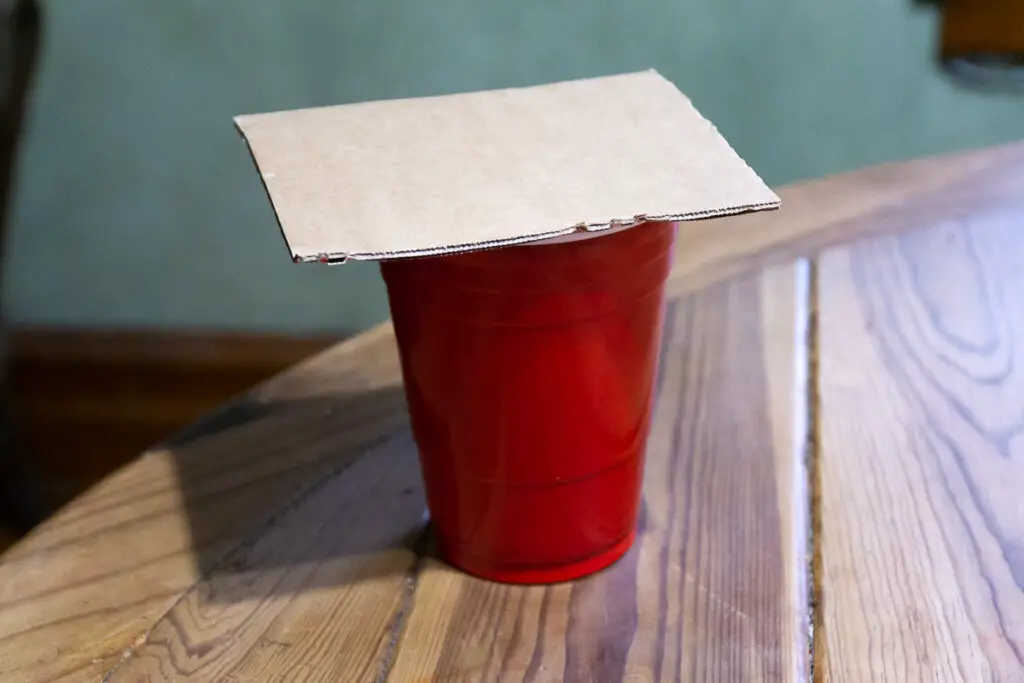
- Fill a plastic cup with water.
- Cut a cardboard piece that is larger than the top of the cup.
- Ensure that the cardboard makes contact with the rim of the cup.
- Huolding the carboard on the top of the cup, turn the cup upside down
- Take your hand away.
- The cardboard will stay in place, and the water will remain in the cup.
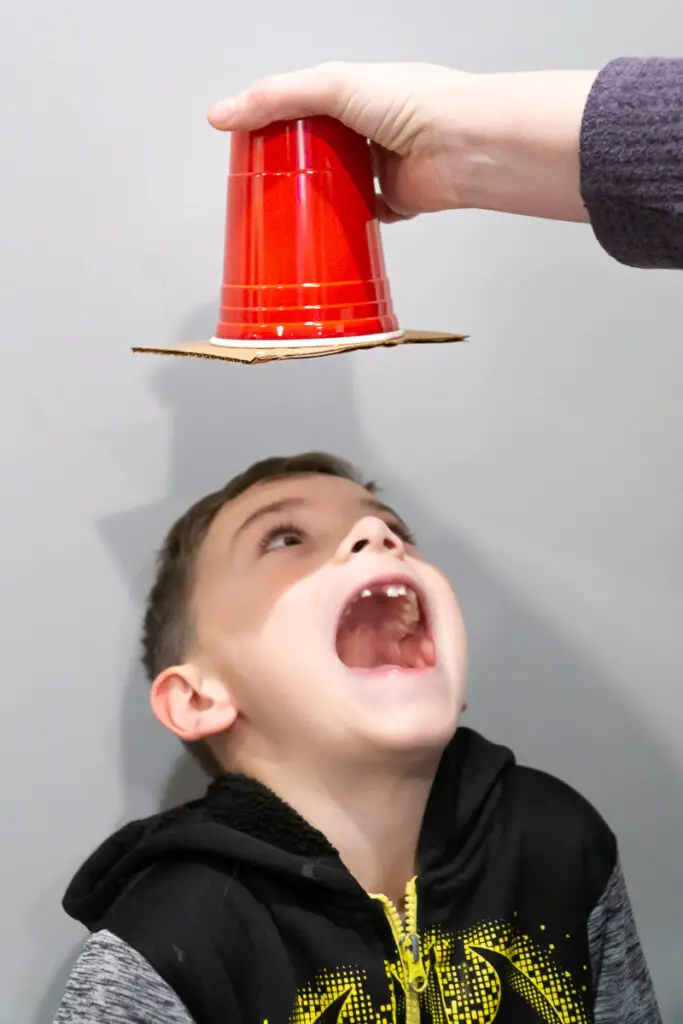
What’s happening? Why doesn’t the cardboard just fall and the water rush out? The air pressure pushing up against the cardboard is more than the weight or pressure of the water, and the result is that the water is held in place by the air pressure. You can alter the experiment by using differing amounts of water and different size containers.
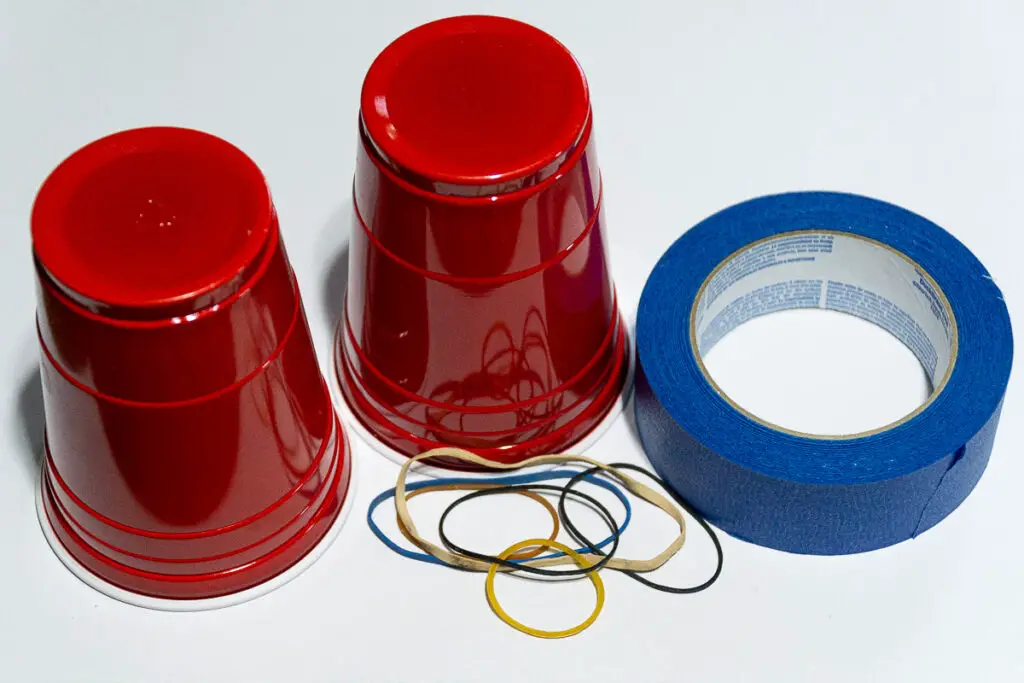
Plastic Cup Flyer – Use Plastic Cups To Show The Physics Of Flight
Do you think a plastic cup can fly? Not just tossing it and watching it tumble about, but in a smooth flight path like a paper airplane?
You’ll need:
- 2 Plastic Cups
- Tape (we used painter’s masking tape)
- Rubber bands
It sounds almost unbelievable that you can teach the physics of flight using plastic cups. For this activity, you will need to explain the Magnus effect to the students. The Magnus effect is an example of Bernoulli’s theorem, which explains how differences in air pressure can create “lift” which facilitates flight. This is the concept behind the design of airplane wings and allows a plane, that is quite heavy, to fly. We’re going to do something similar to our cups.
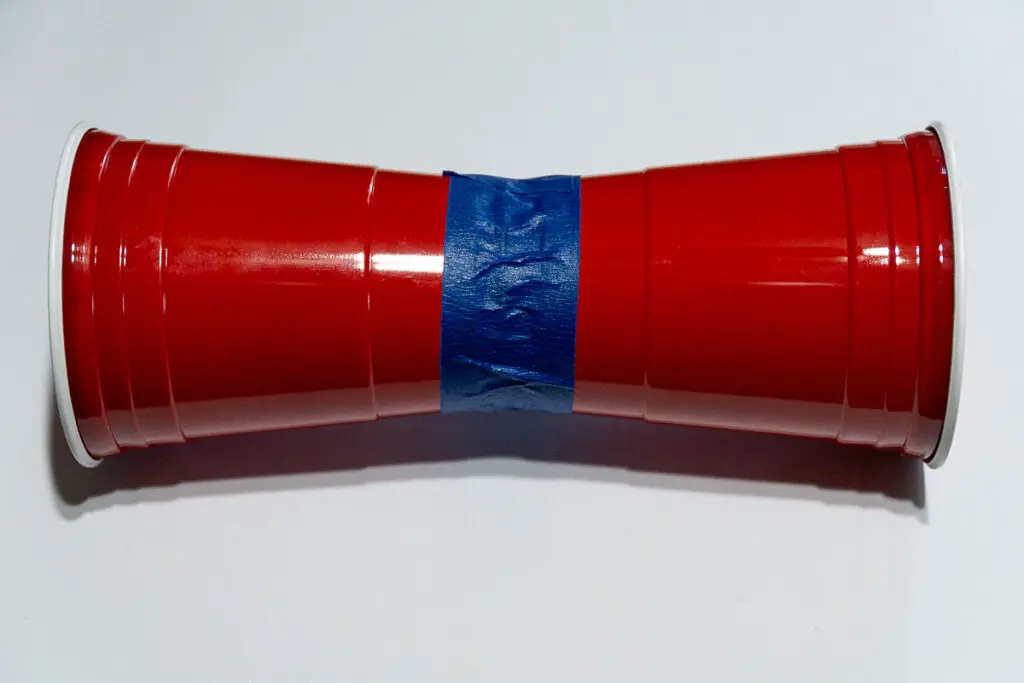
- Tape 2 cups together with their narrowest or bottom ends facing each other.
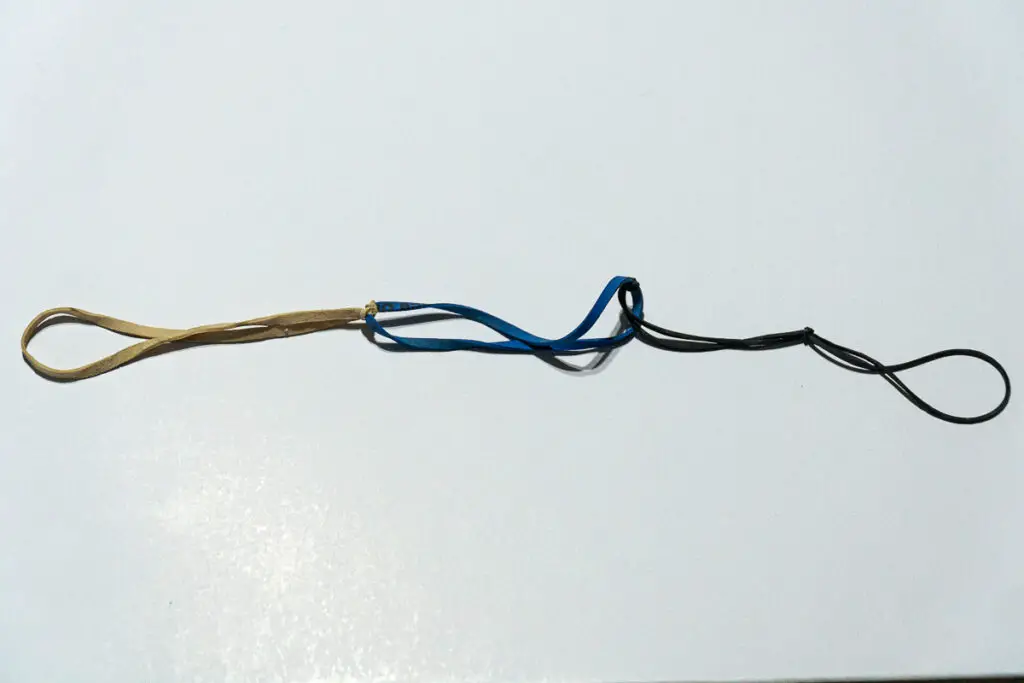
- Use five to six rubber bands that are interlinked or joined to create an elastic string.
- Wrap the rubber band string tightly around the tape joining the cups.
- Using the string like a catapult, send the cups spinning off into the air.
How it works:
The spinning motion of the cups will create an area of low pressure at the top of the cups and high pressure under the cups. Since air moves from high to low pressure, this will create lift and allow the cups to fly. The higher air pressure under the cups pushes them up towards the low air pressure and keeps the cups in the air.
You can vary this task by using different sizes and weight cups. If doing this in a class or group setting, form teams to compete and see who can fly their cups the furthest.
Technology And Engineering With Plastic Cups
Plastic cups are ideal for stacking and building. They can be used alone or with other simple products like wire, pipe cleaners, dowel rods, chopsticks, kebab sticks, or straws.
Build A Castle Using Plastic Cups
Imaginations can be fired up by the challenge of building a castle using plastic cups and a few extra materials. Encourage kids to draw their designs first, just like an architect would design a building.
Once it’s built, ask how the design could be improved. Try implementing features that increase the strength and stability of the design.
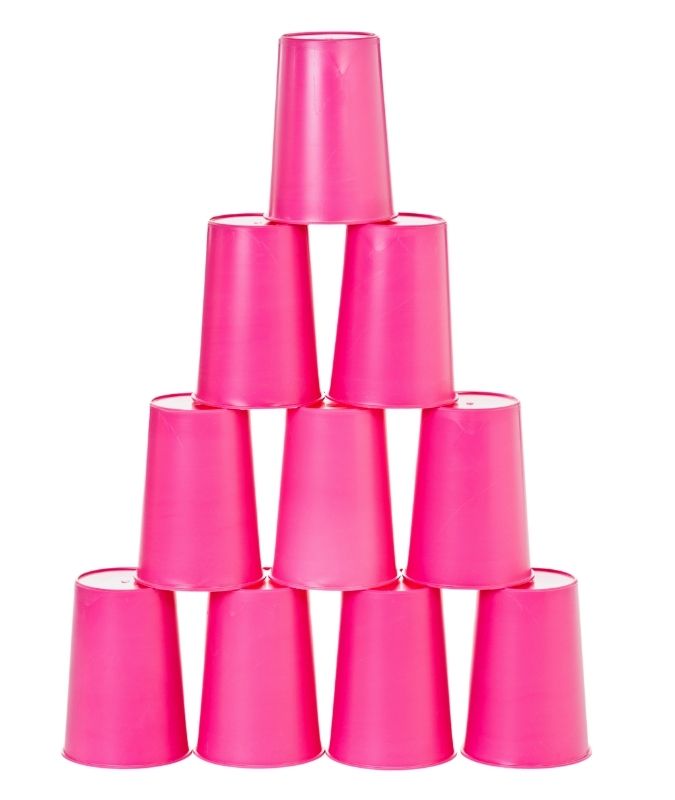
Build A Tower Using Plastic Cups – Without Touching The Cups
Sure, anyone can build a tower. Can you build a tower without touching it with your hands?
You can do this as an exercise with one child, though it’s easier (as well as more fun and chaotic) with a group. This activity is an excellent problem-solving challenge. Simple use the materials provided to manipulate and stack the cups.
Each person should be given:
- Two pencils
- 2 feet of string
- 2 rubber bands
Use 10 plastic cups (or more if you like) – 10 cups will allow the construction of a typical pyramid with 4 cups at the base.
Several people can work together to balance grip the cups between pencils. Will you lasso the cups with the sting, or use the pencils like chopsticks? Challenge everyone to be creative.
Build A Christmas Tree With Plastic Cups
Kids can be challenged to build a Christmas tree using plastic cups. You can vary this activity by allowing them to:
- Use other simple materials such as those described above.
- Putting a price limit on the extra materials is a great way to include some math in the project.
- You can specify height and breadth or make it a competition to build the biggest.
Plastic Cup And Cardboard Structure
In this STEM challenge, kids are provided with plastic cups and cardboard and tasked to build a structure that can support the weight.
You can specify the number of cups they have to build with and the target weight to support. Here are a few simple weight suggestions using practical items:
- A gallon jug of water
- A stack of books
- Their own bodyweight
For this engineering activity, kids will need to use critical thinking, trial and error, or research to develop designs that make the best use of their materials. They’ll need to think about balance and weight distribution.
Should the cups go face up, face down, or some of each. How far should cups be spaced apart? How high can the structure be and remain stable? There are many variables (and lessons) in this challenge.
Plastic Cups And Mathematics
Estimation
Plastic cups can be used in mathematics for estimating problems. You’ll need a few transparent plastic cups, and something small to fill them with; beads, buttons, jellybeans, raisins, cheerios, or something of similar size would work well for this exercise.
Fill a transparent plastic cup half full with beads. Let your kid(s) guess how many beads are in half the cup. Give them the answer and see how close they were. Now let them estimate how many will be in a full cup. (This can be tricky if the cup tapers in diameter from top to bottom, as they cannot just double the number for an accurate answer.)
Use beads or buttons to fill plastic cups so it appears they contain the same amount. Count the beads and see if each cup has precisely the same number. Challenge your kid(s) to explain any differences. This task can be extended by having them estimate how many beads will fill the cups if they are bigger or smaller.
Counting
You can make simple exercises by making stacks of cups in sequence. Place one cup on the table. Make a stack of two cups next to it, then three cups, etc…
Mix it up with skip counting: try counting by twos, or multiples of three, etc., and stacking the cups accordingly.
Wrap Up – Simple STEM Activities for Kids with Plastic Cups
Plastic cups are easily accessible, cheap, and lend themselves to a multitude of activities. They are a must-have in your STEM toolkit or makerspace, and a perfect thing when you need a quick STEM activity.
Plastic cups make a great addition to a crafting station or makerspace! Make sure you’ve got everything you need to make your own STEM makerspace!
More Fun Activities
Looking for more fun activities? Sign up for access to our free printable library for some awesome activities for home, home school, or classroom:
Also check out our posts on Activities with Plastic Bottles and Projects with Recycled Materials.