This Easter, let’s hop into some science-filled fun with experiments that are as exciting as a basket full of treats! From growing colorful crystal eggs to making bouncy Easter-themed slime, these STEM activities bring a festive twist to hands-on learning.
Using simple materials and plenty of creativity, kids can explore, experiment, and celebrate the holiday in a whole new way. So grab your supplies, put on your bunny ears, and get ready for an Easter full of science, surprises, and smiles!
“Easter Egg” Balloon Inflation
Hop into springtime science with this Easter-themed twist on the classic vinegar-and-baking-soda balloon experiment! Add pastel-colored food dye to your vinegar and choose festive balloons—think pastel colors or bunny/egg designs. Watch the balloon magically inflate with carbon dioxide gas, capturing all the bubbly fun of an Easter celebration.
Materials Needed
- Small plastic or glass bottle
- Pastel-colored or Easter-themed balloon (bunny ears or egg designs, if available)
- Vinegar (about ¼ to ½ cup)
- Baking soda (about 1–2 tablespoons)
- Pastel or spring-colored food coloring (optional)
- Funnel (optional but helpful)
- Measuring spoons and measuring cup
Steps
- Color Your Vinegar
- (Optional) Add a few drops of a springtime or pastel food coloring to the vinegar for an Easter-themed pop of color.
- Measure the Vinegar
- Pour about ¼ to ½ cup of vinegar into the bottle using a measuring cup.
- Prep the Baking Soda
- Use a funnel or spoon to carefully place 1–2 tablespoons of baking soda into your balloon.
- Attach the Balloon
- Stretch the balloon’s opening over the mouth of the bottle, ensuring a tight seal. Keep the balloon tilted so the baking soda stays inside for now.
- Let the Fizz Begin
- Lift the balloon so the baking soda falls into the colored vinegar.
- Observe the fizzing and foaming reaction, which releases carbon dioxide and inflates your Easter balloon!
- Experiment & Decorate
- Vary the amounts of baking soda and vinegar to see how it affects the balloon’s size and inflation speed.
- Decorate your balloon or bottle with Easter stickers or drawings—eggs, bunnies, or chicks—to make it extra festive.
How It Works
When baking soda (a base) meets vinegar (an acid), they react to form new substances, including carbon dioxide gas (CO₂). The CO₂ bubbles up and expands in the bottle, eventually filling the balloon. Adding pastel food coloring and a springtime balloon just adds a fun Easter flair while you explore the fascinating effects of an acid-base chemical reaction.
STEM Concepts Involved
- Chemistry: Demonstrating an acid-base reaction that produces carbon dioxide gas.
- Physics: Observing how gas expands and inflates the balloon.
- Measurement & Observation: Tracking how different amounts of vinegar and baking soda change the reaction.
- Creative Engagement: Tying science into holiday themes (like Easter) fosters excitement and hands-on learning.
See Through Easter Eggs (Rubber Eggs)
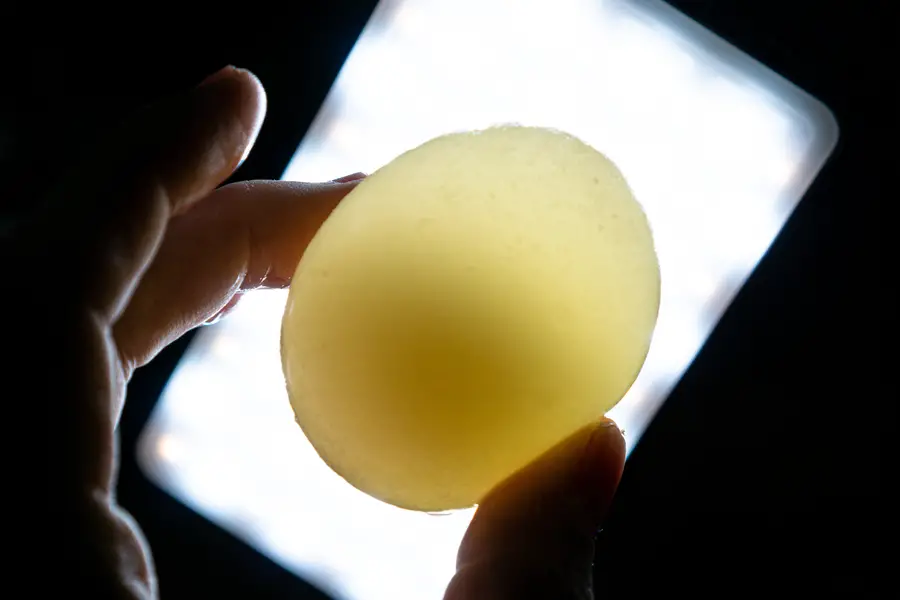
Witness the amazing transformation of an eggshell in vinegar. This experiment reveals a squishy surprise – a naked egg! Click the link for the dissolving eggshell experiment.
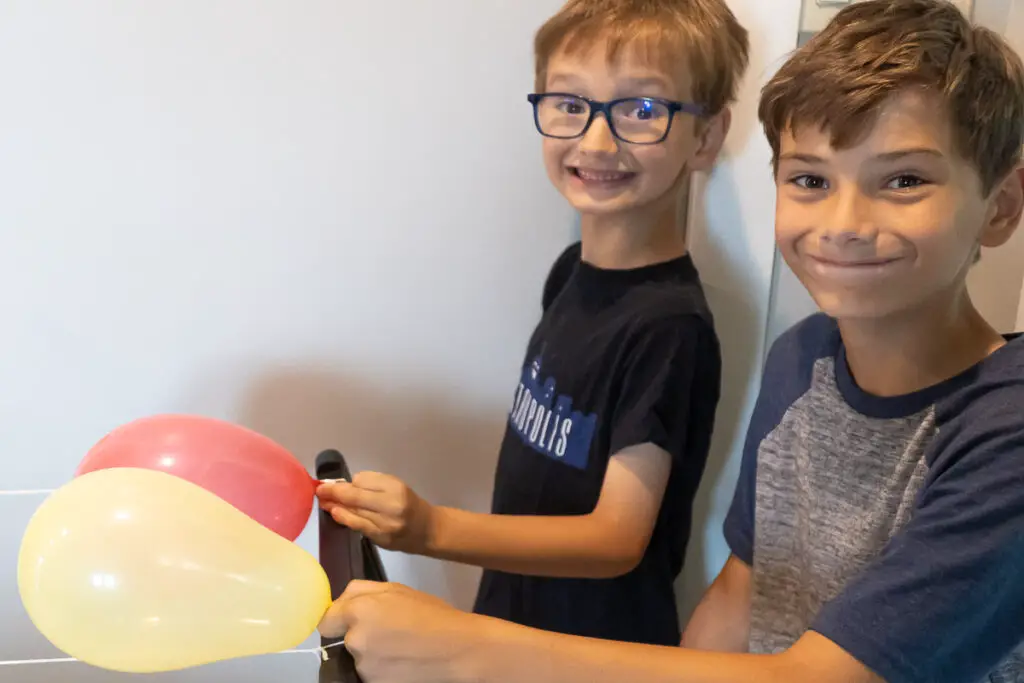
Easter Egg Balloon Rocket
Celebrate spring by launching a festive Easter balloon rocket! Decorate your balloon with bunnies, eggs, and bright spring colors, then watch it zoom along a string. This fun, hands-on activity demonstrates the principles of force and motion—just like a real rocket!
Materials Needed
- Balloon (pastel colors or Easter-themed)
- Long piece of string (6–10 feet or more)
- Drinking straw (or small tube)
- Tape
- Two chairs (or other supports to keep the string taut)
- Markers, stickers, or cut-out Easter shapes (for decorating)
Steps
- Decorate the Balloon
- Draw or attach Easter-themed designs: bunnies, eggs, chicks, or spring flowers.
- Leave some space near the neck of the balloon to tape it to the straw.
- Set Up the String
- Tie one end of the string to the back of a chair (or another solid support).
- Thread the free end of the string through the straw, then tie it to the second chair.
- Make sure the string is pulled tight and straight.
- Attach the Balloon
- Inflate your Easter-decorated balloon but don’t tie it off—pinch the neck to keep the air inside.
- Use two small pieces of tape to secure the balloon to the straw. Position the balloon so the opening faces the starting point.
- Launch Your Easter Rocket
- Release the balloon’s neck and watch as it zooms along the string in a burst of springtime fun!
- Cheer on your rocket and celebrate the season as it travels from one chair to the other.
- Experiment with Variations
- Change the angle of the string to see how it affects the balloon’s path.
- Try different shapes or sizes of balloons.
- Observe and record how each variation impacts speed and distance.
How It Works
When you let go of the balloon’s neck, the air rushing out propels the balloon forward—an illustration of Newton’s Third Law of Motion. The law states that for every action (air escaping), there is an equal and opposite reaction (balloon speeding forward). By guiding the balloon with the straw on the taut string, friction is greatly reduced, allowing the rocket to travel smoothly.
STEM Concepts
- Newton’s Third Law of Motion: Demonstrates action and reaction forces.
- Propulsion: Shows how gases (air) escaping push an object forward, much like a rocket.
- Force & Motion: Highlights how forces cause changes in motion.
- Friction Reduction: Explains how the straw-on-string setup helps the balloon move more easily.
Enjoy this egg-citing way to celebrate Easter, combining hands-on science with colorful holiday fun!
Easter Slime

Celebrate Easter with a fun and festive fluffy slime-making activity! Create soft, pastel-colored, sparkly slime decorated with tiny eggs, bunnies, or glitter for an exciting Easter twist to your polymer exploration.
Materials Needed
- White school glue (½ cup)
- Shaving cream (1½ cups, foam type, not gel)
- Liquid starch (about ¼ cup) OR borax solution (1 teaspoon borax dissolved in 1 cup warm water)
- Pastel food coloring (pink, yellow, blue, or purple)
- Easter-themed glitter, confetti (bunnies, eggs, flowers), or small plastic charms (optional)
- Mixing bowl
- Spoon or stir stick
- Measuring cups
Steps
- Pour ½ cup white school glue into your mixing bowl.
- Add 1½ cups shaving cream to the glue and gently fold it in to maintain the fluffiness.
- Add a few drops of pastel food coloring and mix gently until you achieve your desired shade.
- Decorate your slime by adding Easter-themed glitter, confetti, or small plastic charms.
- Combine with activator:
- If using liquid starch, slowly pour in about ¼ cup while gently stirring.
- If using a borax solution, add it gradually, one tablespoon at a time, stirring continuously.
- Mix until the slime pulls away from the sides of the bowl.
- Knead the slime thoroughly with your hands until it becomes fluffy, stretchy, and smooth.
How It Works Your fluffy Easter slime is a fun combination of chemistry and creativity! Adding shaving cream introduces air pockets, making the slime soft, fluffy, and lightweight. The activator triggers a chemical reaction that transforms the glue into stretchy polymer chains, creating slime. For more detailed insights, explore our article on The Science of Slime.
STEM Concepts
- Chemistry: Explore how cross-linking reactions form polymers.
- Measurement and Ratios: Understand the role of precise ingredient measurements.
- Holiday-Themed Creativity: Incorporate Easter colors and decorations to blend science with art.
- Scientific Observation: Observe how the mixture transforms from liquid to slime during the process.
Tip: Store your Easter slime in small, plastic Easter eggs for a fun and festive way to share your creations with family and friends!
Related Post Alert
Check out this post for different types of slime and the science behind slime!
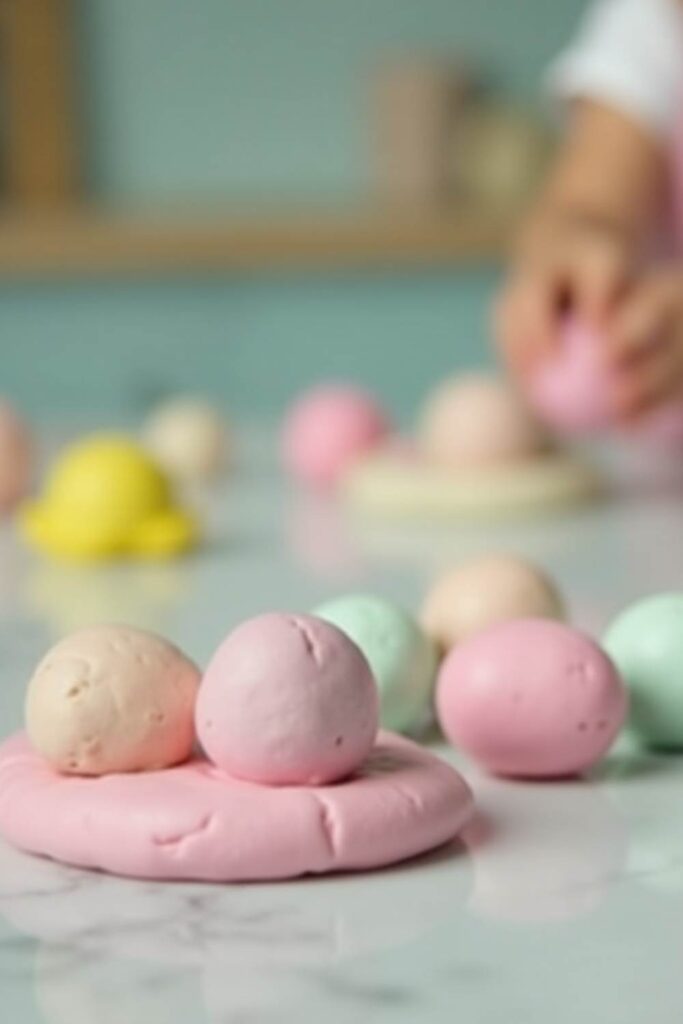
Homemade Play Dough
Short Description
Celebrate the spring season and Easter by making pastel-colored play dough! Children can shape Easter eggs, bunnies, and other festive symbols while exploring chemistry, measurement, and sensory play.
Materials Needed
- 2 cups all-purpose flour
- 1 cup salt
- 2 tablespoons cream of tartar (optional but recommended)
- 1 cup water (approximately)
- 1 tablespoon vegetable oil
- Food coloring in pastel shades (pink, yellow, lavender, light blue)
- Optional: A few drops of a pleasant scent (e.g., vanilla or citrus extract)
- Optional: Egg-shaped cookie cutters or Easter-themed molds
- Mixing bowl
- Spoon or spatula
Steps
- Combine Dry Ingredients
- In a mixing bowl, whisk together the flour, salt, and cream of tartar (if using).
- Add Color & Scent
- In a small cup, mix a few drops of pastel-colored food coloring into the water.
- Add a few drops of your chosen scent for a festive touch.
- Mix in Wet Ingredients
- Pour the colored, scented water and vegetable oil into the dry ingredients.
- Stir until the mixture begins to form a dough.
- Knead the Dough
- Place the dough on a clean surface and knead it with your hands.
- Add more flour if the dough is too sticky or a little water if it’s too crumbly.
- Shape & Play
- Roll out the dough and use egg-shaped cookie cutters or Easter-themed molds.
- Experiment with different pastel colors by making multiple batches.
- Store in airtight containers or resealable bags to keep the dough soft.
(Optional Stovetop Method)
- Combine the flour, salt, and cream of tartar in a saucepan.
- In a separate bowl, mix the food coloring, oil, and scent with the water.
- Slowly stir the wet mixture into the dry ingredients.
- Heat on low, stirring constantly, until the dough pulls away from the pan.
- Remove from heat, knead, and create your Easter shapes.
How It Works (The Science Behind It)
- Formation of Gluten: When flour and water mix, the proteins in flour (gliadin and glutenin) bond to form gluten, giving the dough its stretchy and moldable texture.
- Salt & Preservation: Salt helps preserve the dough by slowing bacterial growth, keeping it usable for longer.
- Cream of Tartar: This acidic ingredient helps the dough remain soft and pliable by stabilizing the gluten network.
- Color & Scent: Using pastel food coloring and fragrant extracts adds a fun, springtime element without affecting the dough’s core properties.
STEM Concepts Involved
- Chemistry: Observe how different ingredients (flour, salt, water, cream of tartar) combine to form a new substance.
- Measurement & Ratios: Practice accurate measuring and see how ratios affect texture and consistency.
- Physical Changes: Notice how mixing, kneading, and heating transform separate ingredients into a cohesive material.
- Experimentation: Encourage kids to test various color intensities and scents, fostering curiosity and critical thinking.
Dancing Easter Eggs Experiment
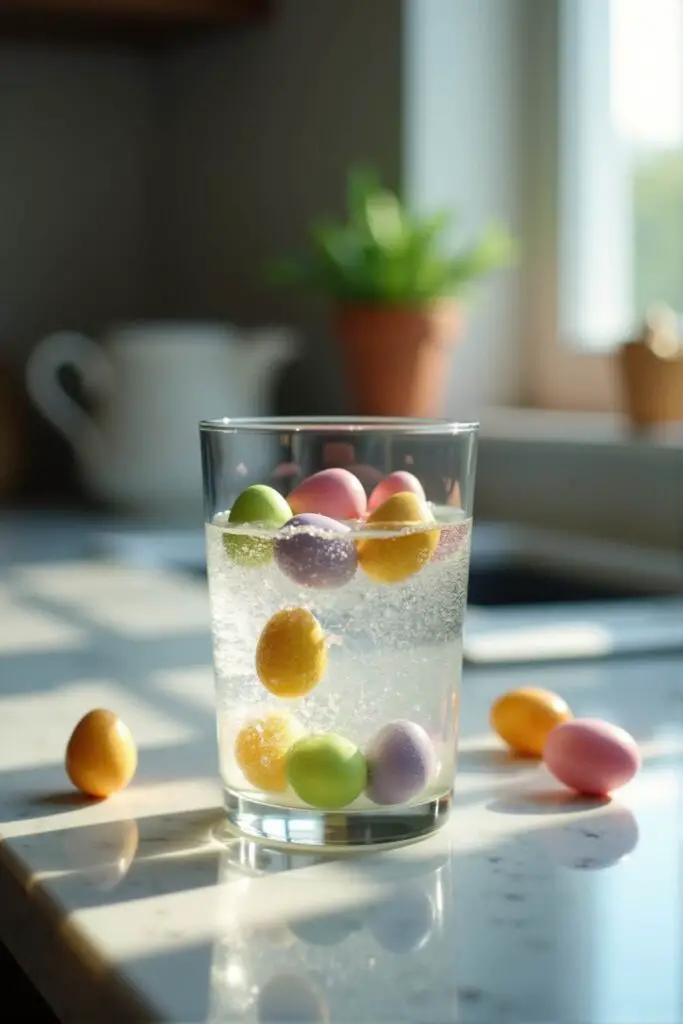
Bring the joy of Easter to science with this festive twist on the “dancing raisins” experiment! Use small, lightweight plastic eggs, mini marshmallow eggs, or candy eggs to create a bubbling, dancing display in a carbonated drink. Kids will love watching the eggs bob up and down while learning about density, buoyancy, and the magic of carbon dioxide bubbles.
Materials Needed
- Clear carbonated beverage (e.g., club soda, sparkling water, or a light-colored soda)
- Transparent glass or clear cup
- Small plastic Easter eggs (lightweight and hollow), mini marshmallow eggs, or small candy eggs
(Optional variation: Use a mixture of water, vinegar, and baking soda to generate bubbles.)
Steps
- Prepare the Glass: Pour the carbonated beverage into the transparent glass until it’s about three-quarters full.
- Drop in the Eggs: Gently add a few lightweight plastic eggs, mini marshmallow eggs, or small candy eggs.
- Observe the Easter Magic: Watch as the eggs sink, then rise and fall in a whimsical “dancing” motion as bubbles attach to them, lift them up, and then pop at the surface.
(Tip: If the eggs stop dancing, gently stir or refresh your carbonated drink.)
How It Works
- Eggs Sink First: Initially, the eggs are denser than the liquid, so they sink to the bottom.
- Bubble Magic: Carbon dioxide (CO₂) bubbles in the drink cling to the textured surfaces of the eggs. As these bubbles collect, they reduce the density of the egg-and-bubble combination, causing it to float.
- Pop & Drop: When the eggs reach the surface, the bubbles pop, making the eggs denser again so they sink. The process repeats as long as there are enough bubbles in the liquid.
STEM Concepts
- Density & Buoyancy: Explore how objects can float or sink based on their density and the effect of attached gas bubbles.
- Properties of Gases: Learn how carbon dioxide bubbles form, stick to objects, and influence their motion.
- Chemical Reactions (if using baking soda and vinegar): Discover how a reaction generates carbon dioxide to make the eggs dance.
- Observation & Hypothesis: Encourage kids to predict, observe, and explain the motion of the eggs, fostering critical thinking.
DIY Easter Lava Lamp – Sensory Activity & Density Experiment
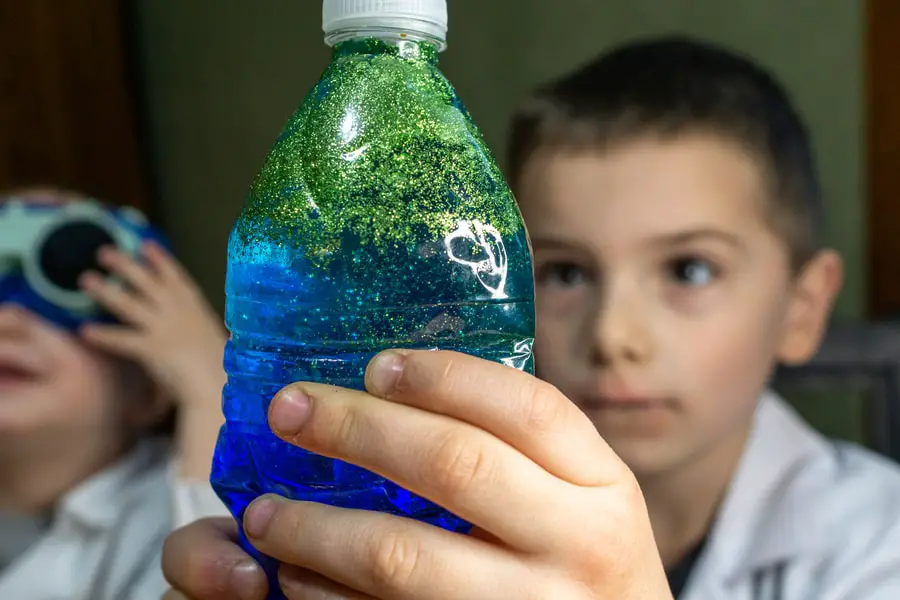
Celebrate Easter with a festive and colorful lava lamp experiment! Add pastel hues, Easter-themed decorations, or even tiny egg-shaped confetti for a seasonal twist. This hands-on activity is a perfect way for kids to learn about density, chemical reactions, and immiscible liquids while enjoying some holiday fun.
Materials Needed:
- A clear plastic or glass bottle or jar
- Water
- Vegetable oil
- Food coloring (pastel shades like pink, yellow, or light blue)
- Effervescent tablets (like Alka-Seltzer) or baking soda and vinegar
- Glitter or Easter-themed confetti (like bunnies, eggs, or flowers) (optional)
- Stickers or markers to decorate the bottle with Easter eggs, bunnies, or spring flowers
- Optional: Flashlight for illumination
Steps for the Activity:
- Decorate Your Bottle (Optional): Use Easter-themed stickers, draw designs with markers, or tie a pastel-colored ribbon around the neck of the bottle for a festive touch.
- Prepare the Base: Fill the bottle about one-quarter full with water.
- Add the Oil: Carefully pour vegetable oil into the bottle until it’s nearly full. Leave some space at the top.
- Color the Water: Add a few drops of food coloring in pastel shades like pink, yellow, or light blue. The drops will mix with the water but not the oil.
- Add Sparkle (Optional): Sprinkle in glitter or Easter-themed confetti for extra holiday flair.
- Start the Reaction:
- If using effervescent tablets, break one into smaller pieces and drop them into the bottle.
- If using baking soda and vinegar, first add a tablespoon of baking soda to the bottle, then slowly pour in vinegar.
- Watch the Magic: Observe the pastel-colored bubbles rise and fall through the oil, creating a beautiful Easter lava lamp effect.
- Illuminate (Optional): Shine a flashlight underneath the bottle for a glowing, festive effect.
How It Works:
Water and oil don’t mix because water molecules are polar, meaning they have a slight charge, while oil molecules are non-polar, with no charge. Polar molecules attract each other and exclude non-polar ones, causing the oil to separate and float on the denser water. When the effervescent tablet or baking soda and vinegar react, they release gas bubbles that carry the pastel-colored water (and glitter or confetti, if used) upward through the oil. Once the gas escapes, the denser water sinks back down, creating the lava lamp effect.
STEM Concepts Involved:
- Density: Why oil floats on water and why they don’t mix.
- Chemical Reactions: Gas production from effervescent tablets or baking soda and vinegar.
- States of Matter: Interactions between solids, liquids, and gases.
- Experimentation: Kids can try different pastel colors, decorations, or glitter amounts to customize their Easter lava lamp.
Easter Layered Liquid Density Experiment
Celebrate Easter with a colorful, spring-themed layered liquid density experiment! Create a pastel density tower inspired by Easter eggs and springtime, complete with fun decorations like mini chocolate eggs and bunny confetti.
Materials Needed:
- A tall, clear glass or container
- Water
- Pastel food coloring (pink, yellow, blue, or purple)
- Dish soap (clear or colored to match the theme)
- Honey (or corn syrup dyed yellow or pink)
- Vegetable oil
- Rubbing alcohol
- Easter-themed decorations (e.g., plastic mini eggs, bunny-shaped confetti, or small chocolate eggs)
- Measuring cup
- Spoon
Steps:
- Prepare the liquids:
- Pour each liquid into separate measuring cups.
- Add pastel food coloring to the water and rubbing alcohol (choose different pastel colors for variety).
- If using clear dish soap, add pastel coloring to match your Easter theme.
- Dye the honey (or corn syrup) yellow or pink for a cheerful base layer.
- Layer the liquids:
- Begin with the honey (or dyed corn syrup) at the bottom, representing the “sweetness of Easter treats.”
- Slowly add the dish soap as the second layer, symbolizing “spring renewal.”
- Pour pastel-colored water as the third layer, representing “springtime rain.”
- Carefully add vegetable oil as the fourth layer, representing the “sunshine of spring.”
- Finish with pastel-colored rubbing alcohol as the top layer, symbolizing the “airy joy of Easter celebrations.”
- Decorate and observe:
- Sprinkle in Easter-themed decorations like plastic mini eggs, bunny confetti, or small chocolate eggs. Observe how they float or sink to different layers based on their density.
- Admire your Easter-themed density tower!
How It Works:
The liquids stack in layers based on their density, with honey (or corn syrup) at the bottom as the densest, and rubbing alcohol floating on top as the least dense. The pastel colors and Easter decorations make the experiment festive and visually appealing.
When you add the mini eggs or other decorations, they either float or sink depending on their density relative to the liquids, enhancing the understanding of buoyancy and density.
STEM Concepts Involved:
- Density: Understanding how liquids and objects of varying densities behave.
- Buoyancy: Observing how Easter-themed items interact with the density layers.
- Properties of matter: Exploring how liquids and solids differ in terms of weight and volume.
- Thematic creativity: Combining science with the holiday spirit of Easter.
- Scientific method: Encouraging predictions, observations, and experimentation in a festive context.
- Easter Eruption
- Celebrate Easter with a colorful and exciting twist on the classic volcano experiment! Create a bubbling eruption inside a decorated Easter egg or an egg-shaped container. This festive activity combines science with Easter fun, making it perfect for kids.
- Materials Needed:
- Baking soda (about 2 tablespoons)
- Vinegar (about ½ cup)
- Plastic Easter egg or egg-shaped container
- Tray or large pan (to catch the overflow)
- Food coloring (pastel colors for an Easter theme)
- Dish soap (optional, for frothier bubbles)
- Small Easter decorations like egg stickers or confetti (optional)
- Spoon for stirring
- Steps:
- Prepare your Easter egg volcano: Place the bottom half of a plastic Easter egg in the center of a tray. Decorate it with Easter-themed stickers if desired.
- Add baking soda: Fill the egg container with about 2 tablespoons of baking soda.
- Add color: Drop a few drops of pastel food coloring (e.g., pink, yellow, or purple) into the baking soda. For extra frothy foam, add a small squirt of dish soap.
- Optional sparkle: Sprinkle some Easter-themed confetti on top of the baking soda for added fun.
- Pour in the vinegar: Slowly pour vinegar into the egg container until the reaction begins.
- Watch the eruption: Enjoy the colorful foamy “lava” bubbling over like an Easter surprise!
- How It Works (The Science Behind the Eruption):
- The bubbling eruption occurs because vinegar (an acid) reacts with baking soda (a base) to produce carbon dioxide gas. This gas forms bubbles, creating the frothy overflow that looks like lava. Adding dish soap traps the gas in the bubbles, creating more foam. The pastel food coloring and decorations give it a festive Easter theme.
- STEM Concepts Involved:
- Chemistry: Learn about acid-base reactions and gas production.
- Physical Science: Observe how gas expansion creates pressure and foam.
- Scientific Method: Experiment with different amounts of ingredients to explore how the reaction changes.
- Creativity and Design: Use Easter decorations and pastel colors to combine art with science.
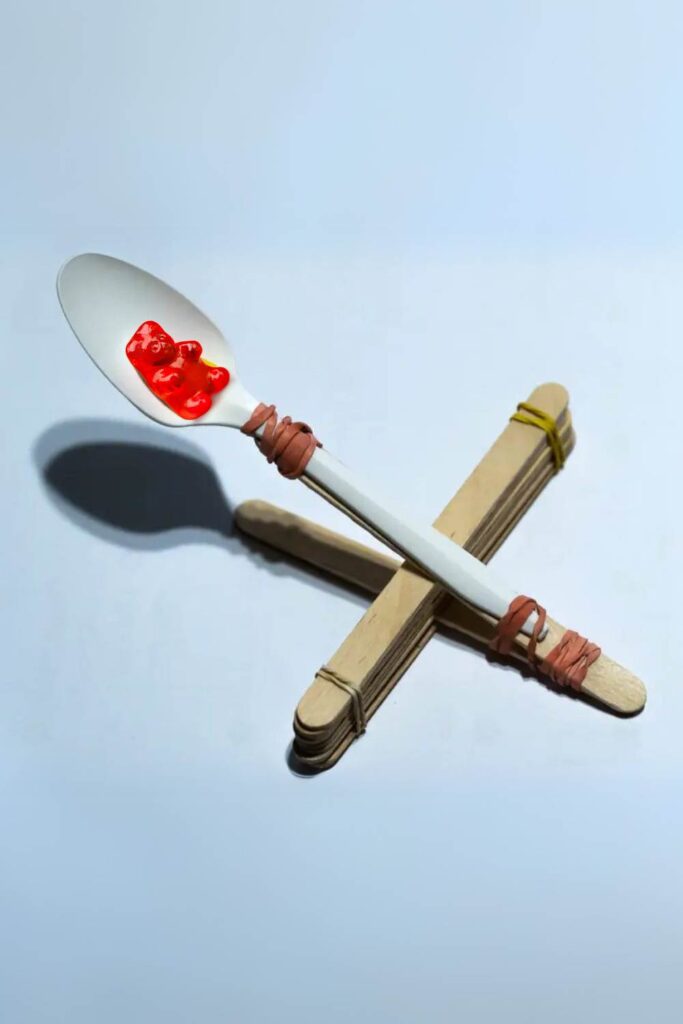
Easter Craft Stick Catapult
Hop into Easter with a festive craft stick catapult! Use it to launch small Easter-themed items, like mini eggs, pom-poms, or paper bunnies, while learning about energy, motion, and design. Decorate it with pastel colors and Easter motifs for extra fun.
Materials Needed:
- 10 craft sticks (painted in pastel colors or decorated with Easter-themed designs)
- 4-6 rubber bands
- Plastic Spoon
- Easter-themed items to launch (e.g., mini plastic eggs, pom-poms, or paper chicks)
- Markers, glitter, or stickers (e.g., bunnies, eggs, flowers) for decoration
Steps:
- Decorate the Materials:
- Paint the craft sticks in pastel shades like pink, blue, and yellow. Add Easter stickers or draw designs such as eggs, flowers, or bunnies.
- Prepare the Base:
- Stack 7 decorated craft sticks together and secure them tightly with rubber bands on each end.
- Create the Lever Arm:
- Stack 2 decorated craft sticks together and wrap a rubber band around one end to keep them together.
- Assemble the Catapult:
- Slide the stack of 7 sticks between the two sticks of the lever arm, positioning them closer to the rubber-banded end.
- Secure the lever arm to the base by crisscrossing a rubber band around the center.
- Attach the Launcher:
- Use a rubber band to attach the spoon to the free end of the top craft stick (the lever arm).
- Test Your Easter Catapult:
- Place an Easter-themed item in the launcher.
- Press down on the lever arm and release to launch it.
- Experiment with different designs, such as varying the stack height or using items of different weights.
How It Works:
The Easter catapult demonstrates energy transformation. Pressing down on the lever arm stores potential energy in the craft sticks and rubber bands. When released, this energy converts into kinetic energy, propelling the object. Adjustments to the design can change the trajectory and distance of the launch.
STEM Concepts:
- Engineering:
- Building and customizing a functional Easter-themed machine.
- Testing and improving the design for optimal performance.
- Physics:
- Exploring energy transformations (potential to kinetic).
- Observing forces, motion, and trajectories.
- Mathematics:
- Measuring distances and calculating averages.
- Analyzing how design changes impact performance.
- Scientific Method:
- Making predictions and testing hypotheses about how variables (e.g., object weight, stack height) affect outcomes.
- Recording observations and drawing conclusions.
This egg-citing Easter STEM activity combines learning with holiday fun, engaging kids with creativity, experimentation, and playful challenges!
Related Post Alert
If you or the kids love launching things, check out our post on catapult builds
Egg Drop Challenge
Yes, you probably remember the egg drop challenge from your science classes because it is a popular way to teach children the fundamentals of physics. The classic egg drop challenge somehow finds its way onto any STEM challenge round up list.
The goal is to create a container that will stop an egg from breaking when it hits the ground from a high drop. It’s so versatile, in that you can use a variety of materials to cushion your egg as part of the challenge.
The great thing about the egg drop challenge is that it’s not limited to any set list of materials. This means you can change up the challenge to use only recycled materials such as egg cartons, plastic bags, toilet paper rolls, straws, and other normally discarded materials to create a structure that would cushion the eggs landing so that it doesn’t crack upon impact.
Try using any recyclables, or maybe set the parameters of the challenge to a smaller set of materials; for instance only cardboard tubes like toilet paper rolls and paper towel rolls. (You can check out our whole post on activities for kids using toilet paper tubes for more projects.)
Easter Crystal Growth Experiment
Celebrate Easter by growing crystals on pipe cleaners shaped like eggs, bunnies, or flowers! This hands-on activity combines science and creativity, allowing kids to craft colorful Easter decorations while exploring the process of crystallization.
Materials:
- Pastel-colored pipe cleaners (pink, yellow, blue, green, etc.)
- Borax powder (or salt/sugar as alternatives)
- Boiling water
- Glass jars or clear plastic cups
- Spoons for stirring
- String or thread
- Pencils or sticks (to suspend the pipe cleaners)
- Food coloring (pastel shades)
- Scissors
- Glitter (optional, for extra sparkle)
Steps:
- Shape the Pipe Cleaners: Twist pipe cleaners into Easter-themed shapes like eggs, bunnies, chicks, or flowers.
- Prepare the Solution: Boil water and pour it into the jars. Add borax powder (1 tablespoon per cup of water) and stir until no more dissolves, creating a supersaturated solution. Add pastel food coloring for a festive touch.
- Suspend the Shapes: Tie the pipe cleaner designs to a pencil with string and balance the pencil across the jar, ensuring the shapes are fully submerged without touching the jar’s sides.
- Wait and Observe: Place the jars in a safe location. Over 12–24 hours, watch as crystals form on the pipe cleaners.
- Remove and Dry: Once the shapes are covered in crystals, remove them and let them dry. Add glitter for extra Easter sparkle.
How It Works:
This experiment demonstrates crystallization, where borax particles from a supersaturated solution settle on pipe cleaners as the water cools. These particles form a lattice structure, creating sparkling, crystal-coated designs.
STEM Concepts:
- Chemistry: Learn about solubility, supersaturation, and the crystallization process.
- Physics: Explore the geometric patterns and structures of crystals.
- Art and Design: Combine creativity with science by crafting Easter shapes and choosing pastel colors.
- Scientific Method: Encourage forming hypotheses, observing crystal growth, and drawing conclusions.
- Festive Connection: Tie STEM learning to Easter celebrations for a fun, themed activity.
This Easter-themed experiment is a perfect blend of science, creativity, and holiday cheer!

Easter Wrap-Up:
This Easter, you’ve done more than hunt for eggs—you’ve explored the wonders of science! From crafting sparkling crystal eggs to creating Easter-inspired experiments, these activities show how fun and exciting STEM can be.
Along the way, kids have discovered new ideas, built confidence, and made memories that will last long after the holiday. Keep experimenting and exploring, and remember—Easter may come once a year, but the joy of discovery is always in season. Happy experimenting, and happy Easter!