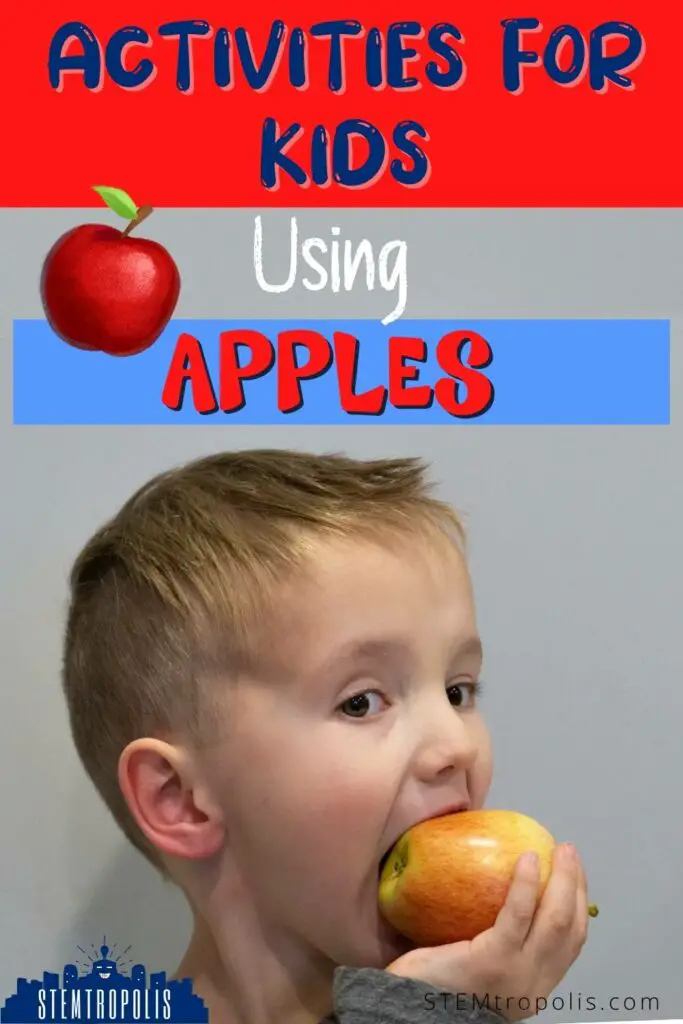
Science lessons don’t have to be difficult or boring. You can make science accessible and fun with some easy experiments with materials you already have at home. Our boys love apples, so it was easy to hold their attention (and occasionally let them sneak eating a slice) when doing an apple science experiment.
Here are some fun hands-on learning activities you can do at home (or in the classroom) with apples! These activities require basic materials you should already have at home and are super easy to perform!

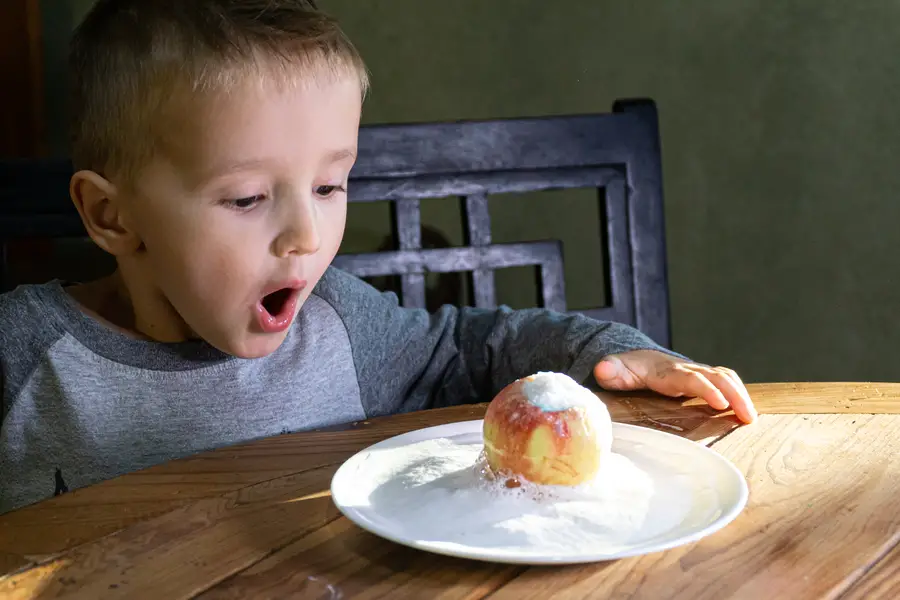
Apple Volcano Experiment
The Apple Volcano, as you may imagine, involves creating a miniature volcano within an apple (via a safe chemical reaction.) Who doesn’t love a good volcano experiment?
The experiment aims to introduce the basics of chemistry to younger children, namely how different properties when interacting with each other can create unexpected and exciting results.
These chemical reactions also illustrate how matter changes relative to external forces, allowing for an introduction to the three primary forms of matter, namely, solids, liquids, and gas.
Finally, it serves as both visualization of chemistry in action and how different properties, and their differing results, teach children about the importance of closely observing visual information as a source of comparison.
The volcanic activity in our experiment comes from an acid and base reaction. Kids love watching the classic vinegar and baking soda fizzy eruption. The lemon juice is acidic like vinegar, and we’re going to compare the similarities and differences of both reactions.
What Do You Need For The Apple Volcano Experiment?
To produce two different reactions for purposes of comparison (namely a “Vinegar Volcano” and a “Lemon Juice Volcano,” you will need the following:
- Two apples
- Two bowls
- knife
- A teaspoon
- A water jug or cup
- Baking soda
- Vinegar
- Lemon juice
- Dish soap
- Food Coloring (optional)
How Do You Perform The Apple Volcano Experiment?
Step One:
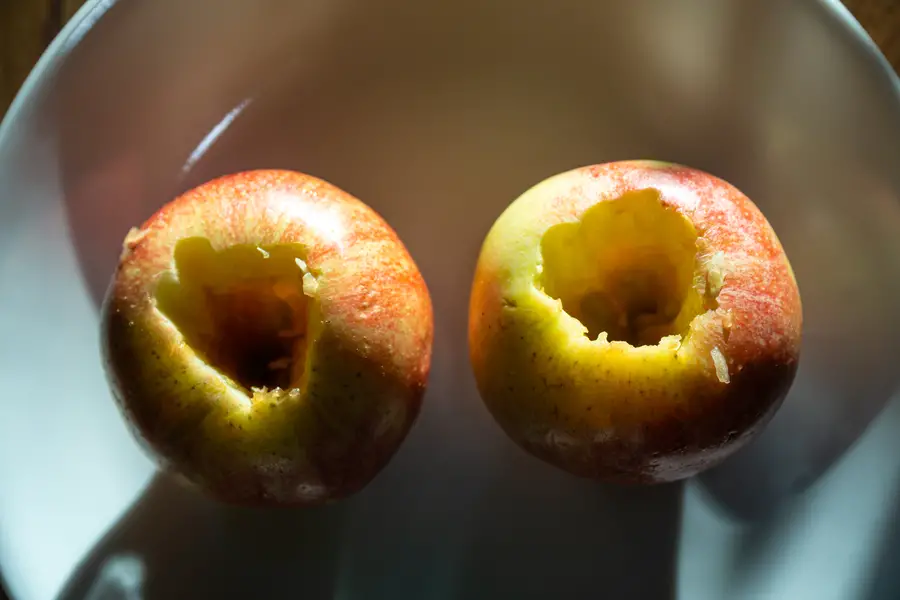
Cut a hole from the top of each apple with a knife (with proper adult supervision for younger kids!) The hole should run approximately halfway down to the center of each apple. You’re hollowing out a portion for the volcano.
Step Two:
Place each apple in its own bowl to catch the overflow of liquid and fizz from each reaction.
Step Three:
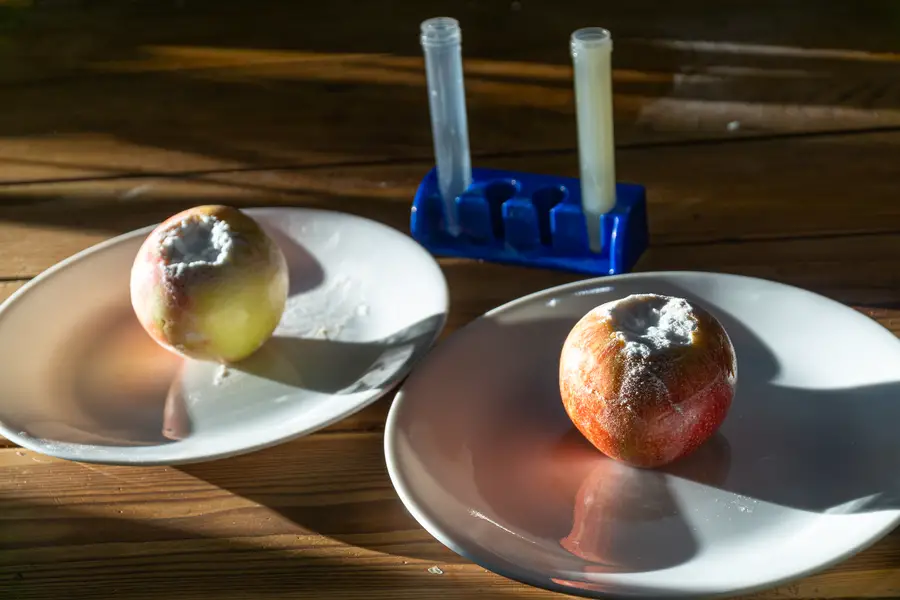
Add a few heaped teaspoons of baking soda into each apple, as well as a few drops of dish soap. Mix the baking soda solution with the teaspoon to form a paste within each apple. You can use a toothpick to stir since there isn’t much room in the apple itself, or mix up your paste first before spooning it into the apple.
Step Four:
Fill up the water jug with just enough vinegar to fill up the majority of the hole cut into whichever apple you decide to experiment on first.
Slowly pour the vinegar into the apple and watch the subsequent ‘eruption,’ making a note of keen observations such as the reaction’s intensity, the reaction’s length, the speed of the reaction, and the sound of the reaction.
Step Five:
Thoroughly rinse and dry the water jug (or use a different container) and repeat the experiment as discussed in Step Four above on the “un-erupted” apple, but this time using lemon juice instead of vinegar.
You don’t need to use exact measurements (it’s going to fizz!) though make sure you use the same amount of baking soda and dish soap in each of the experiments so your results are comparable.
Once again, take careful note of all observations of the new reaction in the second apple.
Step Six:
Compare observation notes of the different reactions. Which one fizzed more? Did you notice any major differences between the vinegar and lemon juice?
If you want to learn more about what makes it fizz, check out our post on the chemical reaction with vinegar and baking soda.
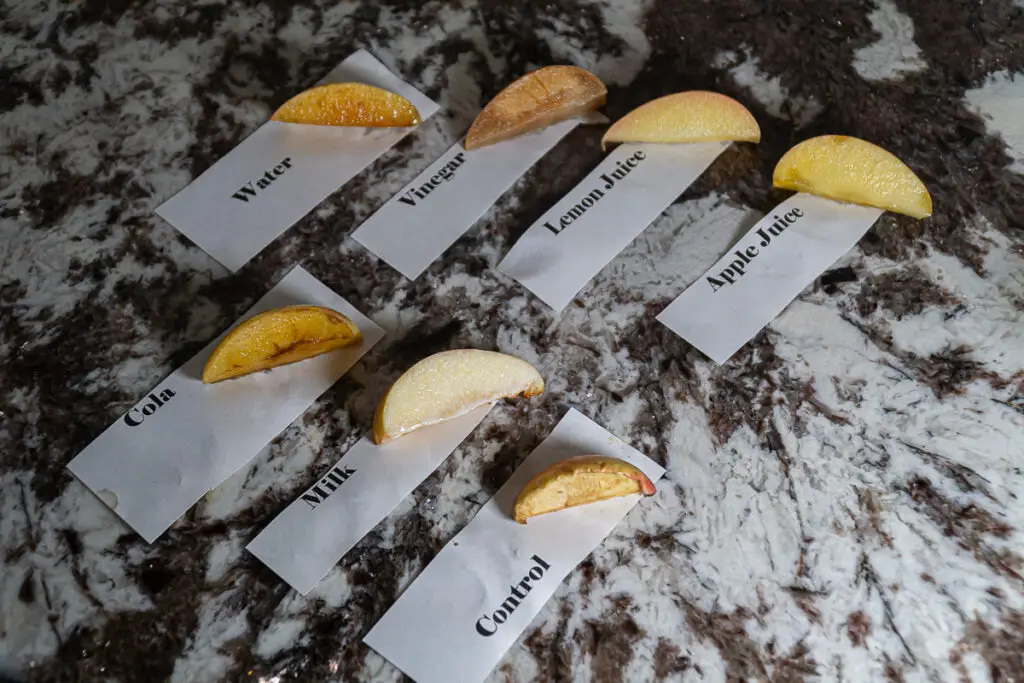
Apple Oxidation Experiment – What makes apples turn brown?
The Apple Oxidation Experiment is an easy apple activity that involves submerging a variety of apple slices in different liquids and comparing against an un-submerged control slice.
The experiment aims to introduce the process by which apples are browned due to exposure to oxygen in what is known as oxidation.
This teaches students the basic concepts of artificial preservation and horticulture and the importance of observation and comparison (similar to the first activity above).

What Do You Need For The Apple Oxidation Experiment?
The following will be needed to perform the experiment successfully:
- 6 cups or glasses
- ¼ cup of water,
- ¼ cup of vinegar,
- ¼ cup of lemon juice,
- ¼ cup of milk,
- ¼ cup of cola
- A knife,
- An apple, and
- Pen and paper for labels
How Do You Perform The Apple Oxidation Experiment?
Here are the four easy steps below to perform the Apple Oxidation Experiment at home!
Step One
Write labels for the liquids you will be testing water, vinegar, lemon juice, cola, and milk. (We printed some labels.)
One will also be labeled “Control,” as this will not contain any liquid and act as your control.
Step Two
Add the ¼ cup of each liquid to their respective corresponding cup; ¼ cup of milk into the bag labeled “milk,” the ¼ cup of water labeled “water,” etc.
Step Three
Cut the apple into slices and place the apple slices into each cup.
Stir them slightly to fully submerge the apple slices.
Step Four
Leave them sit for twelve hours, checking every so often to observe and compare the level of oxidation of the apple slices to each respective liquid.
What did you observe? Which liquid kept the apples from browning? Which apples had the most oxidation? Here’s how our apple slices oxidized after about 24 hours.
To see the experiment performed for visual clues to the above steps, see below the video from the WebsterPublicLibrary YouTube Channel (note the added variety of liquids and use of glasses as opposed to sandwich bags, for further variation):
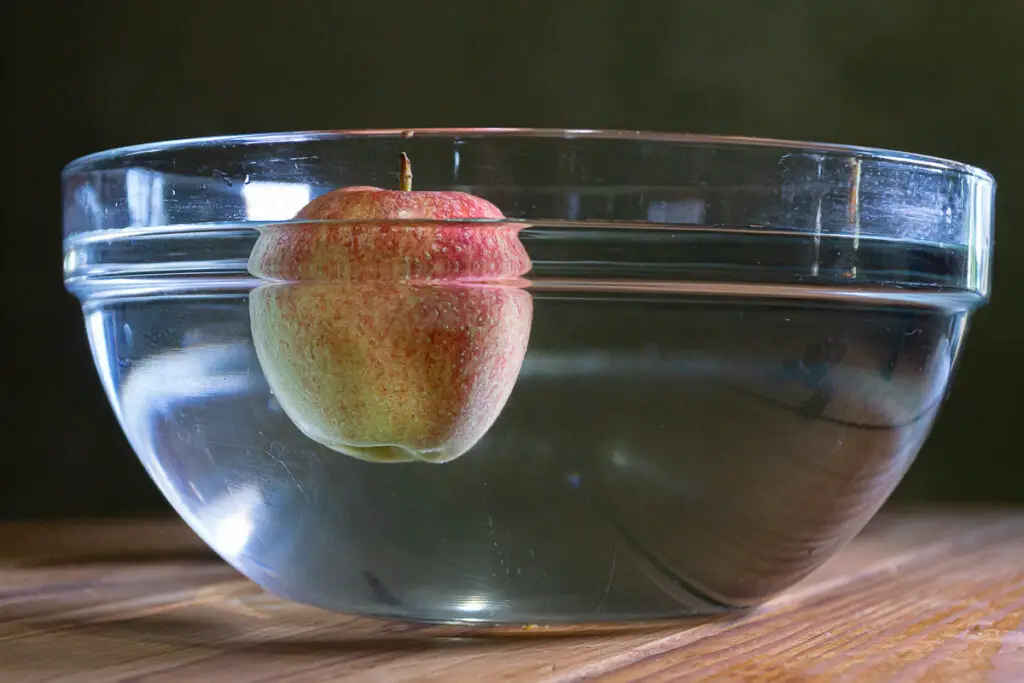
Apple Float Experiment
The Apple Float Experiment involves comparing whether certain fruits float and examining why apples float, but not others (note: this activity can include many fruits, whereby the same outcomes will be achieved).
The experiment allows children to learn the scientific method. They should be encouraged to forecast the outcome to understand the purpose of a “hypothesis” and why experimentation is needed to determine the correct answer.
What Do You Need For The Apple Float Experiment?
The following will be needed to perform the experiment successfully:
- A large glass bowl or bucket of water,
- An apple,
- Other fruits to compare (we tried a banana, orange, mango, grapes, and blueberries)
- Any other fruit you may wish to experiment with (optional)
How Do You Perform The Apple Float Experiment?
Here are the three easy steps below to perform the Apple Float Experiment at home!
- Fill up a bowl bucket with sufficient water to allow space for the fruits to either sink or float.
- Predict which fruits you believe will sink or float.
- Drop each fruit, one after the other, into the bucket of water. Record the results for purposes of comparison and to facilitate a conversation of hypothesis and density.
What did you notice? What fruits floated and which ones sank? Here’s how our data looks:
| Fruit | Sink | Float |
|---|---|---|
| Apple | X | |
| Orange | X | |
| Banana | X | |
| Mango | X (mostly) | |
| Grape | X | |
| Blueberry | X |
What’s Happening? The reason why apples float and not, grapes, blueberries, or mangoes, is because apples are about 1/4 air, meaning they are less dense than water. Thus they float while some other fruits will sink.
Wrap Up – Apple Science Experiments for Kids
It’s a challenge to keep kids occupied, engaged, and learning. Using items they’re familiar with can help hold their attention and allow them to relate to what they are observing. A fun apple experiment can level up your snack time! These educational activities for kids showcase various ways for you and your family to learn with a few apples and everyday household items.
For more kitchen science, check out our posts on cooking with STEM and activities with food.