
Microwaves are not just for heating up leftovers! With a few simple materials and a bit of creativity, you can do some exciting and educational experiments in the microwave. From watching plasma sparks to blowing up marshmallows, these activities can help children learn about a variety of scientific principles while having fun.
Jump to your favorite activity:
Microwave Marshmallow
Expanding Soap
Plasma Grapes
Dancing Raisins
DIY Popcorn
Lava Lamp
Melting Chocolate
We got a new microwave oven, and I was pleasantly surprised that the door was clear enough that we could not only clearly see, but record videos! The kids loved these experiments, and I’m hoping you will too.
When doing these experiments, watch closely and have your finger near the cancel button in case you need to turn it off quickly. When items get superheated in the microwave they can explode. Also, be prepared for a messy microwave.
Microwave Marshmallow
In this experiment, kids will learn about the science of heat and how it affects marshmallows. They’ll be amazed as they watch the marshmallows expand before their eyes in the microwave.
Materials needed:
- Marshmallows
- Microwave-safe plate
- Microwave
Expanding marshmallow in the microwave:
- Place a marshmallow on a microwave-safe plate.
- Microwave the marshmallow for 10-15 seconds until it starts to expand.
- Watch as the marshmallow grows in size and then quickly remove it from the microwave.
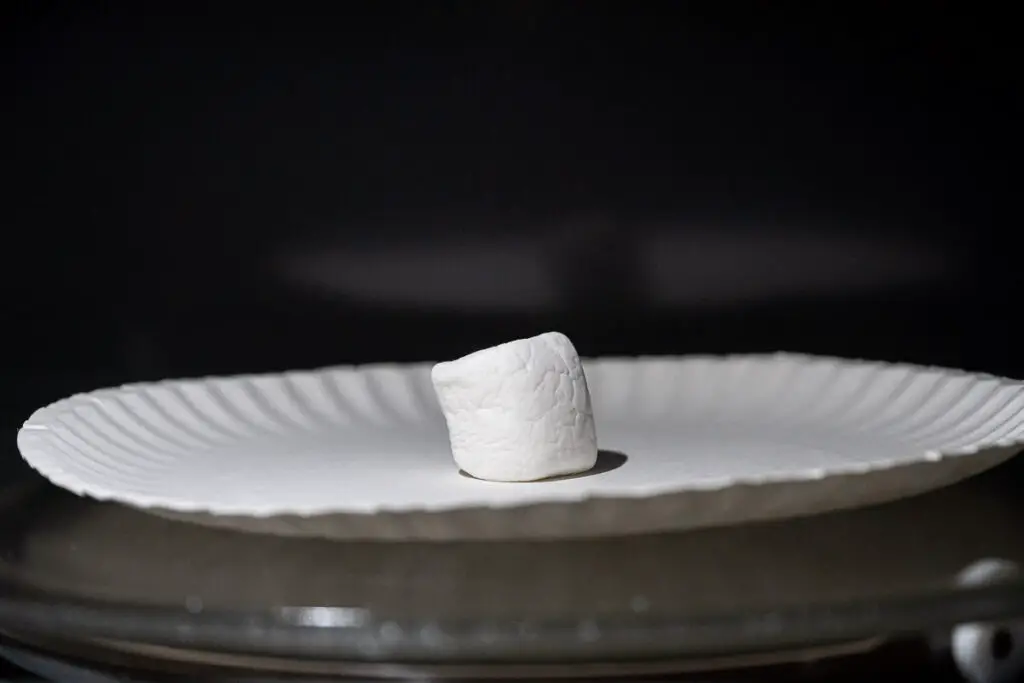
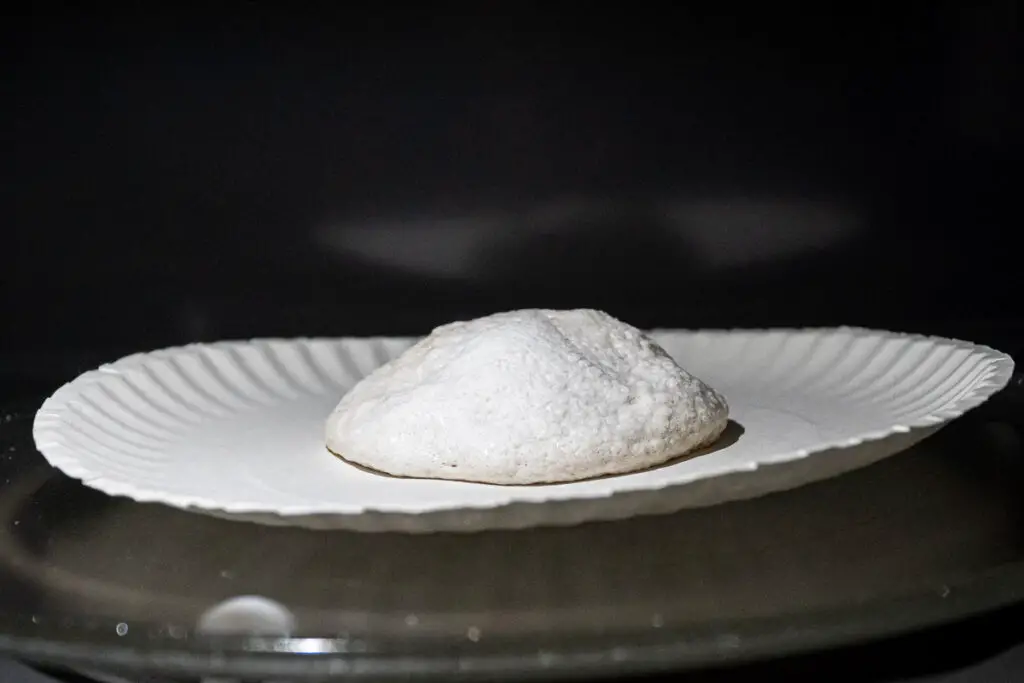
When you cook a marshmallow in the microwave, it gets bigger and puffier because of the heat. Marshmallows are mostly made up of sugar, water, and air, so when they are exposed to microwaves, the water and sugar molecules begin to vibrate and generate heat.
As the molecules inside the marshmallow vibrate faster, this movement creates heat, and the water inside the marshmallow turns into steam.
Related Post: Find out how water changes states of matter and do some more fun experiments!
Steam is like hot air that takes up more space than water, so it makes the marshmallow get bigger and bigger. Plus, there’s air trapped inside the marshmallow, and that air also expands when it gets hot, so the marshmallow gets even puffier.
Just be careful not to cook the marshmallow for too long, or it might pop or catch fire!
Expanding Soap
In this experiment, we’ll learn about how pockets of air can cause objects to expand when heated. We’ll watch as a bar of soap expands to many times its original size in the microwave.
Materials needed:
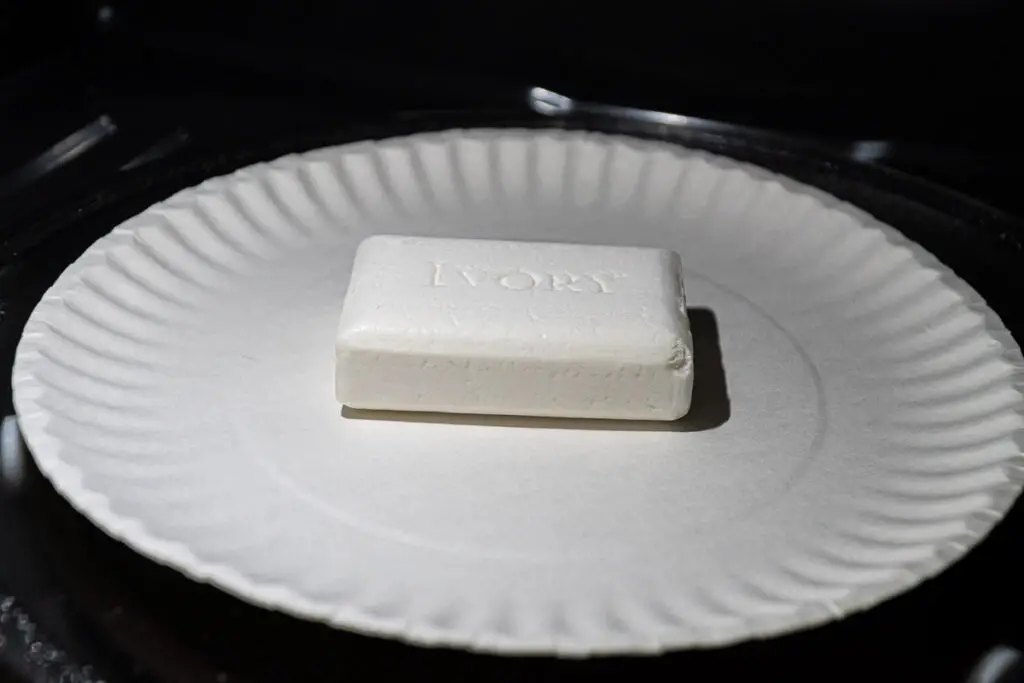
- Bar of Ivory soap (it must be Ivory brand)
- Microwave-safe plate
- Microwave
Expanding Ivory Soap in the microwave:
- Place an Ivory Soap bar in a microwave-safe dish or bowl.
- Microwave the soap for 1-2 minutes until it expands into a foam-like substance.
- Watch as the soap expands and then let it cool before handling.
When Ivory soap is cooked in a microwave oven, it expands because of a special property called “microwave energy absorption.”

Microwaves are a type of electromagnetic radiation, which is a form of energy. When the microwaves from the oven hit the soap, they are absorbed by the water molecules and fatty acids inside the soap. This causes the soap to heat up and melt slightly.
As the soap heats up, the air bubbles that are trapped inside the soap begin to expand rapidly. The expanding air bubbles push against the softened soap, causing it to expand outward in all directions. This is why the soap appears to “grow” when it’s cooked in the microwave. (much like our microwave marshmallow!)
It’s important to note that not all bar soap will expand when cooked in the microwave – it has to be Ivory brand soap specifically. This is because Ivory soap is made with a special whipped texture that incorporates lots of air bubbles. When heated in the microwave, these air bubbles cause the soap to expand dramatically. Bars of soap from other brands won’t react the same way.
Plasma Grapes
Grapes are not a food we’d usually heat up to enjoy, but they make a cool simple science experiment with a great visual. While this experiment can be dangerous if not done properly, it’s a fascinating example of the science behind microwave radiation and plasma. Here’s how you can try it for yourself (with adult supervision, of course).
Materials:
- A grape (preferably seedless)
- A microwave
- A microwave-safe dish
- A knife or scissors
How to create a plasma grape:
- Cut the grape in half so that the two halves are still connected by a small piece of skin.
- Place the grape in the center of the microwave-safe dish.
- Put the dish in the microwave and set the timer for 5-10 seconds on high power.
- Turn on the microwave and watch the grape closely.
After a few seconds, you should see a small spark of plasma form where the two halves of the grape meet. If the grape doesn’t spark after 10 seconds, stop the microwave and check to make sure the grape is still intact. If it is, try again with a few more seconds of microwaving.
You can expect the grape to steam and explode if it heats too much, so be prepared for a bit of a mess.
When you put a grape in the microwave, you’re witnessing a phenomenon known as plasma. The microwave radiation interacts with the grape’s skin, causing a small electrical current to be generated. This current flows through the grape’s flesh, creating a tiny spark of plasma at the point where the two halves of the grape meet.
This plasma spark is very hot, and it quickly heats up the grape’s juice, causing it to turn into steam. The steam builds up pressure inside the grape. If it heats enough, the grape will explode with a small but audible pop – and a mess!
It’s important to note that this experiment can be dangerous, as the plasma spark can create a fire if the grape is left in the microwave for too long.
Dancing Raisins
In this experiment, kids will learn about the science of carbon dioxide bubbles and how they can cause objects to move. They’ll have fun watching the raisins dance up and down in a glass of clear soda.
Materials needed:
- Raisins
- Clear carbonated soda (like Sprite or 7-Up)
- Microwave-safe glass
- Microwave
Making Raisins Dance in the Microwave
- Put a few raisins in a microwave-safe glass of clear carbonated soda.
- Place the glass in the microwave and heat it for about 30 seconds.
- Watch as the raisins start to “dance” as they float up and down in the glass due to the carbon dioxide bubbles.
The dancing raisins experiment involves the science of carbonation, which is the process by which carbon dioxide gas is dissolved in a liquid under pressure. Carbonated soda (like Sprite or 7-Up) contains lots of carbon dioxide bubbles that are trapped in the liquid.
Now we’ll bring the heat! When you put raisins in the soda and then heat it in the microwave, the carbon dioxide bubbles become more active due to the increased heat energy. As the carbon dioxide bubbles rise to the surface of the liquid, they attach themselves to the rough surface of the raisins. When the bubbles reach the surface, they pop, causing the raisins to sink back down to the bottom of the glass.

This creates a cycle of rising and sinking that makes the raisins “dance” in the liquid. The effect is similar to the way bubbles in a boiling pot of water make pasta or vegetables move up and down.
It’s worth noting that the raisins won’t dance forever – eventually, the carbon dioxide bubbles will become less active as they dissipate into the air. And you’ll have some warm, flat soda. But for a short time, it’s a fun and visually interesting experiment that demonstrates the principles of carbonation and gas behavior. Our raisins slowed down after about 3 minutes after removing them from the microwave and had pretty much settled down after 4 or 5 minutes.
DIY Popcorn
In this experiment, we’ll see how heat (and a bit of pressure) can make even the most stubborn popcorn kernels pop when heated. Don’t let those unpopped kernels go to waste!
Materials needed:
- Unpopped popcorn kernels
- Microwave-safe bowl
- Microwave-safe lid or plate
- Salt, butter, cheese, or other toppings (optional)
- Place a handful of unpopped popcorn kernels in a microwave-safe bowl, and cover with a microwave-safe lid or plate. (We used a second small glass bowl for our lid.)
- Microwave the popcorn for a few minutes until the kernels stop popping. Two minutes did the trick for us.
- You can add your own seasonings and toppings, like salt, butter, or cheese.
Each popcorn kernel is made up of a hard outer shell and a small amount of water and starch on the inside. When heated, the bit of water inside the kernel turns into steam and expands, putting pressure on the hard shell. Eventually, the pressure inside the kernel becomes so great that it causes the shell to burst open, releasing the starchy insides and causing the familiar “pop” sound.
By covering the popcorn kernels with a microwave-safe lid or plate, you create a sealed environment that allows the pressure to build up even more, resulting in more kernels popping at once. The steam that escapes from the popcorn kernels during popping not only adds pressure, but carries with it the delicious aroma that makes popcorn smell so good.
Once the popcorn is finished popping, you can season it with butter, salt, cheese, or other toppings to create a tasty snack. It’s important to note that not all types of popcorn are suitable for microwaving – If you’re using left over kernels from a bag of microwave-safe popcorn you shouldn’t have any issues..
Lava Lamp
For our lava lamp, we’ll learn about the science of density and how it affects liquids. We did a similar project in our post on activities with water bottles where an alka seltzer tablet made the movement. This time, we’ll use heat to make the colorful blobs move up and down like a lava lamp.
Materials needed:
- Clear glass cup
- Water
- Food coloring
- Vegetable oil
- Microwave
- Fill a clear glass about 1/4 full with water, then add a few drops of food coloring and a few drops of vegetable oil.
- Microwave the cup for a few seconds until the oil starts to float to the top.
- Turn off the microwave and watch as the oil and water separate and the food coloring makes colorful blobs that move up and down in the cup like a lava lamp.
When you add oil to water, it forms a separate layer on top because oil is less dense than water. In other words, a given volume of oil weighs less than an equal volume of water. When you heat up the mixture in the microwave, the water molecules start to move more quickly and spread out, making the water less dense. Meanwhile, the oil molecules stay the same size and shape, so the oil becomes more dense relative to the water.
As a result, the oil rises to the top of the cup while the water sinks to the bottom. The food coloring added to the cup is denser than both the oil and the water, so it forms droplets that sink through the oil and water layers. When the droplets reach the bottom of the cup, the heat from the microwaving process causes them to expand, making them less dense and causing them to rise back up through the oil and water layers.
The blobs of food coloring move up and down in the cup in a way that is reminiscent of a lava lamp, creating a fun and visually interesting display. The effect is due to the interaction between the different densities of the oil, water, and food coloring and the way that heat affects the density of substances.
Melting Chocolate
In this experiment, we’ll see how heat can melt chocolate. You can enjoy using the melted chocolate to create your own candy creations or drizzle it over fruit.
Materials needed:
- Chocolate bar or chocolate chips
- Microwave-safe bowl
- Microwave
- Optional silicon molds
- Break up a chocolate bar into small pieces and place them in a microwave-safe bowl.
- Heat the chocolate in the microwave for short intervals (10-15 seconds at a time) until it melts.
- Kids can then use the melted chocolate in silicon molds to make their own candy creations, drizzle over fruit, or dip snacks like fruit or pretzels in it for a chocolate coating!
Chocolate is made up of cocoa solids, cocoa butter (a type of fat), and sugar. When heated, the cocoa butter melts and becomes liquid, which causes the chocolate to lose its solid shape and turn into a smooth liquid.
However, it’s important not to heat the chocolate for too long or at too high of a temperature, as this can cause the chocolate to burn or become lumpy. This is because chocolate is sensitive to heat and can easily become damaged if not heated properly.
Though it’s best to heat the chocolate chips in short intervals, we used a medium heat setting and let it run uninterrupted for the sake of the video.
When the melted chocolate cools down, it solidifies again due to the re-solidification of the cocoa butter. This process is called crystallization. The chocolate will have a different texture and consistency than it did before it was melted, which can make it ideal for dipping or molding into different shapes.
Overall, melting chocolate in the microwave is a quick and easy way to transform solid chocolate into a liquid(ish) state. That said, if I was melting chocolate for the purpose of baking, I’d probably do it with a double boiler on the stove for a smoother more controlled consistency.
Wrap Up – Microwave Experiments for Kids
This collection of microwave experiments for kids is a great way to get them interested in science and have fun in the kitchen. Not only do microwaves provide an easy way to heat food up quickly, but they can also be used to conduct exciting and educational experiments! So get out those ingredients and get ready for some hands-on learning with your little ones.
