Valentine’s Day is all about love, creativity, and fun, so why not sprinkle in a little science, too? This collection of Valentine’s Day STEM activities is perfect for kids who love to experiment and explore.
From heart-shaped crystal-growing projects to fizzy chemical reactions that bubble like love potions, each activity is filled with excitement and discovery. Using simple materials and a dash of Valentine’s charm, these hands-on experiments bring learning and laughter together. Let’s explore!
Dancing Valentine Hearts Experiment
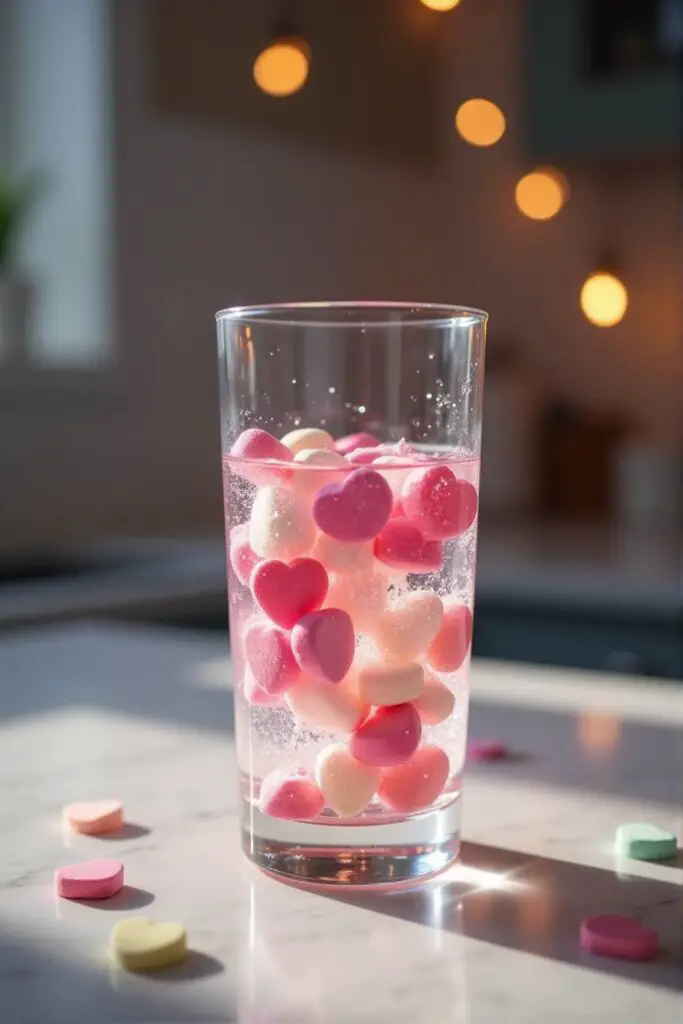
Celebrate Valentine’s Day with a festive spin on the classic “dancing raisins” experiment. Instead of raisins, use candy conversation hearts (or other small heart-shaped candies) to watch them bob and dance in a bubbly drink. It’s a sweet way to learn about density, buoyancy, and the power of carbon dioxide bubbles!
Materials Needed
- Clear carbonated beverage (e.g., club soda, sparkling water, or a light-colored soda)
- Transparent glass or clear cup
- A handful of candy conversation hearts or other small heart-shaped candies
Steps
- Fill the Glass: Pour the carbonated beverage into a transparent glass until it’s about three-quarters full.
- Drop in the Hearts: Gently add a few candy conversation hearts to the drink.
- Observe the Magic: Watch as the hearts initially sink, then start to rise and fall. Notice how they “dance” in the liquid as bubbles form on their surface, lifting them up, then burst at the top, causing them to sink again.
(Tip: If the hearts stop dancing, try stirring gently or refreshing your carbonated beverage.)
How It Works
- Sinking First: Candy hearts are usually denser than the liquid, so they sink to the bottom.
- Bubble Boost: The carbon dioxide (CO₂) bubbles in the drink attach to the uneven surfaces of the candy. As these bubbles accumulate, they decrease the overall density of the heart-and-bubble combo, causing it to float.
- Pop & Drop: When the hearts reach the surface, many of the bubbles pop, making the hearts denser again so they sink—until new bubbles attach and repeat the cycle!
STEM Concepts
- Density & Buoyancy: Observing how objects can become buoyant when gas bubbles cling to them.
- Properties of Gases: Carbon dioxide bubbles form and attach to objects, influencing whether they rise or sink.
- Observation & Prediction: Encourages young scientists to watch the motion and hypothesize why the hearts move the way they do.
Valentine’s Day Volcano
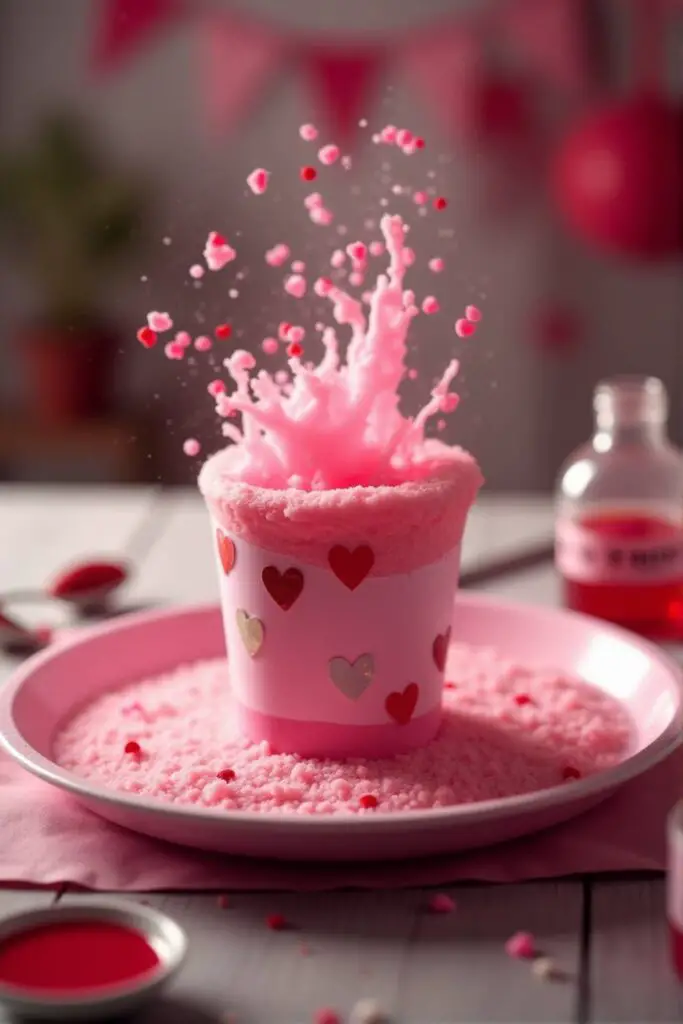
Celebrate love with a burst of bubbly excitement! In this Valentine’s Day twist on the classic baking soda and vinegar volcano, we’ll use pink or red colors, heart-shaped decorations, and all-around “lovely” vibes. Kids will be delighted to see the foamy “lava” erupt just like a mini volcano—only this time with a sweet theme.
Materials Needed:
- Baking soda (about 2 tablespoons)
- Vinegar (about ½ cup)
- Small cup or plastic container (try decorating it with heart stickers or shapes)
- Red or pink food coloring
- Dish soap (optional, for extra frothy bubbles)
- Heart-shaped confetti (optional)
- Tray or large pan (to catch the overflow)
- Spoon for stirring
Steps:
- Set the Valentine’s mood: Place your decorated cup or container in the center of the tray. You can wrap it with pink or red paper and add heart stickers.
- Add baking soda: Scoop about 2 tablespoons of baking soda into the cup.
- Make it festive: Add a drop or two of red or pink food coloring to the baking soda, plus a small squirt of dish soap if you’d like a frothier eruption.
- Optional sparkle: Lightly sprinkle heart-shaped confetti on top of the baking soda for a fun “heart eruption” effect.
- Pour in the vinegar: Slowly pour vinegar into the cup until the fizzy reaction starts.
- Enjoy the Valentine’s “lava”: Watch as the foam bubbles up and overflows, carrying the hearts and color with it!
How It Works (The Science Behind the Eruption):
When vinegar (an acid) is mixed with baking soda (a base), they react to produce carbon dioxide gas. The gas bubbles form throughout the liquid, creating the foamy overflow that looks like lava. Adding dish soap can trap these bubbles, creating more froth, while food coloring and confetti give it a festive Valentine’s look.
Science Alert!
For more on the science at work, check out our post on the chemistry of vinegar and baking soda.
STEM Concepts Involved:
- Chemistry: Learning about acid-base reactions and gas production.
- Physical Science: Observing gas expansion and how bubbles form in the reaction.
- Scientific Method: Encouraging curiosity—kids can change the amounts of ingredients to see how it affects the eruption.
- Creativity and Design: Decorating a festive Valentine’s Day volcano combines art with science.
Valentine’s Day Balloon Rocket
Send your Valentine’s wishes soaring with a heart-themed balloon rocket! In this variation of the classic experiment, decorate a balloon with hearts and love notes before launching it along a string. It’s a fun way to celebrate Valentine’s Day while learning about propulsion and Newton’s Third Law.

Materials Needed
- Balloon (preferably red, pink, or heart-printed)
- Long piece of string (6–10 feet or longer)
- Drinking straw (or small tube)
- Tape
- Two chairs (or other supports to hold the string taut)
- Markers, stickers, or cut-out hearts (for decorating)
Steps
- Decorate the Balloon
- Use stickers, markers, or paper hearts to give your balloon a Valentine’s Day makeover. Write a sweet message or draw hearts.
- Be sure to leave enough space near the neck of the balloon so the tape can attach it to the straw later.
- Set Up the String
- Tie one end of the string to the back of a chair (or another support).
- Thread the free end of the string through the straw, then tie the other end to the second chair.
- Make sure the string is pulled tight and is at a comfortable height.
- Attach the Balloon
- Inflate the decorated balloon but don’t tie it off—pinch the neck to keep the air inside.
- Use two small pieces of tape to secure the balloon to the straw. Position the balloon’s opening so it faces the starting point.
- Launch Your Valentine Rocket
- Let go of the balloon’s neck and watch the Valentine rocket zoom forward, carrying your festive message.
- Experiment with Variations
- Adjust the angle of the string to see how it affects the flight path.
- Try different balloon sizes and shapes (heart-shaped balloons add extra flair!).
- Attach small Valentine notes to the balloon for a sweet surprise.
How It Works
When you release the balloon’s neck, the air rushing out the back pushes the balloon forward. This is a perfect demonstration of Newton’s Third Law of Motion: every action (air rushing out) has an equal and opposite reaction (balloon shooting forward). The straw acts as a guide, reducing friction and keeping the balloon moving smoothly along the string.
STEM Concepts
- Newton’s Third Law of Motion: Action and reaction forces help the balloon rocket forward.
- Propulsion: The balloon generates thrust as air escapes, mimicking how real rockets work.
- Force and Motion: Demonstrates how forces cause objects to accelerate in a specific direction.
- Friction Reduction: The straw-and-string setup provides a near-frictionless path for the balloon.
Celebrate Valentine’s Day by combining science and sweetness—let your messages of love fly high and learn a bit of physics along the way!
Balloon Inflation
Spread some Valentine’s Day cheer with a fizzy, fun experiment! In this special edition of the classic baking soda and vinegar reaction, we’ll use heart-shaped (or pink/red) balloons and add a dash of festive flair—like pink or red food coloring—to celebrate the day of love. Watch the balloon inflate as “love is in the air” with carbon dioxide gas!
Materials Needed
- Small plastic or glass bottle
- Heart-shaped (or pink/red) balloon
- Vinegar (about ¼ to ½ cup)
- Baking soda (about 1–2 tablespoons)
- Pink or red food coloring (optional)
- Funnel (optional but helpful)
- Measuring spoons and measuring cup
Steps
- Add Some Valentine’s Flair
- (Optional) Put a few drops of pink or red food coloring into the vinegar. This adds a festive color and ties in the Valentine’s Day theme.
- Measure the Vinegar
- Pour approximately ¼ to ½ cup of vinegar into the bottle using a measuring cup.
- Prep the Baking Soda
- Using a funnel (or carefully with a spoon), put 1–2 tablespoons of baking soda into the balloon.
- Attach Balloon to the Bottle
- Stretch the balloon opening over the mouth of the bottle, ensuring it’s secure. Keep the balloon tilted so the baking soda remains inside.
- Mix and Observe
- Lift the balloon so the baking soda drops into the colored vinegar.
- Watch the mixture fizz, foam, and release carbon dioxide, inflating your Valentine’s balloon.
- Experiment and Personalize
- Try different balloon sizes or colors (pinks, reds, or hearts!).
- Vary the amounts of vinegar and baking soda to see how it affects inflation speed and size.
How It Works
When baking soda (a base) is combined with vinegar (an acid), the two substances undergo a chemical reaction. A key product of this reaction is carbon dioxide gas (CO₂). As the CO₂ is released, it expands within the bottle and fills up the balloon. In this Valentine’s edition, the colorful balloon and dyed vinegar add a touch of holiday spirit to the fun science behind gas production and chemical reactions.
STEM Concepts Involved
- Chemistry: Understanding acid-base reactions and the formation of new substances (e.g., CO₂ gas).
- Physics: Observing how gas pressure causes the balloon to inflate and captures the carbon dioxide produced.
- Observation & Measurement: Using measuring tools, making predictions, and noting how changes in quantities affect the reaction.
- Festive Creativity: Incorporating themes (like Valentine’s Day colors and shapes) encourages creativity and engagement with science.
DIY Lava Lamp – Sensory Activity & Density Experiment
Celebrate Valentine’s Day with a heart-themed lava lamp experiment! Add a romantic twist to this classic activity by using Valentine’s Day colors like red, pink, and white, and decorate your bottle with hearts and love-themed designs. Kids will enjoy this fun and educational project while learning about density, chemical reactions, and immiscible liquids.
Materials Needed:
- A clear plastic or glass bottle or jar
- Water
- Vegetable oil
- Food coloring (red or pink)
- Effervescent tablets (like Alka-Seltzer) or baking soda and vinegar
- Glitter or heart-shaped confetti (optional)
- Stickers or markers to decorate the bottle
- Optional: Flashlight for illumination
Steps for the Activity:
- Decorate Your Bottle (Optional): Add heart-shaped stickers, draw designs with markers, or tie a ribbon around the neck of the bottle to give it a Valentine’s theme.
- Prepare the Base: Fill the bottle about one-quarter full with water.
- Add the Oil: Carefully pour vegetable oil into the bottle until it’s nearly full. Leave some space at the top.
- Color the Water: Add a few drops of red or pink food coloring to the water. The drops will mix with the water but not the oil.
- Add Sparkle (Optional): Sprinkle in some glitter or heart-shaped confetti for extra Valentine’s flair.
- Start the Reaction:
- If using effervescent tablets, break one into smaller pieces and drop them into the bottle.
- If using baking soda and vinegar, first add a tablespoon of baking soda to the bottle, then slowly pour in vinegar.
- Watch the Magic: Observe the bubbles of colored water rise and fall through the oil, creating a romantic lava lamp effect.
- Illuminate (Optional): Shine a flashlight underneath the bottle for a glowing, festive effect.
How It Works:
Water and oil don’t mix because water molecules are polar, meaning they have a slight charge, while oil molecules are non-polar, with no charge. Polar molecules attract each other and exclude non-polar ones, causing the oil to separate and float on the denser water. When the effervescent tablet or baking soda and vinegar react, they release gas bubbles that carry the colored water (and glitter, if used) upward through the oil. Once the gas escapes, the denser water sinks back down, creating the lava lamp effect.
STEM Concepts Involved:
- Density and Immiscibility: Why oil floats on water and why they don’t mix.
- Chemical Reactions: Gas production from effervescent tablets or baking soda and vinegar.
- States of Matter: Interactions between solids, liquids, and gases.
- Experimentation: Kids can experiment with glitter, confetti, and different color combinations to customize their Valentine’s Day lava lamp.
Valentine’s Layered Liquid Density Experiment
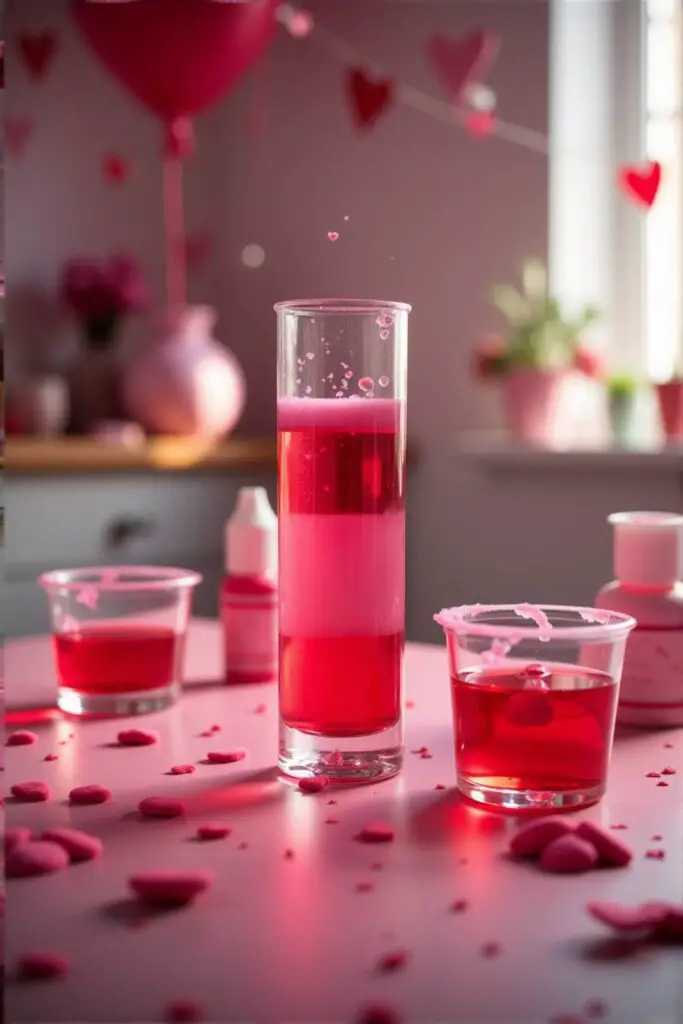
Celebrate Valentine’s Day with a themed twist on the classic layered liquid density experiment! Create a romantic, colorful density tower using red, pink, and white layers to represent love, friendship, and fun.
Materials Needed:
- A tall, clear glass or container
- Water
- Red and pink food coloring
- Dish soap (red or clear)
- Honey (or corn syrup dyed red)
- Vegetable oil
- Rubbing alcohol
- Heart-shaped confetti or small Valentine-themed items (e.g., candy hearts)
- Measuring cup
- Spoon
Steps:
- Prepare the liquids:
- Pour each liquid into separate measuring cups.
- Color the water with red food coloring and the rubbing alcohol with pink food coloring. Mix gently.
- If using clear dish soap, add red food coloring to enhance the theme.
- Layer the liquids:
- Pour honey (or dyed corn syrup) into the glass as the first layer, representing the “foundation of love.”
- Carefully add the dish soap as the second layer, symbolizing “the sweet bond of friendship.”
- Slowly pour the red-colored water as the third layer, representing “passion and care.”
- Add vegetable oil as the fourth layer for “lightness and joy.”
- Finish with the pink-colored rubbing alcohol as the top layer, symbolizing “romance and dreams.”
- Decorate and observe:
- Sprinkle in heart-shaped confetti or drop in small Valentine-themed items like candy hearts. Watch how they settle in different layers based on their density.
- Enjoy the Valentine-themed density tower!
How It Works:
The science behind the Valentine’s Day liquid tower is the same as the original experiment: each liquid has a different density, determining its position in the layered stack. Honey (or corn syrup) is the densest and settles at the bottom, while rubbing alcohol, the least dense, floats on top.
The heart-shaped confetti or candy hearts sink or float depending on their own density relative to the layers. The themed colors and decorations make the science visually appealing and festive for Valentine’s Day.
STEM Concepts Involved:
- Density: Demonstrating how liquids and objects of varying density interact.
- Buoyancy: Observing how themed items sink, float, or rest at specific levels.
- Thematic creativity: Applying scientific principles to holiday themes.
- Properties of matter: Exploring the characteristics of liquids and their differences.
- Scientific method: Encouraging predictions and observations in a fun, festive context.
Valentine’s Day Craft Stick Catapult
Create a heart-themed craft stick catapult to explore engineering and physics while celebrating Valentine’s Day. Launch candy hearts, pom-poms, or paper “love notes” and test how design changes affect the performance of your festive catapult.
Materials Needed:
- 10 craft sticks (painted pink, red, or decorated with Valentine’s stickers)
- 4-6 rubber bands
- A plastic bottle cap or small cupcake liner (heart-shaped if possible)
- Hot glue or strong adhesive (optional)
- Valentine-themed items to launch (e.g., candy hearts, red pom-poms, or paper hearts)
- Markers or stickers for decoration
Steps:
- Decorate the Materials:
- Paint the craft sticks pink or red. Add heart stickers or draw Valentine’s designs with markers.
- Prepare the Base:
- Stack 7 decorated craft sticks together and secure them tightly with rubber bands on each end.
- Create the Lever Arm:
- Stack 2 decorated craft sticks together and wrap a rubber band around one end to hold them together.
- Assemble the Catapult:
- Slide the stack of 7 sticks between the two sticks of the lever arm, positioning them closer to the rubber-banded end.
- Secure the lever arm to the base by crisscrossing a rubber band around the center.
- Attach the Launcher:
- Glue or tape the heart-shaped cupcake liner or bottle cap to the free end of the top craft stick (the lever arm).
- Allow time for the glue to dry if using adhesive.
- Test Your Valentine’s Catapult:
- Place a Valentine-themed item in the launcher.
- Press down on the lever arm and release to launch your item.
- Experiment with design tweaks, such as the height of the stack or the placement of the lever arm.
How It Works:
The Valentine’s Day catapult works by storing potential energy in the rubber bands and the bending of the craft sticks. When you press down on the lever arm, the stored energy increases. Releasing it transforms the energy into kinetic energy, propelling the object forward. The trajectory and distance depend on variables like the angle and the force applied.
STEM Concepts:
- Engineering:
- Designing a functional and decorative Valentine’s Day-themed machine.
- Testing and modifying the design to optimize performance.
- Physics:
- Understanding energy transformations (potential to kinetic).
- Observing motion, force, and trajectories.
- Mathematics:
- Measuring distances and recording results.
- Comparing outcomes based on adjustments to the design.
- Scientific Method:
- Hypothesizing how different variables (e.g., stack height) affect performance.
- Conducting experiments and drawing conclusions.
This fun Valentine’s Day twist makes engineering and physics a festive activity, engaging kids in STEM with a touch of creativity and holiday spirit!
Related Post Alert
If you or the kids love launching things, check out our post on catapult builds
Valentine Crystal Hearts
Celebrate Valentine’s Day by growing sparkling, heart-shaped crystals! Kids will craft colorful pipe cleaner hearts and watch as dazzling crystals form, combining creativity with science.
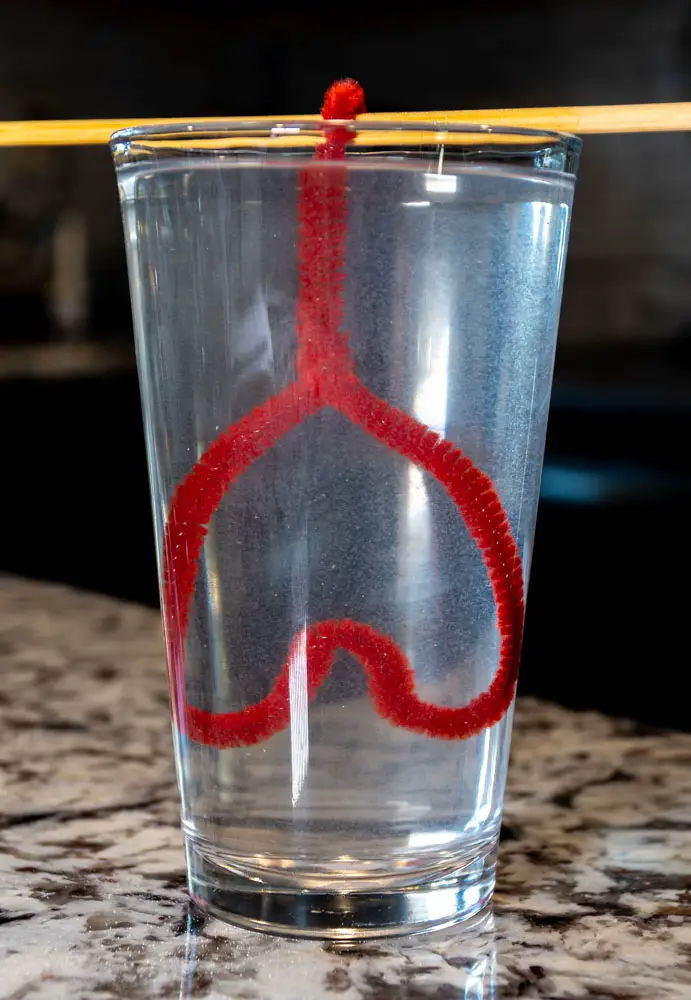
Materials:
- Red, pink, and white pipe cleaners
- Borax powder (or salt/sugar as alternatives)
- Boiling water
- Glass jars or clear plastic cups
- Spoons for stirring
- String or thread
- Pencils or sticks (to suspend the pipe cleaners)
- Food coloring (red or pink)
- Scissors
- Glitter (optional, for extra sparkle)
Steps:
- Shape the Pipe Cleaners: Bend pipe cleaners into heart shapes or other Valentine’s designs, such as arrows or X’s and O’s.
- Prepare the Solution: Boil water and pour it into the jars. Add borax powder (1 tablespoon per cup of water) and stir until no more dissolves. Mix in red or pink food coloring for a festive touch.
- Suspend the Hearts: Tie the pipe cleaner shapes to a pencil with string and balance the pencil across the jar, ensuring the pipe cleaner is fully submerged without touching the jar’s sides.
- Wait and Observe: Place the jar in a safe, undisturbed location. Over 12–24 hours, watch as crystals form on the pipe cleaner hearts.
- Remove and Dry: Carefully remove the hearts and let them dry. For extra sparkle, sprinkle glitter on the wet crystals.
How It Works:
This experiment demonstrates crystallization, where a solid forms from a solution. As the hot water cools, it can no longer hold as much borax, leading to the formation of crystals. The lattice structure of borax particles creates the shimmering, crystal-coated pipe cleaners.
STEM Concepts:
- Chemistry: Learn about solubility, saturation, and crystallization processes.
- Physics: Explore the geometric patterns in crystal growth.
- Art and Design: Combine science with creativity by crafting heart shapes and adding Valentine’s colors.
- Scientific Method: Practice forming hypotheses, making observations, and analyzing results.
- Festive Connection: Link STEM to cultural celebrations for hands-on, themed learning.
This Valentine’s Day-themed activity brings science and love together for a fun and educational experience!
DIY Valentine Slime
Celebrate Valentine’s Day with a fun and science-filled activity by creating your own themed slime! This Valentine’s version features pink, red, and sparkly options, perfect for spreading love and learning about polymers.
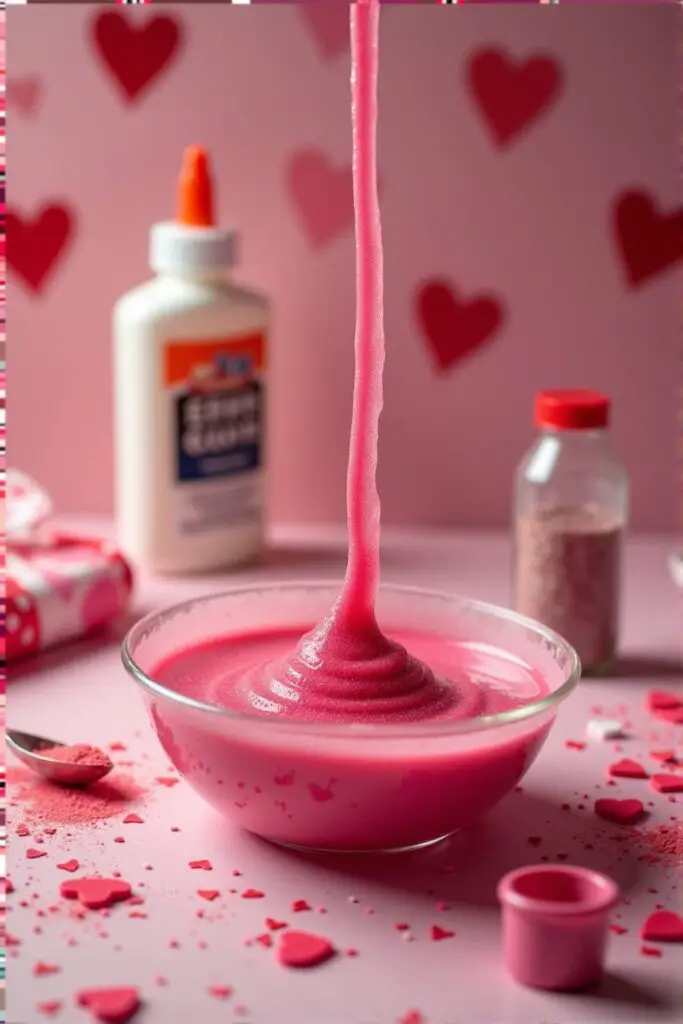
Materials Needed
- White school glue (about ½ cup)
- Liquid starch (about ¼ cup) OR a borax solution (1 teaspoon borax dissolved in 1 cup warm water)
- Pink or red food coloring
- Heart-shaped confetti, glitter, or small foam hearts (optional)
- Mixing bowl
- Spoon or stir stick
- Measuring cups
Steps
- Pour the glue into a mixing bowl (use about ½ cup).
- Add food coloring to the glue, mixing until you achieve your desired Valentine’s Day shade of pink or red.
- Mix in sparkles and confetti: Stir in glitter, heart-shaped confetti, or small foam hearts for a festive touch.
- Combine with activator:
- If using liquid starch, slowly add about ¼ cup of starch while stirring.
- If using a borax solution, add the solution a tablespoon at a time while stirring.
- Mix until the slime forms and pulls away from the bowl’s edges.
- Knead the slime with your hands until it’s smooth and stretchy.
How It Works
Your Valentine’s Day slime is not just cute—it’s science in action! The glue’s molecules transform into a long, stretchy polymer when combined with the activator. This cross-linking process creates a substance that’s both fun and fascinating. For a deeper dive into the chemistry of slime, read our article on The Science of Slime.
STEM Concepts
- Chemistry: Learn about the chemistry of polymers and cross-linking reactions.
- Measurement and Ratios: Practice precise measurements for optimal results.
- Art and Science Fusion: Explore creativity by personalizing your slime with Valentine’s Day decorations.
- Scientific Observation: Observe how the texture and appearance change during the mixing process.
Make it extra fun by gifting your homemade Valentine’s slime in small jars tied with ribbons as a unique holiday treat!
More Slime:
Check out different kinds of slime that you can use for your science experiments and projects.
Valentine’s Day Homemade Play Dough
Spread the love this Valentine’s Day by making a soft, colorful play dough tinted in pinks and reds. Children can shape hearts, flowers, and sweet messages while learning about chemical reactions, measurement, and more!
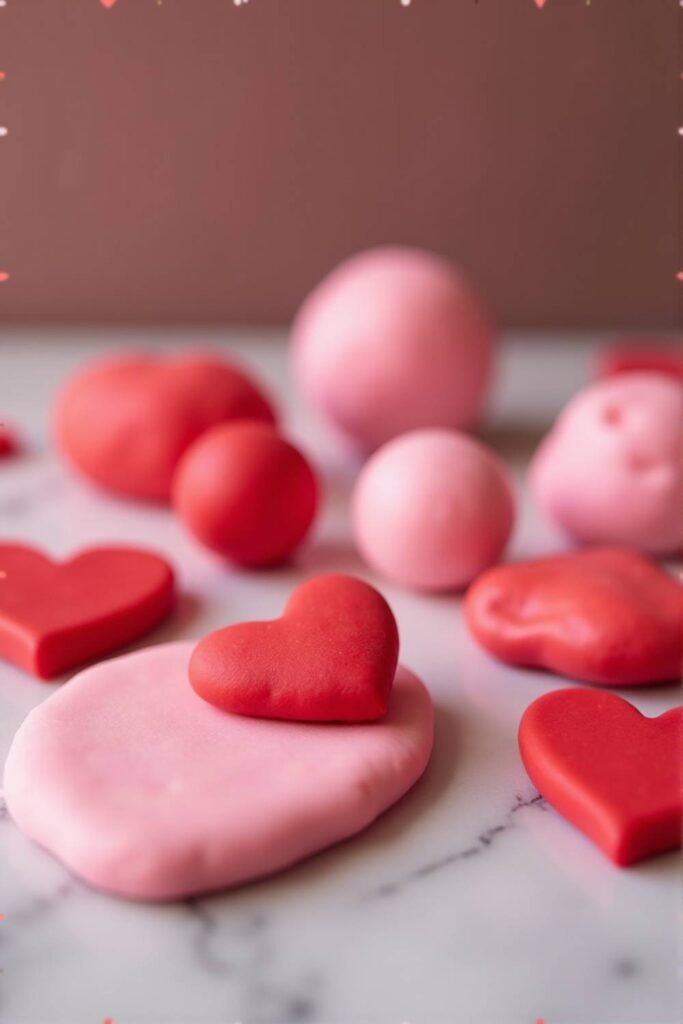
Materials Needed
- 2 cups all-purpose flour
- 1 cup salt
- 2 tablespoons cream of tartar (optional but recommended)
- 1 cup water (approximately)
- 1 tablespoon vegetable oil
- Red or pink food coloring
- Optional: A few drops of a pleasant scent (e.g., vanilla, rose, or strawberry extract)
- Optional: Heart-shaped cookie cutters or Valentine-themed molds
- Mixing bowl
- Spoon or spatula
Steps
- Combine Dry Ingredients
- In a mixing bowl, whisk together the flour, salt, and cream of tartar (if using).
- Tint the Water
- In a separate small cup, mix the food coloring (pink or red) into the water.
- Add a few drops of your chosen scent if desired.
- Mix in Wet Ingredients
- Pour the tinted, scented water and vegetable oil into the dry ingredients.
- Stir until it begins to form a dough.
- Knead the Dough
- Turn the dough out onto a clean surface and knead it with your hands.
- If the dough feels too sticky, add a bit more flour; if it’s too dry, add a few drops of water.
- Shape & Play
- Roll out the dough and use heart-shaped cookie cutters or Valentine-themed molds to create festive shapes.
- Store the dough in an airtight container when finished to keep it soft.
(Optional Stovetop Method)
- Combine the flour, salt, and cream of tartar in a saucepan.
- Mix the tinted water, oil, and scent in a separate bowl.
- Slowly stir the wet mixture into the dry ingredients.
- Warm over low heat, stirring constantly until the dough begins to pull away from the edges.
- Remove from heat, knead, and shape as desired.
How It Works (The Science Behind It)
- Formation of Gluten: Flour contains proteins that form gluten when combined with water, giving the dough its stretchy, moldable texture.
- Preservation with Salt: Salt helps preserve the dough by slowing down bacterial growth, keeping it fresher for longer.
- Cream of Tartar’s Role: Cream of tartar helps the dough maintain a softer, smoother consistency.
- Color and Scent: Adding food coloring and extracts or essential oils doesn’t change the dough’s properties much, but it adds a Valentine’s Day flair and sensory experience.
STEM Concepts Involved
- Chemistry: Observing how different ingredients combine and react (proteins, starches, and preservatives).
- Measurement & Ratios: Learning the importance of precise ingredient measurements for the right texture and consistency.
- Physical Changes: Seeing how mixing and kneading transform dry, powdery ingredients and liquid into a moldable solid.
- Observation & Experimentation: Experimenting with different color intensities, scents, or dough textures enhances curiosity and scientific thinking.
Related Post Alert
Skip traditional Valentines Day cards and 3D Print your own Valentine gifts
Wrap Up – Valentine’s Day Science Activities

This Valentine’s Day, you’ve shared more than cards and candy—you’ve shared the joy of discovery! From growing sparkling heart crystals to creating colorful, love-themed slime, these experiments show that science and creativity make a perfect pair. As kids explore and learn, they’re building curiosity, confidence, and unforgettable memories. Keep the love for STEM alive, and remember—whether it’s Valentine’s Day or any day, there’s always a new experiment waiting to be tried. Happy experimenting, and happy Valentine’s Day!

