As the autumn leaves begin to fall and the air turns crisp, pumpkins start to appear on doorsteps and in festive displays. Pumpkin Spice is EVERYWERE!
Pumpkins are more than just seasonal decorations or ingredients for pie – we can use them in the name of Science with some pumpkin STEM challenges.
Make a pumpkin volcano part of your holiday tradition, or make some cool crystal ornaments to decorate with. Make use of the pumpkin pieces and learn how to get more milage out of your pumpkins.
You can do quite a few of these with the same pumpkin if you like. We’ll start with the volcano:
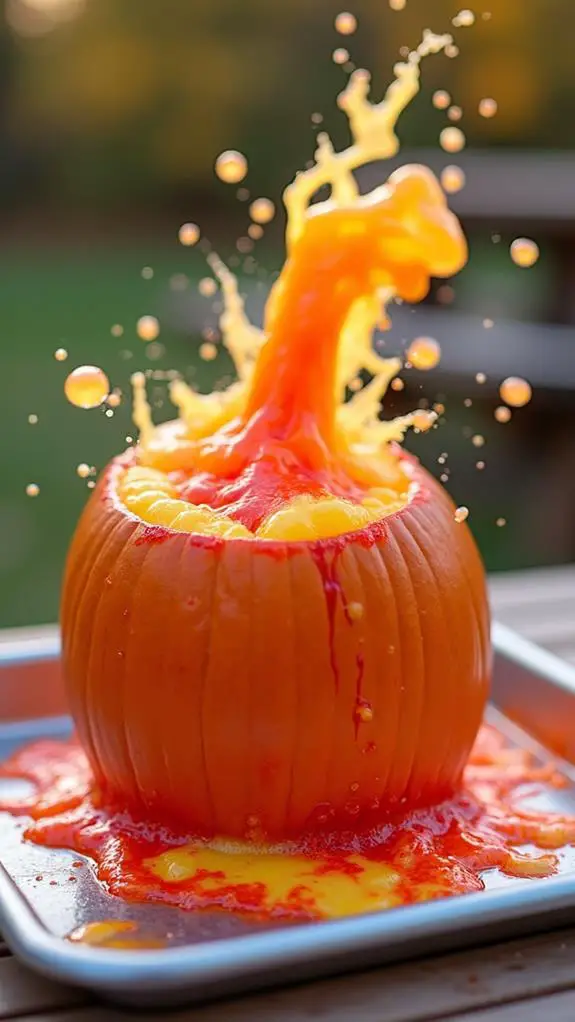
Pumpkin Volcano
The pumpkin volcano adds another festive twist to a classic vinegar and baking soda reaction This one is best done with a small pumpkin, since the foam needs to reach the top to ‘erupt.’ You can use a bit more ingredients if you’re using a larger pumpkin and plan on progressing through some of the other pumpkin activities.
Materials:
- One small or medium sized pumpkin
- 1/2 cup of baking soda
- 1 cup of white vinegar
- Dish soap (a few squirts)
- Food coloring (red, orange, yellow – or your choice)
- Tray or large dish to catch overflow
- Carving tools (knife, spoon)
- Measuring cups and spoons
Steps:
- Prepare the Pumpkin: Cut off the top of the pumpkin and hollow out the insides. Place the hollowed pumpkin on a tray or large dish to contain the eruption.
- Add Baking Soda: Place 1/2 cup of baking soda into the bottom of the pumpkin.
- Enhance the Eruption: Add a few squirts of dish soap to create more bubbles and foam. Add several drops of food coloring to simulate lava flow.
- Prepare the Vinegar: Measure 1 cup of white vinegar into a separate container for easy pouring.
- Erupt the Volcano: When ready, pour the vinegar into the pumpkin over the baking soda mixture. Step back and watch as the pumpkin volcano erupts with colorful foam spilling over the sides.
STEM Concepts:
- Chemical Reactions: Demonstrates an acid-base reaction between vinegar (acetic acid) and baking soda (sodium bicarbonate), producing carbon dioxide gas.
- Gas Production: The rapid release of carbon dioxide gas creates pressure, causing the mixture to overflow.
- Observation and Hypothesis: Encourages making predictions and observing the outcomes of chemical interactions.
Barfing Pumpkin
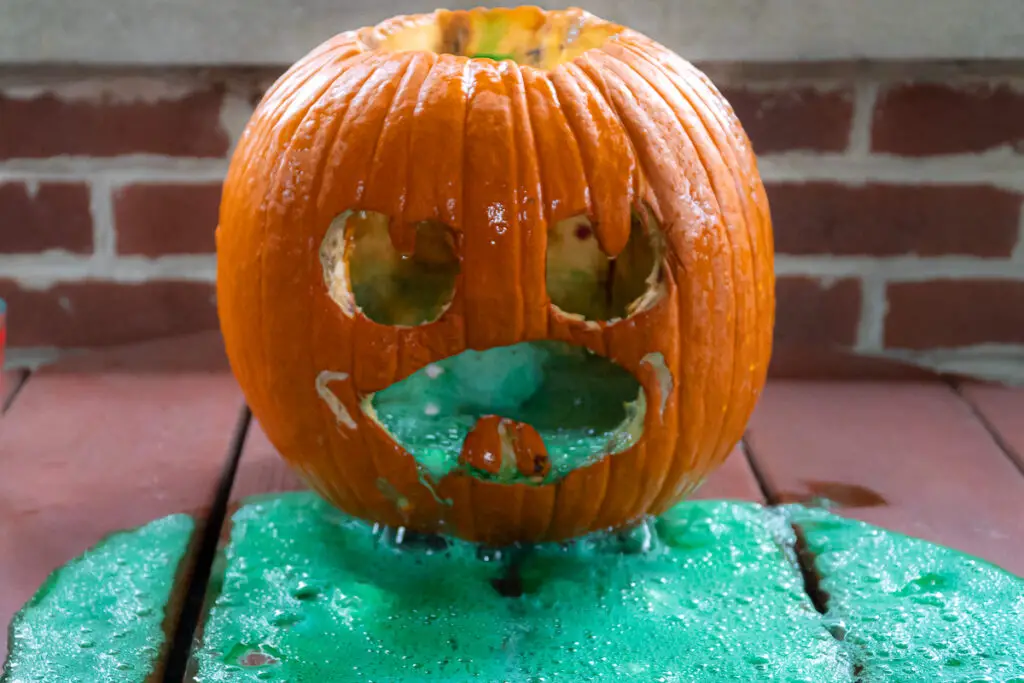
Add a touch of humor and spookiness to your science activities with the “Barfing Pumpkin” experiment! By carving a pumpkin with a large, open mouth and using a classic chemical reaction, you can create the illusion of your pumpkin “barfing” a frothy, colorful mixture.
If you’ve done the pumpkin volcano, you’ve already cut off the top and hollowed it out. You can continue by carving the face.
Materials:
- One medium pumpkin
- 1/2 cup of baking soda
- 1 cup of white vinegar
- Dish soap (a few squirts)
- Green food coloring (to simulate “barf”)
- Tray or large dish to catch overflow
- Carving tools (knife, spoon)
- Measuring cups and spoons
- Protective gloves (optional)
Steps:
- Carve the Pumpkin: Carve a face with a large, open mouth positioned low on the pumpkin to allow the mixture to flow out.
- Set Up the Experiment: Place the carved pumpkin on a tray or dish to catch any overflow.
- Prepare the Mixture:
- Place 1/2 cup of baking soda inside the pumpkin.
- Add a few squirts of dish soap to enhance foaminess.
- Add several drops of green food coloring to mimic the appearance of vomit. We used some green to contrast with the orange pumpkin and look a bit gross or toxic.
- Initiate the Reaction:
- Measure 1 cup of white vinegar in a separate container.
- Quickly pour the vinegar into the pumpkin over the baking soda mixture.
- Observe the “Barfing” Effect: Step back and watch as the foamy, green mixture erupts from the pumpkin’s mouth.
STEM Concepts:
- Chemical Reactions: An acid-base reaction produces carbon dioxide gas, causing the mixture to foam and overflow.
- Gas Expansion: Demonstrates how gas production leads to increased pressure and volume.
- Integration of Art and Science: Combines creative pumpkin carving with scientific principles.
Science Alert!
For more on the science at work, check out our post on the chemistry of vinegar and baking soda.
Pumpkin Elephant Toothpaste
Need more of an eruption than vinegar and baking soda? Let’s put an autumn spin on the “Elephant Toothpaste” experiment! This produces a rapid expansion of foam that resembles giant toothpaste being squeezed from a tube—big enough for an elephant!
You can use the same pumpkin from the above experiments. Elephant toothpaste will give a more explosive eruption and, if you do it in the jack-o-lantern, it should blast out of the carved face.
Materials:
- One medium pumpkin
- 1/2 cup of 6% hydrogen peroxide (hair developer strength)
- 1 packet of dry yeast
- 2 tablespoons of warm water
- Dish soap (a few squirts)
- Food coloring (optional)
- Safety goggles and gloves
- Tray or large dish to catch overflow
- Carving tools (knife, spoon)
- Small mixing cup
- Funnel (optional)
- Measuring cups and spoons
Steps:
- Prepare the Pumpkin: Hollow out the pumpkin and carve a face if desired. Place the pumpkin on a tray to catch any overflow. This is going to be messy.
- Add Ingredients Inside the Pumpkin:
- Pour 1/2 cup of 6% hydrogen peroxide into the pumpkin.
- Add a few squirts of dish soap to increase foaminess.
- Add several drops of food coloring for a colorful eruption.
- Activate the Yeast: In a small mixing cup, combine the packet of dry yeast with 2 tablespoons of warm water. Stir well until the yeast is dissolved.
- Initiate the Reaction: Quickly pour the yeast mixture into the pumpkin using a funnel if necessary. Step back immediately to observe the reaction. Be quick or be foamy!
- Observe the Eruption: Watch as thick foam rapidly expands and flows out of the pumpkin.
- Discuss the Science: Explain how the yeast acts as a catalyst to decompose hydrogen peroxide into water and oxygen gas.
STEM Concepts:
- Chemical Reactions: Demonstrates the rapid decomposition of hydrogen peroxide catalyzed by yeast.
- Catalysts and Enzymes: Introduces the concept of catalysts (yeast containing catalase) speeding up reactions.
- Exothermic Reactions: The process releases heat, which can be felt if you touch the outside of the pumpkin (with gloves).
Pumpkin Slime
Everything turns pumpkin spice at the first sign of autumn. Even slime. This is a great way to make use of your pumpkin guts.
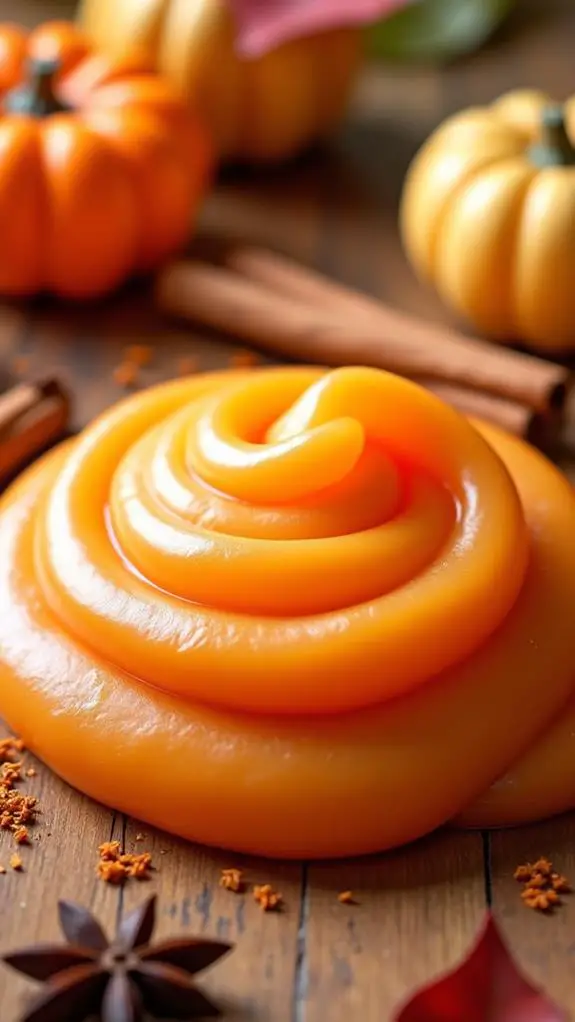
Materials:
- One small pumpkin
- Pumpkin seeds and pulp (scooped from the pumpkin)
- 1 cup of white school glue
- 1 teaspoon of baking soda
- 1 tablespoon of saline solution (contact lens solution containing boric acid)
- Orange food coloring (optional)
- Glitter (optional)
- Large mixing bowl
- Spoon or spatula
- Measuring cups and spoons
Steps:
- Prepare the Pumpkin: Carefully cut off the top of the pumpkin and scoop out the seeds and pulp, placing them into the mixing bowl. Remove excess seeds if a smoother slime is desired (or leave them in for added texture.)
- Add Glue: Pour 1 cup of white school glue into the bowl with the pumpkin pulp. Stir the mixture until the pumpkin pulp and glue are well combined.
- Add Baking Soda: Add 1 teaspoon of baking soda to the mixture. Stir thoroughly to ensure even distribution.
- Add Color and Sparkle (Optional): Mix in a few drops of orange food coloring to enhance the pumpkin theme. Sprinkle in some glitter for extra shine and fun.
- Add Saline Solution: Slowly add 1 tablespoon of saline solution while stirring continuously. The mixture will begin to thicken and pull away from the sides of the bowl. If the slime is too sticky, add a few more drops of saline solution.
- Knead the Slime: Use your hands to knead the slime until it reaches a stretchy, cohesive consistency. It’s going to be goopy, but that’s the fun of slime, right? Observe how the texture changes as you mix it together.
STEM Concepts:
- Chemistry of Polymers: Demonstrates how mixing glue (a polymer) with borate ions from the saline solution forms cross-linked molecules, resulting in slime.
- States of Matter: Explores the characteristics of non-Newtonian fluids, which exhibit properties of both solids and liquids.
- Sensory Exploration: Engages tactile senses and encourages observations about texture, elasticity, and viscosity.
More Slime!
Pumpkin Mold Experiment
What do you do with the pieces of the pumpkin you carved out? Before you toss them out (or better yet – compost them), you can do another science experiment.
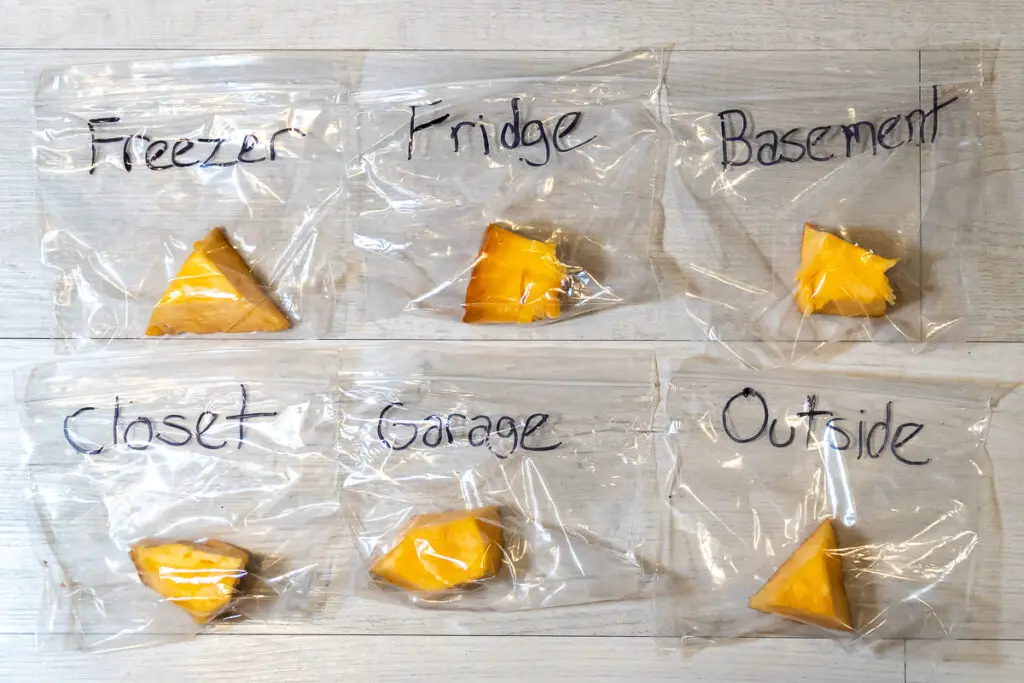
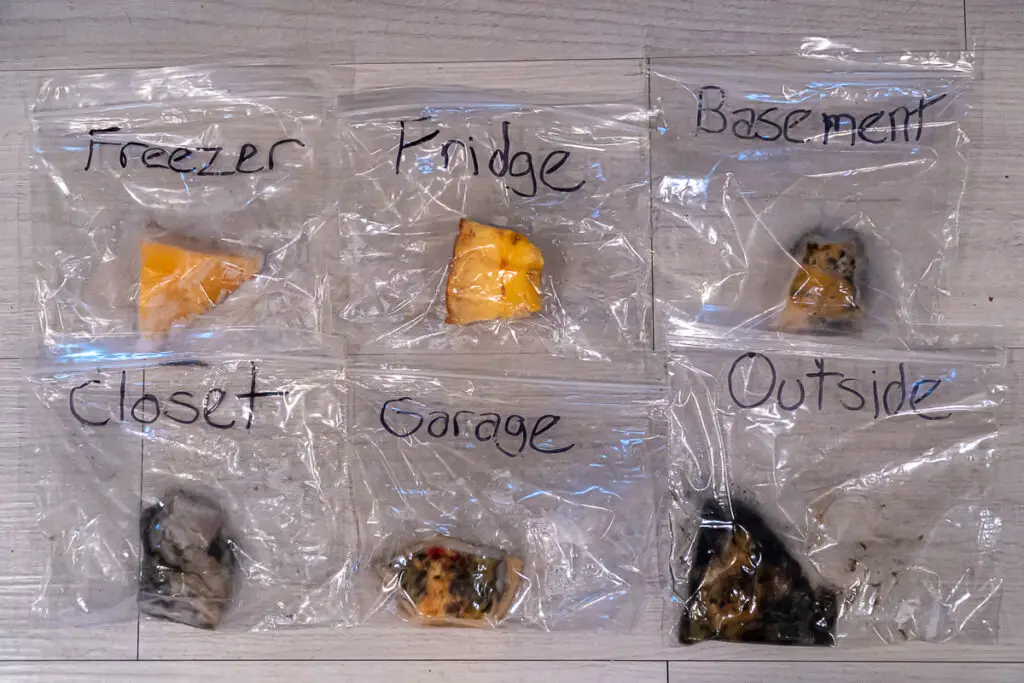
By observing mold growth on pumpkin pieces under different environmental conditions, we can learn about factors that affect fungal development. This experiment encourages critical thinking and teaches about decomposition, microorganisms, and the importance of variables in scientific experiments.
Materials:
- Pumpkin pieces (from a carved jack-o’-lantern)
- Zip-lock bags or airtight containers
- Labels and marker
- Notebook or observation chart
- Magnifying glass (optional)
- Variables to test (e.g., moisture levels, light exposure, temperature)
Steps:
- Prepare Samples:
- Cut pumpkin pieces into equal sizes for consistency.
- Place each piece into a separate zip-lock bag or container.
- Set Up Variables: Assign different conditions to each sample (e.g., one kept outside, one kept in the dark, one refrigerated, one frozen, etc.) Label each bag or container clearly with the condition being tested.
- Make Predictions: Make a hypothesis of which conditions will promote or inhibit mold growth.
- Observe Daily: Check the samples daily for signs of mold.
- Record Data: Note the date, appearance of mold, and any other observations. Take photos if possible.
- Analyze Results: After a set period, compare the mold growth in each condition.
STEM Concepts:
- Microbiology: Study of fungi and microorganisms involved in decomposition.
- Scientific Method: Formulating hypotheses, conducting controlled experiments, and analyzing data.
- Environmental Science: Understanding how conditions like moisture, temperature, and light affect biological processes.
Rotting Pumpkin Experiment
Once you cut into a pumpkin, you’re exposing the inside to the elements. Like food left out on the counter or in the refrigerator too long, it’s going to grow mold and rot.
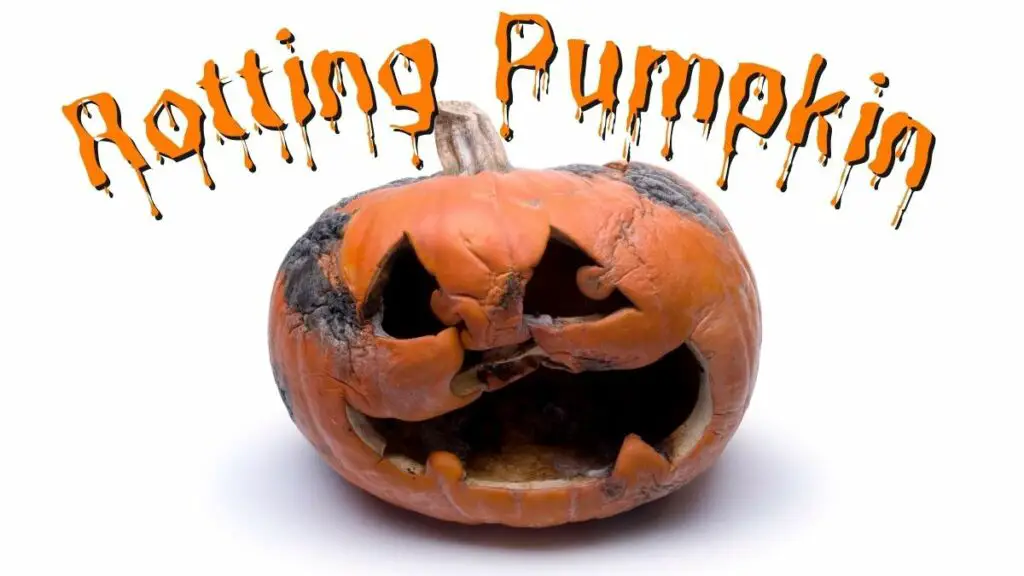
By monitoring a carved pumpkin over time, you can observe the stages of decay and understand the factors that contribute to the breakdown of organic matter. This experiment promotes patience, observation skills, and a deeper appreciation for the cycles of nature.
Materials:
- One carved jack-o’-lantern
- Camera or smartphone for photos
- Notebook or journal
- Scale and measuring tape (optional)
- Gloves (for handling the pumpkin)
Steps:
- Set Up the Pumpkin: Place the carved pumpkin in a consistent location, either indoors or outdoors. Ensure it’s in a spot where it won’t be disturbed by animals or weather (unless testing outdoor conditions).
- Document Initial Conditions: Record the date, weather conditions, and initial appearance. Take measurements of the pumpkin’s weight and dimensions if you like – at least until it starts to get fragile.
- Daily Observations: Observe the pumpkin each day at the same time. Note changes in color, texture, smell, and structural integrity. You can take photographs to visually document the progression.
- Record Environmental Factors: Note temperature, humidity, and other environmental conditions that may affect decomposition.
- Analyze Changes: After a set period (e.g., two weeks), review the observations.
- Draw Conclusions: Consider how factors like air exposure, temperature, and microbes contribute to rotting.
STEM Concepts:
- Decomposition: Understanding how organic matter breaks down over time.
- Biology: Learning about the organisms (bacteria, fungi) involved in decomposition.
- Data Collection: Systematic recording and analysis of observations.
Check out Pumpkin Jack which details a pumpkin’s life cycle in a cute story.
Preserving Pumpkins
We’ve done a few experiments with the decay of pumpkins, and know they can rot and mold pretty quickly.
There are a few ways we can preserve our pumpkins and extend their life. You can check out our full pumpkin preservation article for the details.
By treating carved pumpkins with various substances, you can determine which methods best prevent decay. This hands-on activity teaches about chemical properties, microbial growth inhibition, and the scientific process of testing and comparing results.
Materials:
- Multiple carved pumpkins (identical in size and carving complexity)
- Preservation agents (e.g., bleach solution, vinegar, petroleum jelly)
- Brushes or spray bottles for application
- Labels and marker
- Gloves
- Notebook or observation chart
Steps:
- Prepare the Pumpkins: Carve each pumpkin in the same design and place them in the same location to maintain consistency. We know from our other experiments how different conditions can affect the rate of decay.
- Apply Preservation Methods: Apply a different preservation agent to each pumpkin. Leave one pumpkin untreated as a control.
- Label the Pumpkins: Clearly label each pumpkin with the preservation method used.
- Record Initial Observations: Note the appearance and condition of each pumpkin at the start. You can use a cell phone or camera to make a photo journal.
- Daily Monitoring: Observe the pumpkins daily, recording any signs of mold, dehydration, or decay. Take photographs for visual comparison.
- Analyze Results: After a set period, compare the condition of each pumpkin. Determine which preservation method was most effective.
- Draw Conclusions: Discuss why certain substances slowed decay and how they affect microbial growth.
STEM Concepts:
- Chemistry: Understanding how different chemicals interact with organic material to inhibit decay.
- Microbiology: Learning about the growth of microbes and how preservatives affect them.
- Scientific Method: Controlled experimentation, observation, and analysis.
Which one worked the best?
Pumpkin Sink or Float Experiment
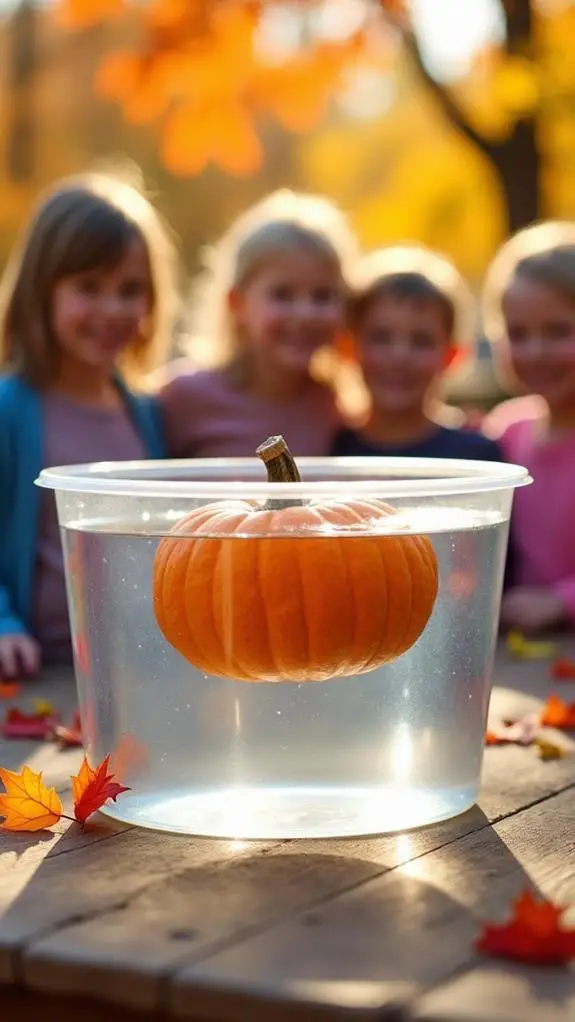
Explore the principles of buoyancy and density with the “Pumpkin Sink or Float” experiment! By predicting and testing whether pumpkins of various sizes will sink or float in water, children can learn about the factors that affect an object’s buoyancy.
Materials:
- Pumpkins of various sizes and weights
- Large clear container or tub filled with water
- Paper and pencils for recording predictions and results
- Measuring tape or ruler (optional)
- Scale (optional)
Steps:
- Hypothesis: Make a prediction whether a pumpkin will sink or float. If you’re doing the experiment in a group, record everyone’s predictions, including reasons for their guesses.
- Test the Pumpkins: Gently place each pumpkin into the water one at a time. Observe whether it sinks or floats.
- Record Observations: Note the outcome for each pumpkin, comparing it to the initial predictions.
- Measure and Weigh (Optional): Measure the circumference and weigh each pumpkin to gather data. Discuss how size and weight might influence buoyancy.
- Discuss Findings: Talk about why pumpkins float or sink, relating to the concepts of density and buoyancy.
STEM Concepts:
- Buoyancy and Density: Objects float if they are less dense than the fluid they are in.
- Scientific Method: Encourages hypothesis formation, testing, observation, and conclusion.
- Mathematics Integration: Measuring and recording data to analyze results.
Salt Crystal Pumpkins
Decorating for Fall is one of the joys of the season, and you can combine crafting with a bit of science. By creating pumpkin-shaped cutouts and growing salt crystals on them, children can observe how crystals form over time.
This experiment illustrates concepts of saturation, evaporation, and crystal growth, providing a hands-on experience that combines art and science – and gives you some Fall themed DIY decorations.
Materials:
- Cardboard or heavy paper
- Orange food coloring or paint
- Scissors
- 1 cup of table salt
- 2 cups of warm water
- Shallow dish or tray
- String or pipe cleaners (optional)
- Measuring cups and spoons
- Paintbrushes (optional)
Steps:
- Create Pumpkin Shapes: Cut out pumpkin shapes from cardboard or heavy paper. Decorate the shapes with orange paint or food coloring.
- Prepare the Salt Solution: In a bowl, mix 2 cups of warm water with 1 cup of table salt. Stir until no more salt can dissolve, creating a saturated solution.
- Set Up the Experiment: Place the pumpkin cutouts in the shallow dish. Pour the salt solution into the dish, covering the bottom but not submerging the cutouts completely.
- Add String or Pipe Cleaners (Optional): Attach a string or pipe cleaner to the cutouts to encourage crystal formation.
- Observe Over Time: Place the dish in a safe, undisturbed area. Over several days, watch as the water evaporates and salt crystals form on the pumpkin shapes.
- Document the Process: Make notes or draw/photograph the crystals as they grow.
STEM Concepts:
- Crystallization: Demonstrates how crystals form from a saturated solution as water evaporates.
- Evaporation: Shows the process of liquid turning into vapor, leaving solid crystals behind.
- Observation Skills: Enhances attention to detail and patience as children wait for crystals to form.
Safety Note:
- Supervision: Adult assistance may be needed when handling warm water.
- Clean-Up: Ensure that salt residue is cleaned to prevent surface damage.
(Candy) Pumpkin Catapult
Kids love catapults. Any activity that involves flinging objects across the room is sure to be a hit. This one is super simple to set up.
Construct a simple machine capable of launching mini pumpkins or pumpkin candies out of household items (or a few items from your makerspace.) Catapults are a fun way to explore physics principles such as force, motion, and energy transfer.
Materials:
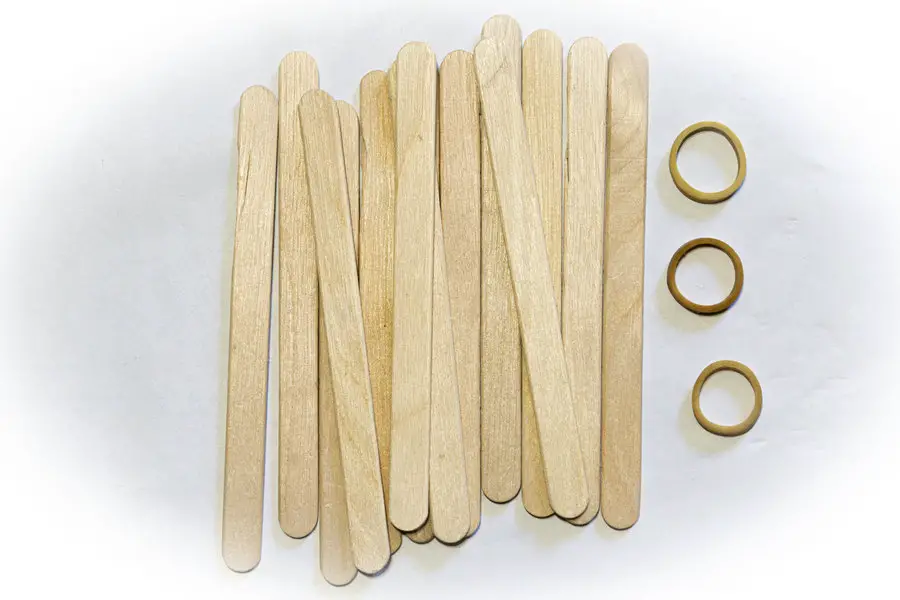
- Popsicle sticks (at least 10)
- Rubber bands
- Plastic spoon
- Mini pumpkins or candy pumpkins
- Tape (optional)
- Glue (optional)
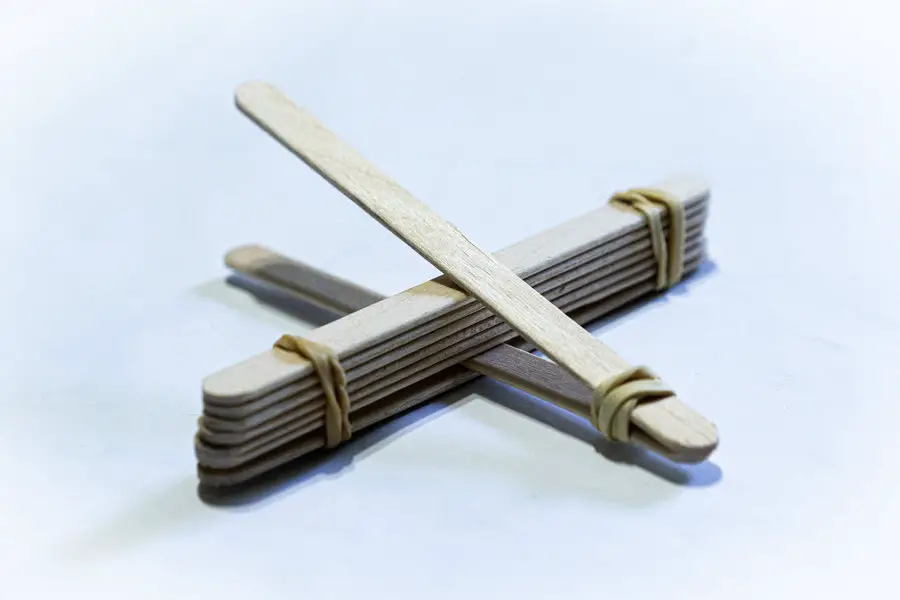
Steps:
- Construct the Base:
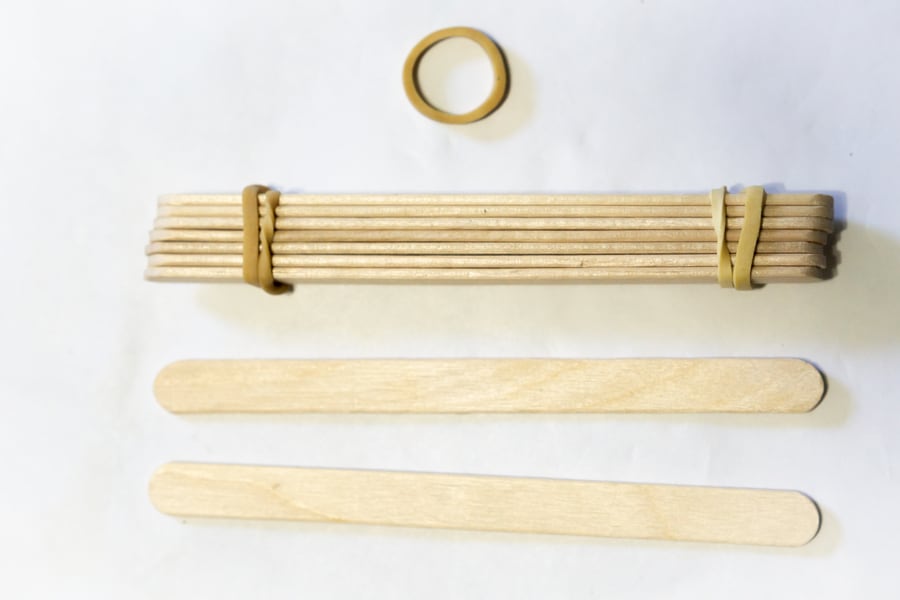
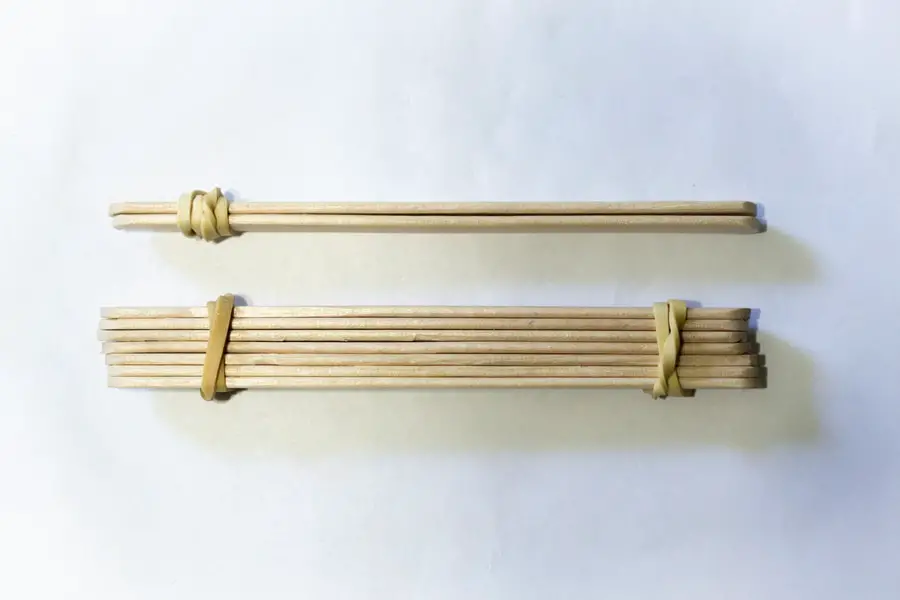
- Stack several popsicle sticks together (about 5-6) and secure them with rubber bands at each end.
- This will serve as the fulcrum of the catapult.
- Build the Launching Arm:
- Take two popsicle sticks and place a spoon at one end, securing it with tape or rubber bands.
- This will act as the lever arm.
- Assemble the Catapult:
- Insert the stack of sticks between the two popsicle sticks of the launching arm near the spoon end.
- Secure the intersection with rubber bands, allowing the arm to pivot.
- Prepare to Launch:
- Place the base of the catapult on a flat surface.
- Put a mini pumpkin or candy pumpkin in the spoon.
- Test the Catapult:
- Press down on the free end of the spoon and release to launch the pumpkin.
- Measure the distance traveled.
- Experiment and Improve:
- Encourage kids to modify the design to improve performance, such as adjusting the fulcrum or adding weight.
STEM Concepts:
- Simple Machines: Understanding levers and how they multiply force.
- Energy Transfer: Conversion of potential energy to kinetic energy during the launch.
- Projectile Motion: Exploring factors that affect the trajectory and distance.
More Catapults
Check out more ways to build a DIY catapult!
Pumpkin Battery
Illuminate your understanding of electricity by creating a “Pumpkin Battery”! This innovative experiment transforms ordinary pumpkins into a source of electrical energy capable of powering a small LED light or digital clock. It’s an excellent way to demonstrate how chemical reactions can generate electricity and to introduce concepts of circuits and renewable energy using biodegradable materials.
Materials:
- 3–5 small pumpkins
- Copper rods or clean copper pennies
- Zinc galvanized nails
- Alligator clip wires
- LED light
- Voltmeter or multimeter (optional)
- Knife or awl (for making small holes)
- Sandpaper (optional, for cleaning pennies)
- Measuring tape or ruler
Steps:
- Prepare the Pumpkins: Use a knife or awl to make two small holes in each pumpkin, spaced about an inch apart.
- Insert Electrodes: Insert a copper rod or penny into one hole of each pumpkin. Insert a zinc nail into the other hole of each pumpkin. Ensure that the electrodes do not touch inside the pumpkin.
- Connect the Pumpkins in Series: Use alligator clip wires to connect the copper electrode of the first pumpkin to the zinc electrode of the second pumpkin. Continue connecting the pumpkins in this manner (copper to zinc).
- Complete the Circuit: Attach a wire to the free zinc electrode at one end of the chain (negative terminal). Attach another wire to the free copper electrode at the other end (positive terminal).
- Attach the Device: Connect the free ends of the wires to the LED light, matching positive to positive and negative to negative terminals.
- Test the Voltage (Optional): Use a voltmeter to measure the voltage across the circuit.
- Observe the Results: The LED should light up demonstrating the flow of electricity.
- Troubleshoot if Necessary: If the device doesn’t work, check all connections and ensure the metals are clean and properly inserted.
STEM Concepts:
- Electrochemistry: Shows how chemical energy is converted into electrical energy through redox reactions.
- Electrical Circuits: Understanding how series circuits work and the importance of connecting cells properly.
- Renewable Energy: Explores alternative, eco-friendly sources of electricity.
Wrap Up: Pumpkin Science Activities
These are some fun STEM activities with a Fall pumpkin theme. We’ve got a touch of pumpkin spice, along with volcanos, foam, chemical reactions, physics, and fun.
Try a few of these pumpkin science experiments that will leave lasting memories long after the jack-o’-lanterns have dimmed. Whether conducted in a classroom, at home, or as part of a community event, these pumpkin experiments will add a bit of spice to your autumn.
Here’s to a season filled with exploration, imagination, and the joy of scientific discovery. Happy experimenting!
More Fall Fun
Don’t miss these other Fall science activities!

