
Printables are great! When you use them, you can always just print them out again for a fresh, clean sheet. Do that enough and you can start going through quite a bit of paper and printer cartridges, and those costs can start to add up over time. (Not to mention that gnawing feeling about not being eco-conscious and all of that. You ARE recycling your paper, right?)
If you laminate your printables, you can use dry erase markers to reuse your worksheets. You can create your own DIY reusable worksheets and activity pages. This works great for handwriting or number practice sheets where kids may be working on an activity of skill over and over again.
*We’re an affiliate – we may earn a commission through qualifying purchases from the links on this page. As always, thanks!*
How to make worksheets reusable
Printables are great; you can instantly download your file and print it out for immediate use. Since you have the file, you can print out a fresh copy every time you need it. That can potentially use quite a bit of paper, especially if it’s something you’ll print and use often.
You can make your printable worksheets reusable either by laminating them or placing them in plastic sleeves. We’ll spend the bulk of this article talking about laminating, though you can take a shortcut with simple plastic page protector sleeves (more on those below.)
Laminating to protect the pages
Some printables are best used when laminated. Many printables are designed to be laminated with cutouts to attach to other sheets with Velcro. You can find some examples of our printables here.
We’d go through paper like crazy with pieces getting crumpled with every use if we didn’t laminate our pages.
How do you laminate a worksheet?
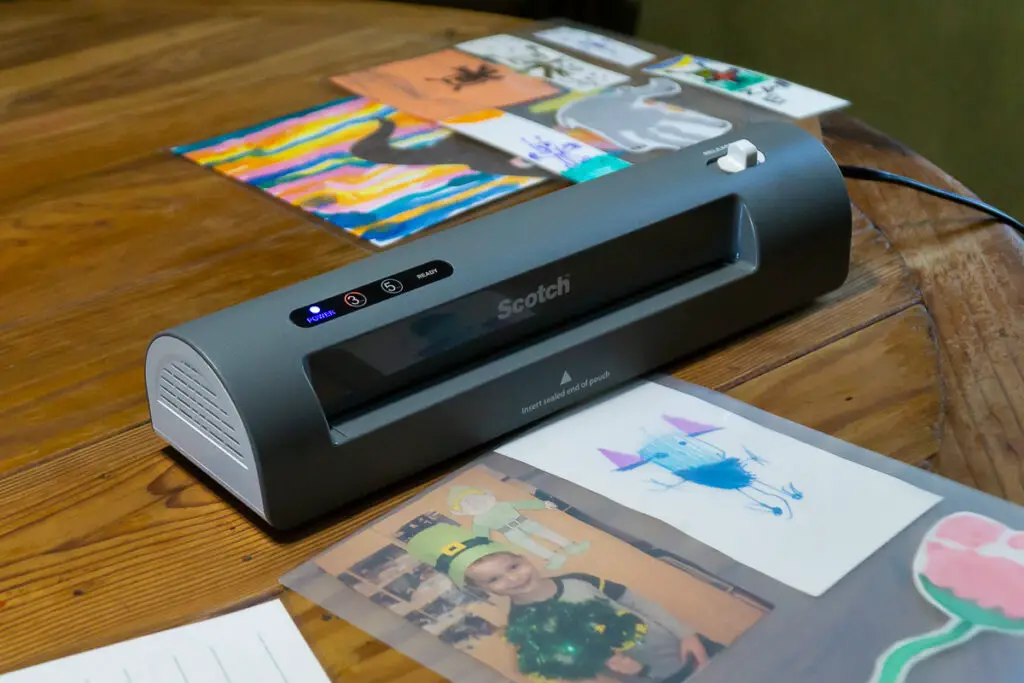
You can use a laminator like the one we use in a few simple steps. Follow along with us for some fun reusable printables. Read on below and we’ll let you know where to get everything and some alternatives to consider.
- Prepare – Place your laminator on a flat, level surface with enough room to feed your sheets and let them come out the other side.
- Turn on your laminator and let it heat up.
- While you’re waiting for your laminator to reach its temperature, prepare your pages. Place your items in a laminating pouch. If you’re doing a single sheet, try and center it so the margins are even.
- If you have a number of smaller items, you can arrange them on a single laminating pouch; just make sure to leave enough space between them so they can seal properly. Do not cut them out beforehand, you can easily cut them after the full sheet is laminated.
- Insert the sealed edge into the laminator, and you’ll feel it gently grab the sheet and start to feed it through. You may want to support or guide it, especially if you have several smaller items in the pouch.
- Let the sheet feed through itself; don’t pull it. Let it cool a moment once it’s fed all the way through and you’re ready for another sheet.
- Let the unit cool down before storing it away.
Free Printables! Check out our FREEBIES page for some printables to get you started.
What are Laminating Sheets?
Laminating sheets are simply the plastic sheets designed to work with your laminating machine to seal the pages. Your laminator should have come with a few starter sheets so you can use it right away. You’ll go through those quickly, and will want to get a pack of laminating sheets so you’re ready to go.
Where can I get a laminator for home?
Laminators are expensive office equipment, right? And If I got one, where would we possibly store it?
Great questions. Sure, you can spend a lot of money on a large industrial sized machine, though that’s overkill for most needs. Laminators are fairly small (maybe comparable to a brick, but a bit wider) and quite affordable. You can readily find laminators online or at big box office supply stores. We use this one, available on Amazon:

Make sure you have enough plastic sheets as well!
Is it Worth it to Laminate Worksheets?
If we reprint documents, we’ve got to consider the consumable cost of paper and ink. Laminators can save us the cost of reprinting, though we need to buy the laminator itself as well as the plastic laminating sheets. How do the costs stack up?
For the paper, we can look at a formula to calculate the cost per sheet of paper: Cost per ream (500 sheets) / number of sheets = cost per sheet
A ream of printer paper costs about $5 USD and contains 500 sheets. This gives us a per-page cost of 1 cent per sheet of paper.
Most home printers are inkjets, which have an average cost per page 20 cents for a color and 7.5 cents for black and white. So, our page plus printing totals $.21 for color and $.09 for black and white.
200 Laminating sheets for $25.99 comes out to about $.77 per sheet. Add our one cent sheet of paper and we’re up to $.78 per laminated page. We need to print 3.71 color pages to equal our laminated page, so we’ll round up to 4 pages (and perhaps factor in a bit of electric usage to run our laminator.) For black and white sheets, that number is closer to 9 sheets.
If you’re going to use a color worksheet more than 4 times or 9 times for black and white, laminating may save you in the long run.
Dollars and cents aside, sometimes we laminate things not so much to reuse them, but to make them durable for sustained use. Think of things like busy books or daily schedules. Sometimes we laminate our pages to preserve them, like special drawings or artwork. That’s priceless:
Other Uses for Laminating
Photos
In the digital age, most of our photos live on our phones or computers. Occasionally we may have something that’s worth printing out and having a physical copy. Laminating can help preserve these. Sure, you can always print it out again (as long as you can find the file.)
What if the paper copy is all you have. When our kids were in daycare full time, we’d often get pictures sent home of their daily activities. Sometimes there would be cute art projects involving a photo. We laminated our favorites to preserve these memories – especially since these were our only copies.
Drawings
Do you have artwork or drawings that your kids (or you) may have produced and want to preserve them?
My son went through a phase where he loved to draw robots (don’t we all?) It only lasted a few weeks before he was on to the next thing. During his prolific robot drawing phase, he drew me a bookmark.
It’s adorable. Though it sounds silly, I would be seriously bummed if anything happened to it. It was one of the first things I laminated. Now I don’t worry about it folding, creasing, ripping, or getting something spilled on it. I’ll have this little snapshot of my son’s artwork to remind me of his cute robot phase for a long time to come.
Planners and Schedules
Whether you’re planning a vacation or just trying to stay organized, having a planner or schedule can really help you stay on track. Buying a new planner every year can get costly, and even printing out a new planner each year can waste paper. That’s where laminated printables come in handy.
To prevent yourself from wasting money and resources, try laminating your printables instead. Laminating a dateless planner or schedule allows you to print it once and use it again and again.
Reusable Graph Paper
Graph paper comes in handy for drawing shapes, taking notes, or mapping out a gaming session. You can laminate and reuse your graph paper instead of going through stacks of paper for something you’ll only need one time.
What is rainbow writing?
Rainbow writing is a technique where you write letters or words on a piece of paper, and trace them using different colors of ink. This is a fun (and colorful) way to practice handwriting.
– Rainbow writing is an effective tool for teaching kids about letters, words, and numbers.
– Rainbow writing can be used to teach kids about colors and shapes.
A laminated sheet for rainbow writing makes it easy to erase and write different words or numbers instead of using a new sheet of paper each time.
Alternatives to Laminating
You could also look at plastic page protectors (also called plastic covers, pouches, or dry erase pockets.) You can insert your pages into these sleeves and use a dry erase marker much as you would a laminated sheet.
Wrap Up: Laminating to create DIY Reusable Activity Sheets (and more)
Laminating has a wide range of uses. Sure, you can preserve photos, keepsakes, or important documents. We like laminating to make our educational printables and practice sheets reusable. For pages that we’d need to print out the entire sheet again and again, laminating can save us on the paper and our little guys can use dry erase markers instead of printing out multiple copies of their practice sheets.
